Alexander - The Fist of the Son (Savage)
Alexander - The Fist of the Son (Savage)
.png)
- Level
- 60 (Sync: 60)
- Item Level
- 215
- Difficulty
- Normal
- Party size
- Full Party
8 man • 2 2
2  4
4 
- Unsyncing
- Allowed
- Time limit
- 90 minutes
- Phoenix Down
- Not Available
- Duty Finder
- Savage Raids (Heavensward)
- Tomestones
 15
15 - Req. quest
- A Refrain for the Undaunted
- Location
- The Fist of the Son
- Region
- Dravania
- S/S/S
- Available
- Patch
- 3.2
 The Echo
- Permanent +20%
- Links
- EDB GT TC
Sometimes even the most thrilling tale can benefit from slight embellishment, and the wandering minstrel's reimagining of your foray into Midas─while stretching the bounds of believability─proves to be even more invigorating than your memory of it. A memory you must relive in order to compare...
— In-game description
Alexander - The Fist of the Son (Savage) is a level 60 raid introduced in patch 3.2 with Heavensward. Also known as A5S, it is the first sector of Alexander: Midas (Savage).
Strategy
 Faust and Hummelfaust
This raid starts with a mini-boss, first a twin pair of Faust and, afterwards, Hummelfaust. Their attacks and mechanics are simple, but serve as a DPS check.
![]() Faust will only use Kaltstrahl, which is a frontal cleave tank-buster cast every 10 seconds. The second cast will be done twice in succession, and later casts three times in succession.
Faust will only use Kaltstrahl, which is a frontal cleave tank-buster cast every 10 seconds. The second cast will be done twice in succession, and later casts three times in succession.
Tanks simply have to face Faust away from the party while the DPS do their job.
After 50 seconds, or once both Faust have died, Hummelfaust will drop a proximity marker on a random player and land in that spot.
Hummelfaust will explode any living Faust, dealing party-wide damage based on their remaining health, and gain 1 stack of ![]() Damage Up per 1% health remaining on the Faust (rounded up).
Damage Up per 1% health remaining on the Faust (rounded up).
![]() Hummelfaust only has two abilities:
Hummelfaust only has two abilities:
- Kaltstrahl: A frontal cleave that gives a stack of
 Physical Vulnerability Up for 20 seconds. Hits twice initially, then three times, capping at four times in succession.
 - Panzerschreck: Party-wide magic damage. The fourth cast is an Enrage that will wipe the party.
The party has 90 seconds to kill Hummelfaust before it enrages. Tanks should face it away from the party and can swap every time a Kaltstrahl chain ends.
The fight is quite short, but mechanically diverse. There are no major DPS checks but rather a large swathe of mechanics that can kill players and the entire party if mishandled.
Note: When attempting this fight solo, a Tank invulnerability can be used in the short window prior to getting Concussion to be invulnerable to a follow-up Gobstraight. However, Gobcut ignores invulnerability and will instant-kill regardless of health/buffs when solo. Players will need to be able to kill Ratfinx before their second Guzzle which always ends with Gobcut.
Syringes/Puddles

There are four colored syringes, one on each cardinal direction of the arena. In the center of the arena is an electric Aether Converter with a purple ring AoE.
When players step inside the Aether Converter ring, they will be dealt ~1300 damage per second, but fill the "Goblixer Sample" meter (shown in the duty info) by 3 units per tick.
The syringes will fire continuously until the Goblixer Sample meter is empty. When there are no players inside the Aether Converter ring, the Goblixer Sample meter will drain at a rate of 1 unit per second. Once it empties, the syringe puddles will disappear.
Note that if the Goblixer Sample meter somehow reaches 100/100, the Aether Converter will wipe the party with endless casts of Therapeutic Shock.
Each syringe grants a different effect to players and enemies that stand in the puddle.
| Syringe Type | Player Effect | Enemy Effect |
|---|---|---|
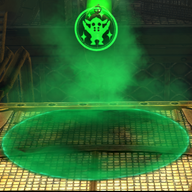
| Green (North) | Grants
|
Grants stacks of |
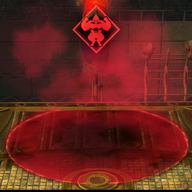
| Red (East) | Grants
|
Grants stacks of |
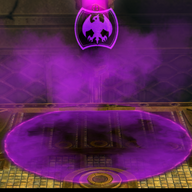
| Purple (West) | Grants
|
Grants stacks of |
| Blue (South) | Grants
|
The enemy becomes Invisible and untargetable for 10 seconds. |
Taking a syringe buff will grant the player one stack of ![]() Goblixer Overgulp. This debuff lasts 180 seconds at one stack, but every additional stack reduces the timer by 20 seconds, to a minimum of 90 seconds.
Goblixer Overgulp. This debuff lasts 180 seconds at one stack, but every additional stack reduces the timer by 20 seconds, to a minimum of 90 seconds.
If this debuff expires or reaches 12 stacks, the player will be afflicted with ![]() Goblixer Grumblygut, reducing movement speed and taking ~2800 damage every 3 seconds for 20 seconds. Any goblixer buffs are instantly cancelled.
Goblixer Grumblygut, reducing movement speed and taking ~2800 damage every 3 seconds for 20 seconds. Any goblixer buffs are instantly cancelled.
- The four syringe puddles that appear on the edges of the arena.
-
 Green (North)
 -
 Red (East)
 -
 Purple (West)
 -
 Blue (South)


Phase 1: 100% - 60% or after 3 minutes.
Ratfinx has two phases which can be progressed through faster via damage, but will automatically progress over time.
There are two different groups of attack Ratfinx will use: One series of attacks specific to giant form, and a different series of attacks only used when normal-size.
| Size | Name | Description |
|---|---|---|
| Normal | Guzzle | Ratfinx grows giant, increasing damage dealt, reducing damage taken, and enabling the use of new attacks. |
| Glupgloop | One player is marked with a red spread circle arrow. Six seconds later, Ratfinx will throw a potion at them, creating a giant puddle at their location. This puddle inflicts | |
| Shock Therapy | Unavoidable magic damage to the entire party. | |
| Bombs Away | Ratfinx drops two Smartbombs in the center of the arena, which will explode in a near-arena-size AoE. Can be moved by a player with
| |
| Tetrabomb | Spiky untargetable bombs dropped throughout the fight. Will explode in a + shape, leaving safe zones in the diagonals. Inflicts | |
| Glassy-Eyed Cobra | A snake enemy. Will give itself
| |
| Giant | Gobjab | Adds a stack of |
| Gobstraight | Ratfinx a line AoE tankbuster with heavy knockback. | |
| Gobcut | A Stack marker. If less than 4 people are in the stack, players inside are instantly killed instead. | |
| Gobdash | One player is marked with | |
| Gobhook | Follows a Gobdash. Ratfinx will aim at a random player and deal lethal damage in a 180-degree frontal cone. | |
| Boost | Ratfinx slams the ground four times, dealing massive damage, knockback, and |
Ratfinx will end this rotation early if brought to 60% health, however they will not end a Guzzle attack rotation early. Depending on preference, this can be favorable in order to reduce the health Ratfinx has going into the next phase.
| Attack | Syringe | Strategy |
|---|---|---|
| Guzzle | Face Ratfinx towards the north wall. Ratfinx takes 50% less damage while giant, and be prepared to take heavy damage. | |
| Gobjab x4 | Once the main tank suffers | |
| Gobstraight / Gobcut | The attack chosen here is random. If Gobstraight, face Ratfinx 90 degrees away from the stunned tank. If Gobcut, bring the stackmarker to the rest of the party. | |
| Gobdash | Skipped if below 90% health. The | |
| Glupgloop x2 | Marked players should ideally drop these puddles on the west side. Avoid dropping these AoEs in the center, on the green (north) syringe. | |
| Glassy-eyed Cobra x2 | Green (North) | The off-tank should grab these immediately while DPS these adds ASAP. Stuns will help minimize their effect on the party. Any players inflicted with |
| Shock Therapy x2 | ||
| Bombs Away | Red (East) | One designated player should turn into a gorilla with the red puddle and knock the Smartbombs into the same corner the spiky Tetrabomb drops. All players should stack in the corner opposite to the bombs. |
| Guzzle | Once this is cast, the rest of the rotation can't be skipped regardless of health values. | |
| Boost | Purple (West) | All players should run into the purple syringe and become birds to dodge Boost. |
| Tetrabombs | Four Tetrabombs will drop one-after-another and explode in that same order. The first will always drop on a corner. Wait diagonal to that first bomb for it to explode, then fly into that corner. | |
| Gobdash + Gobhook | Shield the Prey and have them run away, avoiding being between them and Ratfinx. Once Ratfinx charges, all players should run towards him and stand behind him to dodge Gobhook. | |
| Gobjab x4 | Once the main tank suffers | |
| Gobcut | Stack with the party away from the stunned tank. | |
| Phase 2 Start | ||
Phase 2: 60% - 0%
Ratfinx doesn't add any new abilities, but rather a series of additional enemies that will be summoned throughout the phase.
| Name | Description |
|---|---|
| Gobbledygroper | A winged goblin chimera that attaches a chase tether to a random player. Frequently casts Lion's Breath, a high damage cleave that will kill most non-tanks.
|
| Gobbledygawker | A one-eyed goblin that casts the gaze attack Oogle. Failure to look away will inflict the player with
|
| Yorn Pig | Small rats that spawn in large groups. Will be eaten by the Glassy-eyed Minotaur if nearby. |
| Glassy-eyed Minotaur | A giant minotaur with an extremely large amount of health. Will eat nearby Yorn Pigs and Glassy-Eyed Cobras, gaining a
|
| Glassy-eyed Shabti | Is buffed with |
Ratfinx will mix up prior mechanics with fakeouts and confusing bomb patterns to try to trip up the party. On top of this, additional enemies will spawn that must be handled with care as their abilities are lethal if they run amok.
| Attack | Syringe | Description |
|---|---|---|
| Gobbledygroper | Blue (South) | The tethered player should move to the blue puddle while the off-tank starts building enmity. Once the tether is broken, the off-tank should turn the enemy away from the group while DPS kill it. |
| Glupgloop | Aim it away from important areas. | |
| Bombs Away | Red (East) | The boss will attempt to fake-out the group by dropping a Tetrabomb on the safe corner first, then one on the opposite. The party should move towards the first Tetrabomb and knock the bombs to the opposite corner. |
| Shock Therapy x5 | Keep the party healed | |
| Guzzle | Start running towards the purple puddle in preparation for Boost. | |
| Boost + Tetrabombs | Purple (West) | Three Tetrabombs will drop in random spots of the arena, leaving one area safe. Find the safe zone before the bombs explode. |
| Gobcut + Gobdash x2 | Two players will be marked with The second marked player should stack for Gobcut, then move away from the stack— but not towards the first | |
| Gobhook | Run behind Ratfinx to dodge. It is a good idea to have the second | |
| Gobjab x4 | Tank-swap after the | |
| Gobstraight / Gobcut | As before, stack or point the boss away depending on which attack is used. | |
|
The Glassy-eyed Minotaur will spawn either in the North-west or South-east corner and must be immediately grabbed by the off-tank while the rest of the party moves away. DPS should ignore the Minotaur completely.
The main-tank must grab the aggro on the Yorn Pigs to prevent them from running to the Minotaur. DPS should focus on killing the Gobbledygawkers ASAP or else they may wipe the group. | |
| Glupgloop | Keep this away from the group. Putting this in the center is fine during this phase.
The off-tank holding enmity on the Minotaur should move the other side of the arena now. If Northwest, they should move Northeast. If Southeast, they should move Southwest. | |
|
Green (North)
(if needed) |
Three Yorn Pigs will spawn on the same initial spawning location as the Minotaur, hence why it must be moved prior. Across from it, a Glassy-eyed Cobra will spawn.
The Minotaur must be brought to the Cobra to feast. This will cause the Minotaur to start accumulating |
| Shock Therapy x5 | Keep the party alive. If DPS is nominal, the boss should die around here. | |
| Guzzle + Glassy-eyed Shabti | The off-tank must grab the Shabti and use large mitigations to survive its | |
| Gobstraight / Gobcut | Handle as normal. | |
| Loop Repeat | ||
Loot
 Treasure Coffer 1
| Name | Type | Item Level | Rarity | Quantity |
|---|---|---|---|---|
| Midan Earrings of Fending | Earrings | 240 | Blue | 1 |
| Midan Earrings of Slaying | Earrings | 240 | Blue | 1 |
| Midan Earrings of Aiming | Earrings | 240 | Blue | 1 |
| Midan Earrings of Casting | Earrings | 240 | Blue | 1 |
| Midan Earrings of Healing | Earrings | 240 | Blue | 1 |
| Midan Neckband of Fending | Necklace | 240 | Blue | 1 |
| Midan Neckband of Slaying | Necklace | 240 | Blue | 1 |
| Midan Neckband of Aiming | Necklace | 240 | Blue | 1 |
| Midan Neckband of Casting | Necklace | 240 | Blue | 1 |
| Midan Neckband of Healing | Necklace | 240 | Blue | 1 |
| Midan Bracelets of Fending | Bracelets | 240 | Blue | 1 |
| Midan Bracelets of Slaying | Bracelets | 240 | Blue | 1 |
| Midan Bracelets of Aiming | Bracelets | 240 | Blue | 1 |
| Midan Bracelets of Casting | Bracelets | 240 | Blue | 1 |
| Midan Bracelets of Healing | Bracelets | 240 | Blue | 1 |
| Midan Ring of Fending | Ring | 240 | Blue | 1 |
| Midan Ring of Slaying | Ring | 240 | Blue | 1 |
| Midan Ring of Aiming | Ring | 240 | Blue | 1 |
| Midan Ring of Casting | Ring | 240 | Blue | 1 |
| Midan Ring of Healing | Ring | 240 | Blue | 1 |
Treasure Coffer 2
| Name | Type | Item Level | Rarity | Quantity |
|---|---|---|---|---|
| Midan Earrings of Fending | Earrings | 240 | Blue | 1 |
| Midan Earrings of Slaying | Earrings | 240 | Blue | 1 |
| Midan Earrings of Aiming | Earrings | 240 | Blue | 1 |
| Midan Earrings of Casting | Earrings | 240 | Blue | 1 |
| Midan Earrings of Healing | Earrings | 240 | Blue | 1 |
| Midan Neckband of Fending | Necklace | 240 | Blue | 1 |
| Midan Neckband of Slaying | Necklace | 240 | Blue | 1 |
| Midan Neckband of Aiming | Necklace | 240 | Blue | 1 |
| Midan Neckband of Casting | Necklace | 240 | Blue | 1 |
| Midan Neckband of Healing | Necklace | 240 | Blue | 1 |
| Midan Bracelets of Fending | Bracelets | 240 | Blue | 1 |
| Midan Bracelets of Slaying | Bracelets | 240 | Blue | 1 |
| Midan Bracelets of Aiming | Bracelets | 240 | Blue | 1 |
| Midan Bracelets of Casting | Bracelets | 240 | Blue | 1 |
| Midan Bracelets of Healing | Bracelets | 240 | Blue | 1 |
| Midan Ring of Fending | Ring | 240 | Blue | 1 |
| Midan Ring of Slaying | Ring | 240 | Blue | 1 |
| Midan Ring of Aiming | Ring | 240 | Blue | 1 |
| Midan Ring of Casting | Ring | 240 | Blue | 1 |
| Midan Ring of Healing | Ring | 240 | Blue | 1 |
Music
| Section | Theme |
|---|---|
| Pre-Boss | Sins of the Father, Sins of the Son |
| Boss | Locus |