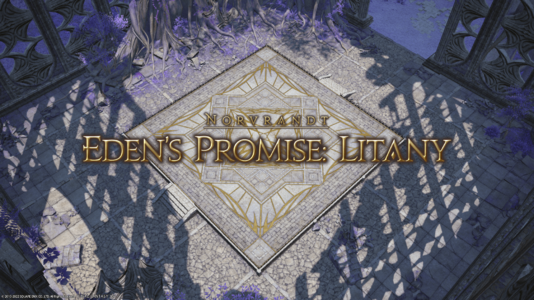
Eden's Promise: Litany
Eden's Promise: Litany
- Level
- 80 (Sync: 80)
- Item Level
- 485
- Difficulty
- Normal
- Party size
- Full Party
8 man • 2 2
2  4
4 
- Unsyncing
- Allowed
- Time limit
- 90 minutes
- Phoenix Down
- Not Available
- Duty Finder
- Normal Raids (Shadowbringers)
- Roulette
- Normal Raids
- Tomestones
 20
20 - Req. quest
- Shadows of the Past
- Entrance
- The Empty (X:5.8, Y:6.5)
- Location
- Laxan Loft
- Region
- Norvrandt
- Stone, Sky, Sea
- Available
- Patch
- 5.4
The Ascian Mitron appears before you and not only reveals the true nature of Eden, but also claims to share a past with Gaia. The shadowy visitor lures you into Eden's core where Gaia is spirited away. To have any hope of rescuing her, you must comply with the Ascian's demand to reenact the fateful battle between the Warriors of Light and the Shadowkeeper.
— In-game description
Eden's Promise: Litany is a level 80 raid introduced in patch 5.4 with Shadowbringers. The raid is also known as E10N.
Phases & Abilities
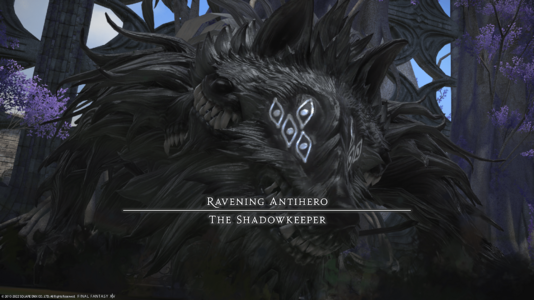
 Ravening Antihero: Shadowkeeper
The fight will largely uses forward vs. backward and left vs. right attacks. The shadow versions of these attacks require you to pay attention to the shadow tail indicator to know which way the boss is going to be facing (the tail will be the boss' butt) to correctly position to dodge the attacks. At 50% HP, the boss will begin to chain attacks together, so make sure you're paying extra attention!
Beast Phase Abilities
- Forward or Backward Implosion: A battlefield wide AoE that will hit everyone either in front of, or behind the boss. Pay attention to the name and position yourself on the opposite side to avoid taking damage.
- Forward or Backward Shadow Implosion: The same as the previous implosion ability, only now there will be a shadow tail indicator to let you know the way the boss will be facing when the attack executes. The tail is naturally the butt of the boss, so position accordingly to dodge the attacks.
- Deepshadow Nova: Unavoidable full room AoE, make sure to group heal and pop any group magic resistance cooldowns prior to the attack.
- Spawn Shadow + Shadow Warrior: The boss will summon three shadow clones, one with a tether indicator. The clones will then jump around the room in a clockwise pattern, and you'll need to make sure you're behind where the tethered clone ends up. You will not see the tether anymore once they start jumping, so make sure you're paying attention!
- Fade to Shadow: Two shadow pools will form on the edges of the battlefield. Each explosion will explode their quarter of the map only, so you can continue DPSing the boss in the middle of the room as long as you're not positioned in the quadrant the explosions are coming from.
- Shadowy Eruption: This will place a large cluster of targeted ground AoE indicators. Dodge to live!
- Sword Phase Transition: There will be no spell casting bar, however the boss will stand up on it's hind legs and shoot out a point blank AoE. Run away from the boss and the Sword Phase begins.
Sword Phase Abilities
- Umbra Smash: Tank single targeted ability that will hit them with four individual slashes, giving the tank slashing vulnerability stacks. These stacks can be ignored and do not require a tank swap.
- Shadow's Edge: Tankbuster, straight line slashing attack on the tank. Cooldowns/heals as needed and don't be in line in front of the boss!
- Left and Right Giga Slashes: The named side of battlefield relative to the boss will get slashed, move to the opposite side prior to the cast bar completing to avoid
- Left and Right Shadow Slashes: Look for the shadow tail indicator to know which direction the boss will be facing, and be on it's eventual opposite side of the named attack to avoid.
- Voidgate: The boss will summon three drop-zone indicators in the room, with beams showing how many people need to stand in them. Make sure each one has at least two people in them to avoid a getting a damage reduction debuff.
- Beast Phase Transition: This will be signified by a point blank knockback indicator. Make sure you don't get pushed off the battlefield, as well as being ready to heal through as this is a room wide AoE attack
Loot
Treasure Coffer 1
| Name | Type | Item Level | Rarity | Quantity |
|---|---|---|---|---|
| Helm of Lost Antiquity | Other | N/A | Basic | 1 |
| Armor of Lost Antiquity | Other | N/A | Basic | 1 |
| Greaves of Lost Antiquity | Other | N/A | Basic | 1 |
| Bangle of Lost Antiquity | Other | N/A | Basic | 1 |
Treasure Coffer 2
| Name | Type | Item Level | Rarity | Quantity |
|---|---|---|---|---|
| Gauntlets of Lost Antiquity | Other | N/A | Basic | 1 |
| Chausses of Lost Antiquity | Other | N/A | Basic | 1 |
| Greaves of Lost Antiquity | Other | N/A | Basic | 1 |
| Bangle of Lost Antiquity | Other | N/A | Basic | 1 |
Treasure Coffer 3
| Name | Type | Item Level | Rarity | Quantity |
|---|---|---|---|---|
| Don't Be Afraid Orchestrion Roll | Other | N/A | Basic | 1 |
Dialogue
Shadowkeeper: By your sacrifice, a warrior born...
I will show you no mercy, and expect none in return!
Shadowkeeper: I am the Shadowkeeper!
There is no escape from me!
The Shadowkeeper prepares to reveal its true form!
The Shadowkeeper prepares to reveal its true form!
Shadowkeeper: Cloaked in shadow, I lie in wait!
Shadowkeeper: Death stalks at every turn!
Shadowkeeper: My world, consumed by Darkness. The source of my power...
Music
| Section | Theme |
|---|---|
| Main | Don't Be Afraid |


