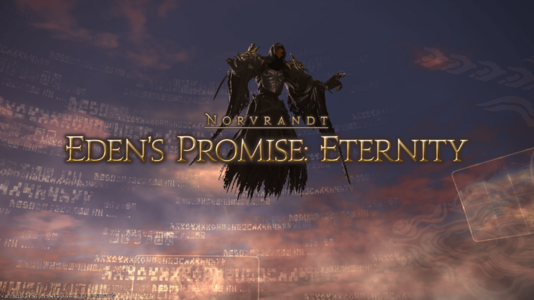
Eden's Promise: Eternity
Eden's Promise: Eternity
- Level
- 80 (Sync: 80)
- Item Level
- 485
- Difficulty
- Normal
- Party size
- Full Party
8 man • 2 2
2  4
4 
- Unsyncing
- Allowed
- Time limit
- 90 minutes
- Phoenix Down
- Not Available
- Duty Finder
- Normal Raids (Shadowbringers)
- Roulette
- Normal Raids
- Tomestones
 20
20 - Req. quest
- Voice of the Soul
- Entrance
- The Core (X:23.4, Y:23.2)
- Location
- The Garden of Nowhere
- Region
- Norvrandt
- Stone, Sky, Sea
- Available
- Patch
- 5.4
The entity formed by the fusion of Mitron and Gaia seeks to create a utopia where time has no meaning. Should this plan succeed, not only will the vast quantities of aether absorbed by Eden drain the land of life, but Gaia as you know her will be lost forever. Ryne makes a desperate bid to send you in pursuit, though there is no way of knowing what manner of danger you will face.
— In-game description
Eden's Promise: Eternity is a level 80 raid introduced in patch 5.4 with Shadowbringers. The raid is also known as E12N.
Phases & Abilities
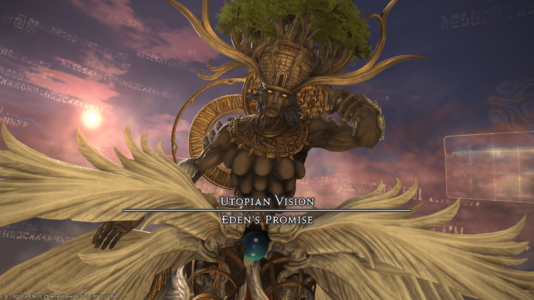
 Utopian Vision: Eden's Promise
Please note that players may fall off of the arena to their deaths.
Stage 1
Abilities
- Maleficium: Unavoidable raid-wide AoE dealing magical damage.
- Cast: Eden's Promise will tether one of the primal crystals in the background onto the battlefield, indicating a late telegraphed attack.
- Leviathan (Blue): The safe zone for this is directly down the middle of the battlefield.
- Garuda (Green): The safe zones for this strike are in the intercardinals.
- Ramuh (Purple): The safe zone for this is at max melee range from the boss (on the ring of the arena containing the X and O floor patterns).
- Ifrit (Red): The safe zone for this in a narrow cone on either side of the boss. Be immediately left or right of the boss to avoid.
- The Titan (brown) and Shiva (white) crystals will not be tethered.
- Formless Judgment: Both tanks will be marked with large red arrows for non-AoE tankbusters. Mitigation recommended.
After the boss reaches around 67% HP, it will become untargetable and a brief cutscene will play. All players must step on the glowing circle on the edge of the arena to be transported to a new platform, as the original arena will be destroyed. A massive untargetable Guardian of Eden will spawn for the upcoming phase.
Stage 2
During this phase, the party is entrusted with protecting Gaia's memories, which will be indicated by a duty gauge that decreases from 100. Adds will spawn and attack the memory crystal in the center. These adds should be defeated.
- Note: The adds are not a DPS check and will simply disappear if they are not killed in time with no consequence. It is not possible to fail from the duty gauge reaching 0.
Platform Stage 1
- Four adds will spawn.
- Line Stack Marker + Two Single Target AoE Telegraphs: All non-marked players should stack up in the middle of the room, while the marked players move to either side to position a targeted cone away from the raid. After the cone telegraph comes out, both players can join the stack.
- Step on the glowing circle to move to the next platform.
Platform Stage 2
- Two Stack Markers: Each healer is given a stack marker, indicating a statue add will spawn on them and do light damage. Because the stack AoEs do not inflict vulnerability debuffs on players, it is fine to stack both markers. Once the adds spawn, players will need to defeat the adds.
- Laser Eye: A telegraphed knockback from one side. The telegraph extends beyond the battlefield itself so it's best to stay lined at the edge in the middle. Can also use knockback immune.
- Step on the glowing circle to move to the next platform.
Platform Stage 3
- Six adds will spawn.
- Battlefield Push Telegraph (Center): Run to the middle of the battlefield to avoid getting blown off the stage, or use knockback immune.
- Step on the glowing circle to move to the next platform.
Stage 3
Abilities
- Stock: The boss will now tether two random crystals (excluding Titan and Shiva). Players will need to remember which two were tethered.
- Release: The boss will cast both stored crystals at the same time, releasing two overlapping AoEs.
- Leviathan + Garuda: In and intercardinals safe.
- Leviathan + Ramuh: North/south and max melee range safe.
- Leviathan + Ifrit: In and east/west safe. The safe spots are very small.
- Garuda + Ramuh: Out and intercardinals safe.
- Ifrit + Ramuh: Out and east/west safe.
- Junction Shiva: The boss will tether Shiva's crystal. This has no effect, but telegraphs the next series.
- Diamond Dust: High unavoidable magical raid-wide damage and transitions the arena. Make sure you spread out before this cast finishes, as the entire battlefield will be covered in ice. Half of the party will be given with spread AoE markers at this time (if you've spread out, you won't need to move). Afterwards, one player will be given a stack AoE marker, so the entire party should stack on them.
- Rapturous Reach: The boss telegraphs a large cleave that will hit slightly more than half of the arena from its glowing arm, in addition to giving everyone in the raid an individual AoE marker. Move to the correct side of the map, and spread out to avoid overlapping damage.
- Junction Titan: The boss will tether Titan's crystal. This has no effect, but telegraphs the next series.
- Earthen Fury: High unavoidable magical raid-wide damage and transitions the arena. The boss will place two large boulders on one side of the battlefield, and then two sets of small boulders around the battlefield along the edges. Stand where the second set of small boulders spawned, and move onto the space where the first boulders were after they explode. Start on the opposite side of the arena from the large boulders, as their explosions are much larger.
- Rapturous Reach: The boss telegraphs a massive cone AoE that will hit slightly more than half of the arena from its glowing arm, in addition to giving a random player a stack AoE marker.
Loot
 20 Allagan Tomestone of Poetics
- Eden's Promise Card (Drops at a fixed rate.)
Treasure Coffer 1
| Name | Type | Item Level | Rarity | Quantity |
|---|---|---|---|---|
| Armor of Lost Antiquity | Other | N/A | Basic | 1 |
| Gauntlets of Lost Antiquity | Other | N/A | Basic | 1 |
| Chausses of Lost Antiquity | Other | N/A | Basic | 1 |
| Bangle of Lost Antiquity | Other | N/A | Basic | 1 |
Treasure Coffer 2
| Name | Type | Item Level | Rarity | Quantity |
|---|---|---|---|---|
| Armor of Lost Antiquity | Other | N/A | Basic | 1 |
| Chausses of Lost Antiquity | Other | N/A | Basic | 1 |
| Greaves of Lost Antiquity | Other | N/A | Basic | 1 |
| Bangle of Lost Antiquity | Other | N/A | Basic | 1 |
Treasure Coffer 3
| Name | Type | Item Level | Rarity | Quantity |
|---|---|---|---|---|
| Wind-up Gaia | Minion | N/A | Basic | 1 |
| Promises to Keep Orchestrion Roll | Other | N/A | Basic | 1 |
Dialogue
All boss and NPC lines are voice acted.
Eden's Promise: Joined as one, never to be parted...
Eden's Promise: Unbound by past or future in this single perfect moment!
Eden's Promise: We shall draw your memories from you...
Eden's Promise: And they will be your undoing!
Eden's Promise: Must you interfere?
Eden's Promise: Our utopia will only be complete...
Eden's Promise: ...once you are erased from our memory!
Gaia's memories have taken form!
Ryne: You've got to protect her memories! Hurry!
Protect Gaia's memories of Ryne!
Eden's Promise: You would defy us?
Ryne: Mmm! Delicious, aren't they?
Gaia: These are actually quite good.
Ryne: See? Let's have another one. Half each?
Eden's Promise: Such fragile things, memories...
Gaia: Hmm? What happened to the other half?
Ryne: Am I being erased from her memory!?
Protect Gaia's memories of Ryne!
Eden's Promise: Pitiful!
Gaia: I told you it would make a great necklace.
Ryne: Ohhh...it's beautiful! I think it'll really suit you!
Gaia: Me? But I thought you should have it...
Eden's Promise: They shatter... They fade...
Gaia: Is this ice? Where did this come from?
Ryne: If this goes on much longer, she'll forget everything!
Protect Gaia's memories of Ryne!
Eden's Promise: We tire of your insolence!
Ryne: How about... Hmm... This one?
Gaia: That's my color.
Gaia: Now this one on the other hand...
Gaia: What am I doing with this? I'd never wear this color...
Ryne: No...! We can't let this happen!
Eden's Promise: You are unworthy of our utopia!
Gaia's memories of Ryne are fading away...
Eden's Promise: We shall bring eternal harmony.
Eden's Promise: Tranquility and vitality in perfect balance...
Eden's Promise: Why will you not disappear?
Eden's Promise: No... Our utopia cannot fall...
Eden's Promise: Now, your memories belong to us!
Eden's Promise draws strength from your memories of Shiva!
Eden's Promise: Memories of ice...
Eden's Promise: Begone!
Eden's Promise draws strength from your memories of Titan!
Eden's Promise: Memories of earth...
Eden's Promise: Now, your memories belong to us!
Achievements
This duty is associated with the following achievements:
| Name | Points | Task | Reward | Patch |
|---|---|---|---|---|
| Paradise Within Thee I | 5 | Complete Eden's Promise. | - | 5.4 |
| Paradise Within Thee II | 10 | Complete Eden's Promise 5 times. | - | 5.4 |
| Paradise Within Thee III | 20 | Complete Eden's Promise 10 times. | - | 5.4 |
Music
| Section | Theme |
|---|---|
| Main | Promises to Keep |


