The Cloud of Darkness (Chaotic)
The Cloud of Darkness (Chaotic)
- Level
- 100 (Sync: 100)
- Item Level
- 710 (Sync: 735)
- Difficulty
- Chaotic
- Party size
- Alliance
24 man • 6 6
6  12
12 
- Unsyncing
- Allowed
- Time limit
- 90 minutes
- Phoenix Down
- Not Available
- Duty Finder
- Raid Finder (Chaotic Alliance Raids)
- Tomestones
 20
20 - Req. quest
- Talk to the Wandering Minstrel in Tuliyollal after completing Dawntrail
- Location
- Sphere of Naught
- Region
- ???
- Stone, Sky, Sea
- Available
- Patch
- 7.15
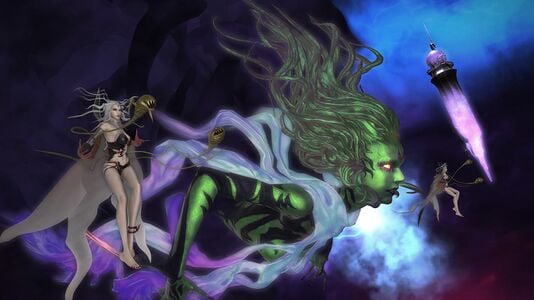
Strumming wistful chords upon his harp, the wandering minstrel sings a ballad of a dread voidsent queen who sought to engulf all in Darkness as part of an unholy pact with Emperor Xande. Thanks to your comrades' valiant sacrifice, you succeeded in vanquishing the being in her Lightless domain...but what might have happened had there been none at your side in whom flowed the royal blood of Allag? Could you have withstood the might of a further empowered Cloud of Darkness? Such possibilities play on your mind as the minstrel's evocative verse brings his wild imaginings to vivid life...
— In-game description
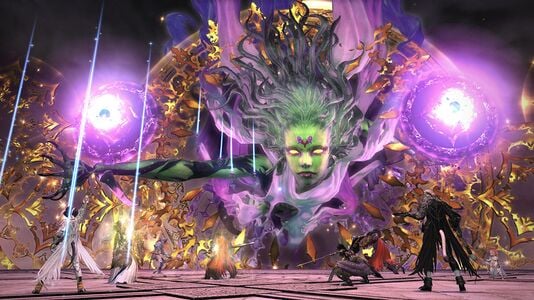
The Cloud of Darkness (Chaotic) is a level 100 chaotic alliance raid introduced in patch 7.15 with Dawntrail.
Phases & Abilities
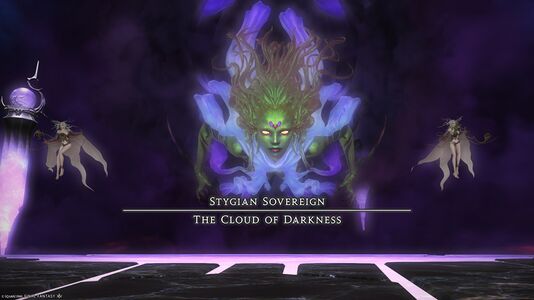
 Stygian Sovereign: The Cloud of Darkness
The boss opens with two different attacks before the first phase proper.
- Blade of Darkness (two variations depending on boss animation):
- Both arms in front of boss: large point blank AoE. Getting hit only gives a bleed, so melee players often choose to ignore the AoE to maintain uptime (using personal mitigation or heals for the bleed).
- One arm raised: Donut AoE on the non-raised arm, either left or right.
After two of the above, the boss will cast:
- Deluge of Darkness: Raidwide damage and Bleeding
- Changes the arena and marks the start of Phase 1 proper.
Phase 1
- The boss will begin inflicting stacking Lightning Resistance Down to the main tank with its auto attacks, necessitating tank swaps periodically.
- Grim Embrace: Tethers twelve players and inflicts Deadly Embrace causing a large line AoE on debuff expiration which if it hits will give a stack of Damage Down and a 5-second cleansable Doom. The debuff timers are staggered throughout the phase, so keep an eye on your own debuff timer.
- The line AoE will come either from the player's face or their back depending on the boss' animation. If the boss is pulling the crystal towards her, the line will come from the player's rear. If she is pushing the crystal, it'll be the player's front. In either case, the hand will move in a line AoE towards and through the player. To dodge, players need to dodge into and through the hand as it appears. The timing on this can be somewhat tight, especially on high ping, because players are also given a Heavy debuff just before their hand appears.
While Grim Embrace is resolving, several cloudlets will appear along the edges of the arena and do four sets of line AoEs that will need to be dodged.
At the same time, the boss will be casting one of three spells:
- Death IV: a draw-in to the center of the platform, followed by a point-blank AoE that inflicts Doom on any player hit, followed in turn by a donut AoE on the same position.
- Aero IV: Powerful knockback AoE at the center of the platform.
- Flare: Flare markers on one player from each alliance. Maximum distance and party mitigation recommended. A single misplaced flare can cause many deaths (these flares hurt!), so it is best for a player marked with a flare to jump off the arena if they cannot get their flare to a corner in time. After the flare markers, each alliance will get two light party stack markers which should not be overlapped as doing so will be lethal.
Both Death IV and Aero IV can be mitigated with Arm's Length or Surecast though they should probably be saved for later.
- Blade of Darkness as above
- Endeath IV: Alters the next Blade of Darkness to be immediately followed by Death IV. The boss says "Death abide in my breast" as a telegraph.
- Enaero IV: Alters the next Blade of Darkness to be immediately followed by Aero IV. The boss says "Wind abide in my breast" as a telegraph.
Knockback immunity is best used with the next cast of Blade of Darkness to make resolving the stored Death IV/Aero IV easier.
The boss will then do one of the two following patterns:
- Break IV: (If the boss cast Flare earlier) The boss summons two eyes along the arena's edges and casts a gaze attack that inflicts Petrification on any player looking towards the boss or either of the eyes. This means only one side of the arena (either east or west) is safe to look at.
- Rapid-sequence Particle Beam: (if the boss cast Death IV or Aero IV earlier) Targets each alliance with an unmarked stack AoE that is an 8-player soak and hits four times. It also deals significantly more damage to the first two players it hits, so tanks should be out front. Party mitigation and healing recommended, as these can easily kill squishier targets even when players are positioned properly.
The remainder of the first phase consists of a mix of the above mechanics, interspersed with Grim Embrace debuff timers expiring. Note that if the boss did not use Flare near the beginning of the phase, it will use it instead near the end of the phase, and in this case, it will not be followed by light party stacks.
Once all the mechanics finish resolving the boss will initiate Phase 2 with two casts of
- Deluge of Darkness: Raidwide damage and Bleeding.
The first cast switches the arena back to its original state from the start of the fight, and the second switches the arena to the configuration (see below) for Phase 2. The second cast also hurts much more than the first, although mitigation is recommended for both.
Phase 2
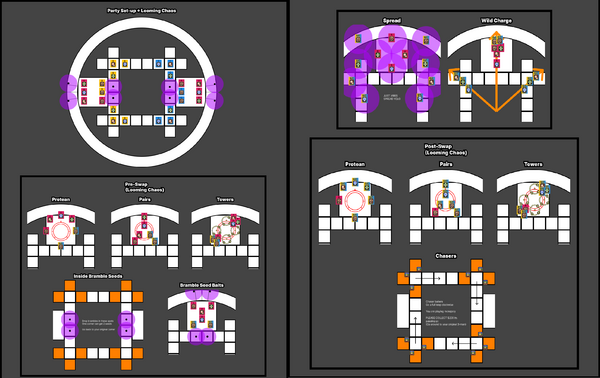
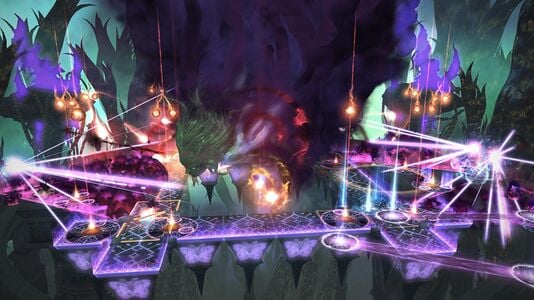
The inner ring tiles can only support one player at a time or they disappear immediately and the players fall to their deaths. Additionally, the tiles will only support a single player for around 43 seconds and periodically have to be vacated to refresh this hidden timer. Tiles will give a visual indicator about 6 seconds before timing out, giving players a window to refresh the timer. Players on the tiles can target the boss, meanwhile players on the platforms cannot and must hit the Stygian Shadow on their platform instead. Damage dealt to the Stygian Shadows will be dealt to the boss at the end of the phase. The boss and the Stygians will be doing their mechanics simultaneously throughout the phase.
Throughout the phase, the boss will hit the top 4 players in enmity with auto attacks, so all tanks on the tiles should Provoke the main boss at the start of the phase. Similarly, the Stygian Shadows will each auto attack the top player in enmity.
- Dark Dominion: Changes the outer ring to a death zone and inflicts heavy Bleeding on all players.
- Particle Concentration: Three stack tower on the outer platforms. Inner ring players have a two stack tower and a single stack tower. Any tower that not filled with enough players will deal raidwide damage and inflict a stack of Vulnerability Up to the raid, and an empty tower will instantly wipe the raid without tank LB3.
- Ghastly Gloom: Donut or Cross AoE, telegraphed by flickering clouds around the base of the boss. This is cast twice, and the second cast will do whichever AoE pattern didn't happen the first time.
- Diffuse-Force/Chaos-Condensed Particle Beam: Spreads or wildcharge line stacks. Instead of a cast bar, the attack is telegraphed by the boss either saying "Darkest Darkness awaits!" or "Begone with you!", indicating line stacks or spreads, respectively. For the line stacks, there will be one line stack directed at each corner of the ring of tiles and one line stack directed at each platform; these deal extra damage to the first target hit, so tanks should be in front. For spreads, the boss will fire two waves of 12 AoEs each targeted at living players; if any players are dead, then some players will be hit twice and die (unless they are a tank and use their invulnerability).
- Access-Pivot Particle Beam: The boss will telegraph a rotation either clockwise or counterclockwise. The boss will then fire a sequence of very wide line AoEs (the same width as the cross AoEs from Ghastly Gloom); the first AoEs are directed east and west towards the platforms, and the subsequent AoEs will gradually rotate a total of 90 degrees in the indicated direction.
- Looming Chaos: All players are tethered together in pairs, and tethered players swap positions. While the swaps can be controlled to an extent, if any players are dead or out of position, swaps can easily become very unpredictable. Looming Chaos also resets enmity on the boss, so after swaps, tanks should immediately Provoke either the boss or their Stygian Shadow (if swapped to tiles or platforms, respectively).
- Feint-Particle Beam: Four players on the tiles (one in each corner) will be targeted with a chasing AoE indicator. Marked players should start moving immediately, as the chasing AoEs move quite quickly and will catch anybody who doesn't get a head start. If the targeted player dies before the chasing AoEs finish firing, then the AoEs will immediately switch to target other players, which all but guarantees multiple further deaths or even a wipe if the AoEs move to target players on the platforms.
- Third Art of Darkness: The Stygian will telegraph a sequence of three attacks: two half-platform AoEs (left or right arm lights up), and either a line AoE spread (body lights up) or pair partners (both arms light up).
- Curse of Darkness: Several different timed debuffs that shoot conal AoEs from the player when they expire, inflicting a damage-over-time on any players hit.
- Evil Seed: Marks 8 players—two on each platform, and two on each the east and west halves of the tiles—with purple indicators above their heads. These players will drop brambles on their location after a delay. Brambles placed on tiles count as a player, so stepping on a tile with a bramble already on it will break the tile.
- Thorny Vine: Each bramble will tether to the nearest player. At the same time, two pairs of players on the tiles will be tethered together. Pairs will consist of players in the same corner of the tiles, and one pair will be on the north edge and one pair will be on the south edge. Tethers must be broken quickly.
- Flood of Darkness: An interruptible cast that, if completed, deals heavy raidwide damage.
- Core-Lateral/Lateral-Core Phasers: The Stygian will teleport to the outside edge of the ring alongside its platform and cast a sequence of two AoEs, as indicated in the cast name: Core-Lateral first casts a cone AoE in front of the Stygian followed by two cone AoEs to the sides, whereas Lateral-Core does the same thing in the other order. (Note: When the fight originally released, the cast names were mistakenly reversed.) These can be dodged normally or avoided entirely by moving along the outer ring to the teleportation puddles left behind by the Atomoses.
- Excruciate: An AoE tankbuster on the highest enmity target.
![]() Atomos
Atomos
These tether and inflict heavy damage-over-time to a player and, if ignored, will eventually begin healing the boss. Ranged kill these as they spawn. When they die, they will leave behind a small purple puddle. Stepping in this puddle will make a line appear from the player's location, which players can aim by turning and moving their character; after a delay, they will teleport to the location at the other end of the line. These can be used by players on the tiles who are resurrected on the platforms to return to their original position. Note there is no way to move in the other direction (from tiles to platforms) except by dying.
Unlike the first phase, the second phase has only one timeline, which goes as follows:
- Dark Dominion
- Particle Concentration and Third Art of Darkness (players on platforms resolve Third Art of Darkness before moving into the towers for Particle Concentration)
- Ghastly Gloom
- Curse of Darkness (the first debuffs expire almost immediately)
- Evil Seed
- Ghastly Gloom (whichever AoE didn't happen the first time)
- Thorny Vine
- Flood of Darkness (interrupt)
- Diffuse-Force/Chaos-Condensed Particle Beam
- Access-Pivot Particle Beam, together with Core-Lateral/Lateral-Core Phasers (players on platforms resolve phasers before moving to avoid Access-Pivot Particle Beam)
- Excruciate
- Looming Chaos
- Curse of Darkness
- Particle Concentration and Core-Lateral/Lateral/Core Phasers (players on platforms resolve phasers before towers; tanks consider using LB3 if it is likely towers will be missed)
- Dark Dominion
- Feint-Particle Beam and Third Art of Darkness (this cast of Third Art of Darkness will always do pairs instead of spreads)
- Ghastly Gloom
- Core-Lateral/Lateral-Core Phasers
- Diffuse-Force/Chaos-Condensed Particle Beam
- Flood of Darkness (interrupt)
Following this, about 80% of the damage dealt to the Stygians over the course of Phase 2 is dealt to the boss, and the boss will cast Deluge of Darkness and return the arena to its original state from the start of the fight. This is followed by another Deluge of Darkness, leading to Phase 3.
Phase 3
This phase is the same as Phase 1, except the boss will follow whichever timeline it didn't follow the first time (i.e., if the boss cast Flare after the cloud line AoEs, it will instead do Death IV/Aero IV, and vice versa). If the boss is not killed by the end of the timeline, the enrage (a final Deluge of Darkness) will wipe the raid.
Loot
See also: Clouddark Armor
- 2 Clouddark Demimateria I (guaranteed)
- 1 Clouddark Demimateria II (guaranteed)
Treasure Coffer
| Name | Type | Item Level | Rarity | Quantity |
|---|---|---|---|---|
| Clouddark Head Gear Coffer (IL 730) | Other | N/A | Basic | 1 |
| Clouddark Chest Gear Coffer (IL 730) | Other | N/A | Basic | 1 |
| Clouddark Hand Gear Coffer (IL 730) | Other | N/A | Basic | 1 |
| Clouddark Leg Gear Coffer (IL 730) | Other | N/A | Basic | 1 |
| Clouddark Foot Gear Coffer (IL 730) | Other | N/A | Basic | 1 |
| Shroud of Darkness | Other | N/A | Basic | 1 |
| Dais of Darkness | Other | N/A | Basic | 1 |
| Wisp of Darkness | Minion | N/A | Basic | 1 |
| Modern Aesthetics - A Half Times Two | Other | N/A | Basic | 1 |
Two non-duplicate equipment coffers are guaranteed to appear, while the other items are rare drops.
Each party in the alliance will receive its own treasure coffer. Players cannot roll on items in a treasure coffer belonging to another party.
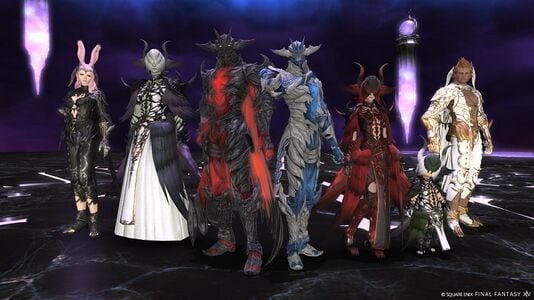
By speaking with Uah'shepya in Solution Nine (X:8.7 Y:13.5), players can exchange obtained demimateria for rewards, including all gear, both mounts and the hairstyle. The minion is only available as a drop.
There are no weekly restrictions on loot. In addition, there are two additional loot bonuses:
- First Time Duty Bonus: Additional tokens will be rewarded in proportion to the number of alliance members new to the duty. Specifically, each player will receive an additional 2 Clouddark Demimateria II per first-time clear. If all 24 players clear for the first time, each player would receive 49 Clouddark Demimateria II.
- Limited Time Bonus: A randomly occurring reward bonus that persists for several hours. Entering the duty during this period will give improved drop rates for the rare drops and a chance of additional tokens upon completion. Randomly chosen players in each party will receive additional Clouddark Demimateria I. A total of 8 extra Demimateria I will be distributed per party. It is possible for the same player to receive multiple additional demimateria.
In patch 7.5, this duty can now be completed with an Unrestricted Party, which removes the item level sync, making it the only level 100 duty that can be "unsynced." However, if participating with Minimum Item Level settings, the drop rates for the following items become guaranteed:
Achievements
This duty is associated with the following achievements:
| Name | Points | Task | Reward | Patch |
|---|---|---|---|---|
| Cloud Strife | 5 | Defeat the Cloud of Darkness in the Cloud of Darkness (Chaotic). | - | 7.15 |
Music
| Section | Theme |
|---|---|
| Main | Hunger |
Images
Raid Images
Gear Images
Notes
- Even though pre-made parties can enter the raid with a minimum of 12 players, as of patch 7.15, it was not possible to complete it with this number of players due to having insufficient headcount for the Particle Condensation (towers) mechanics. With the option to enter with an Unrestricted Party (i.e. unsynced) in patch 7.5, it is now more feasible to complete with fewer than 24 players.

