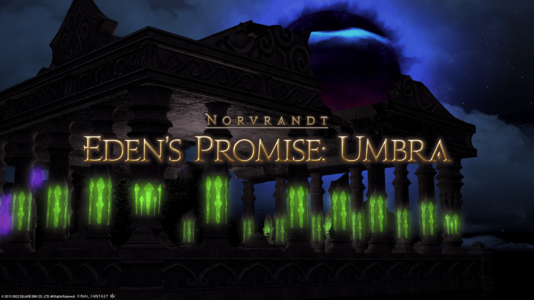
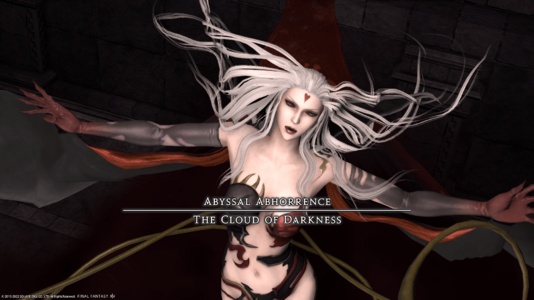
Eden's Promise: Umbra
Eden's Promise: Umbra
- Level
- 80 (Sync: 80)
- Item Level
- 485
- Difficulty
- Normal
- Party size
- Full Party
8 man • 2 2
2  4
4 
- Unsyncing
- Allowed
- Time limit
- 90 minutes
- Phoenix Down
- Not Available
- Duty Finder
- Normal Raids (Shadowbringers)
- Roulette
- Normal Raids
- Tomestones
 20
20 - Req. quest
- Fear of the Dark
- Entrance
- The Core (X:23.4, Y:23.2)
- Location
- Sphere of Naught
- Region
- Norvrandt
- Stone, Sky, Sea
- Available
- Patch
- 5.4
Though balance had supposedly been restored to the six elements, it seems that they are still strongly aligned in favor of Light. To rectify this, you and your companions seek to call forth an embodiment of Darkness and by its defeat, restore life to the Empty.
— In-game description
Eden's Promise: Umbra is a level 80 raid introduced in patch 5.4 with Shadowbringers. The raid is also known as E9N.
Phases & Abilities
 Abyssal Abhorrence: Cloud of Darkness
The fight will transition between the three listed phases continuously until the boss is killed.
Deluge of Darkness Phase
Abilities
- Ground Razing Particle Beam: Room wide, unavoidable AoE. Make sure to prepare mass healing.
- The Art of Darkness: Watch her hands to know which half of the room she is going to cleave, the telegraph is incredibly short so you'll likely not have enough time to move if you're not watching her hands.
- Wide Angle Particle Beam: Very large, but basic, cone AoE. Plenty of time to move out of the way.
- Zero Form Particle Beam: Arrow indicator on the Tank (tankbuster ability, prepare cooldowns), which will shoot a reasonably wide beam through the target. Make sure you're not between the boss and the target by a decent margin.
- Particle Concentration: Four columns will appear and require at least one person to be standing in each. Stay in place until the tiny meteor hits you.
- Empty Plane: This will be the phase transition ability, which is triggered with a room wide AoE for considerable damage. Make sure to prepare mass healing.
Empty Plane Phase
For the entirety of this phase, the blocks you stand on will highlight to signify a timer. Initially this will be yellow, and then will gain a red border if you're on it long enough. In order to reset the block to normal, everyone has to be off the block. The boss will also be casting The Art of Darkness and Ground Razing Particle Beam during this phase, so you have to pay attention to the cast bar as well as the floor to survive this phase.
Abilities
- Flood of Emptiness: Explodes the corners of the room off the battlefield, as well as creates a death zone right under the boss. Do not stand in any of these locations.
- Hypercharged Condensation: Purple tethers will appear and cause two cloud adds to appear. These will move towards the boss and will buff her when they meet up in the middle. Kill these as quickly as you can. They can be slowed down by standing in front of them!
- Summon: Two green ghosts will be summoned in opposite corners of the battlefield, pay attention to which direction they are facing for the next ability!
- Anti-Air Particle Beam: The two summoned ghosts will fire a beam across the battlefield in front of them, as the boss will fire a pointblank AoE ability at the same time. Position yourself away from the boss, and out of line from the ghosts to survive the attack.
- Obscure Woods: This will be the phase transition ability, which is triggered with a room wide AoE for considerable damage. Make sure to prepare mass healing.
Obscure Woods Phase
Abilities
- Flood of Obscurity: A pointblank AoE indictor will form around the boss, as eight single location AoEs will form around the room. Position yourself close to the boss, and angled in a way that you won't get pushed into one of the eight single location AoE markers. These eight AoE markers will turn into death zones, and each will tether a member of the raid. That person will need to move right next to (but not in) the death zone while their tether looks like a beam of light. When the tether changes into a rope, you will need to run away from your death zone until the tether breaks. Failing to do this will result in the party member getting sucked into the death zone and killed.
- Wide Angle Phaser: The boss will shoot gold tethers onto a specific wall in the room, and you need to immediately run as close as you can to that edge of the battlefield, to either side of the middle death zone against that wall. A very quick, very large cone AoE telegraph will appear, and blast anyone not standing in the right location.
- Rejuvenating Balm: Two purple tethers will target opposite walls, signifying where a massive explosion is going to appear. You must position yourself in the very middle of these two tethers and as close to middle death zone as you can. The explosion telegraph leaves a very tiny space to stand in to survive.
- Deluge of Darkness: This will be the phase transition ability, which is triggered with a room wide AoE for considerable damage. Make sure to prepare mass healing.
Loot
Treasure Coffer 1
| Name | Type | Item Level | Rarity | Quantity |
|---|---|---|---|---|
| Helm of Lost Antiquity | Other | N/A | Basic | 1 |
| Armor of Lost Antiquity | Other | N/A | Basic | 1 |
| Chausses of Lost Antiquity | Other | N/A | Basic | 1 |
| Bangle of Lost Antiquity | Other | N/A | Basic | 1 |
Treasure Coffer 2
| Name | Type | Item Level | Rarity | Quantity |
|---|---|---|---|---|
| Helm of Lost Antiquity | Other | N/A | Basic | 1 |
| Gauntlets of Lost Antiquity | Other | N/A | Basic | 1 |
| Greaves of Lost Antiquity | Other | N/A | Basic | 1 |
| Bangle of Lost Antiquity | Other | N/A | Basic | 1 |
Dialogue
Cloud of Darkness: No light could ever reach us...
Cloud of Darkness: We shall engulf everything in our shadow...
Cloud of Darkness: The Darkness swallows all, even the ground beneath your feet.
Cloud of Darkness: By the power of Darkness, we call forth life, boundless and irrepressible.
Cloud of Darkness: With balance comes life, insatiable and all-consuming.
Cloud of Darkness: We shall return all to nothingness.
The Darkness forms hypercharged clouds!
Cloud of Darkness: Hope, despair...they are what feeds us...
Music
| Section | Theme |
|---|---|
| Main | Don't Be Afraid |


