The Weeping City of Mhach
The Weeping City of Mhach
- Level
- 60 (Sync: 60)
- Item Level
- 205
- Difficulty
- Normal
- Party size
- Alliance
24 man • 3 6
6  15
15 
- Unsyncing
- Allowed
- Time limit
- 120 minutes
- Phoenix Down
- Not Available
- Duty Finder
- Alliance Raids (Heavensward)
- Roulette
- Alliance Raids
- Tomestones
 100
100  60
60  8
8 - Req. quest
- The Weeping City
- Entrance
- The Parrock (X:7.0, Y:7.1)
- Location
- The Weeping City of Mhach
- Region
- Mor Dhona
- Patch
- 3.3
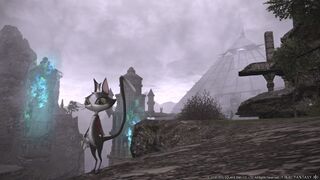
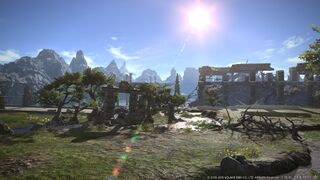
Deep in the Yafaem Saltmoor lie the ruins of the fabled city of Mhach─a civilization of the Fifth Astral Era whose prosperity was built upon unparalleled magicks of destruction. It is to this ancient edifice, and its vaults of occult secrets, that you and the Redbills plan your next foray.
You expect to encounter voidsent─the same terrible beings that grounded Radlia and her crew─but on your path to retrieve a relic of incalculable power, can you prevail over the unfettered miseries of the Weeping City itself?— In-game description
The Weeping City of Mhach is a level 60 raid introduced in patch 3.3 with Heavensward. It is the second part of Shadow of Mhach.
Objectives
- Clear the peat bogs: 0/1
- Defeat Arachne Eve: 0/1
- Clear the Shantotto Memorial: 0/1
- Defeat Forgall: 0/1
- Clear the security corridor: 0/1
- Defeat Ozma: 0/1
- Defeat Calofisteri: 0/1
Enemies and Bosses
Peat Bogs
Enemies (part 1 and 2): Sarcosuchus x6
After defeating the first three enemies, another group of three will spawn. They will use Critical Bite, a telegraphed frontal conal AoE.
Enemies (part 3): First Daughter x3, Yafaemi Spider x6
Upon death, the spiders will leave behind a small poison puddle that will inflict a stack of Digesting to anyone who steps in it, dealing damage-over-time. The First Daughters will use Silkscreen, a telegraphed frontal line AoE.
Phase 1
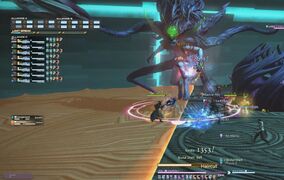
Throughout this phase, the boss casts Dark Spike, a tankbuster, and Silken Spray, a tail swipe which knocks you back and gives you the Heavy debuff. Heavy can be removed with Esuna. Later, it randomly selects three players with orange target markers that places webs at their location. At this phase, it doesn't matter where the webs are located. Next, random players are targeted with green spread markers. Anyone caught in the ring gets tethered with the Seized debuff and other players have to walk into the tether to break you free.
The boss burrows to the ground and a series of ring AoEs appear starting from the center. Right after the last ring AoE, a proximity marker appears, which is where the boss pops up. Sometimes right after, some players are marked with the green spread markers.
Phase 2: Web
In this phase, the boss pulls everyone up to her web.
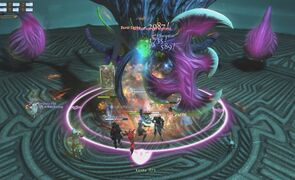
One group must find and kill a small spider, Spitting Spider, to make a hole in the web and drop down to the ground below. Then destroy the pillars called Keyknot, that surround the arena and kill any Webmaiden adds.
NOTE: A random player on the ground level may get targeted and tethered that brings them back up to the upper web level.
Meanwhile, the others on the web must absorb the blue orbs (Earth Aether) and destroy the purple orbs, Deep Earth Aether, to avoid buffing the boss. Make sure to avoid the yellow webs on the ground. They give you the Digestive Fluid debuff that slows you down and small damage over time. During this phase, the boss continuously casts Implosion, which is an unavoidable room-wide damage. After all the pillars are destroyed, the boss and everyone on the web will fall to ground level.
Phase 3
This phase is similar to the first phase, but more mechanics are introduced. Stack when the boss casts Shadow Burst. If you are marked, stand within melee distance so people can stack with you. Later, it will cast Fond Affeared, which is a Gaze mechanic. Look away or you get Hysteria.
This time, if you are targeted with the orange marker, you must go to the outer arena to place the webs away from the center. The boss burrows in the ground and casts a room-wide, tornado-like AoE called Widow’s Kiss. The AoE sucks everyone to the center and will kill anyone at the center or close to the center where the boss comes back up. Get on a sticky web to avoid getting sucked in.
NOTE: Anyone standing on a web close to the center can also receive high damage or die.
After this, the boss repeats each phase until it’s killed.
Overview of Skills and Abilities
| Skill/Action* | Description | Amt of Damage | AoE? |
|---|---|---|---|
| Dark Spike | Tankbuster | Med-High | |
| Silken Spray | Tailswipe | Medium | X |
| orange target marker | Go to outer arena to place sticky web | Small | |
| burrow & return | Avoid ring AoEs, then proximity marker | Small-High | X |
| green/yellow spread marker | - Avoid standing in the circle - If anyone is tethered, run through the tether to free them |
Small | X |
| Implosion | Unavoidable room-wide damage | Medium | |
| orange "hourglass" target marker | Brings you back up to web level | ||
| Frond Affeared | Gaze - look away | Medium | |
| Shadow Burst | Stack | Medium-Death | |
| Widow's Kiss, Pitfall |
Get on web to avoid getting sucked to center | High-Death |
*Italicized words are names of casts that are shown in the cast bar.
Shatotto Memorial
Enemies (part 1): Mhachi Bhoot x3
The Bhoots have no mechanics. After defeating them, another group of enemies will spawn.
Enemies (part 2): Mhachi Ghost x1, Black Mage Corpse x6
The Mhachi Ghost will use Inner Demons, a telegraphed point-blank AoE that will inflict Terror on anyone hit, and Dark II, a telegraphed conal AoE that will inflict Heavy on anyone hit.
Enemies (part 3): Mhachi Bhoot x6, Mhachi Ghost x3
Phase 1
The boss summons adds called Shriveled Talon. Kill the adds before Necropurge is done casting. After Necropurge is casted, green puddles appear under random players. Avoid the puddle so you don’t get the Gradual Zombification debuff. If you get more than one, then you gain Zombification and become a zombie.
Later, the boss casts Punishing Ray that has multiple purple towers throughout the arena. Each tower needs one person standing on it, which gives you Bleeding, a minor damage-over-time debuff. Sometimes, the boss casts Megiddo Flame, while the towers are still out. If the column AoE is overlapping the tower, wait for the column AoE to pass first before stepping onto the tower puddle.
When Brand of the Fallen is cast, stack with others who have the same marker to avoid damage and the Toad debuff. Evil Mist gives unavoidable room-wide damage and spawns Poison Mists throughout the arena. Avoid the mists during this phase because they eventually turn into green puddles.
Phase 2: Adds
The boss summons three adds:
- Summoned Succubus - casts Beguiling Mist, which inflicts Seduced. Affected players will be mind controlled and led to death.
- Summoned Haagenti - casts Mortal Ray This is a gaze attack, look away or be inflicted by Doom. Healers can use Esuna to remove it.
- Summoned Dahak
Kill the Succubus first, and stun her when she casts Beguiling Mist. Kill the Haagenti second.
After the ads are killed, the boss finishes casting Mana Explosion, an unavoidable room-wide damage.
Phase 3
This phase is similar to the first but with some new mechanics, especially Mega Death.
After the boss casts Necropurge, stand on the green puddles to gain the Gradual Zombification debuff. You need this debuff to survive Mega Death. After the boss casts Mega Death, tall black wine cups pop up throughout the arena and anyone without the debuff instantly dies/wipes.
Note: Turning into a zombie also avoids death.
The boss can cast Dark Eruption which targets random players that drop fire puddles. Dump these puddles away from everyone while avoiding them. Just like with Punishing Ray, Megiddo Flame can also appear at the same time as Dark Eruption. Make sure to avoid these columns while placing the puddles away from everyone. Later, healers need to quickly mass heal everyone after Hell Wind is cast. This is a room-wide damage that’s unavoidable and depletes everyone’s HP to extreme lows.
This time, when the boss casts Evil Mist, stand next to a Poison Mist to get Gradual Zombification. After the boss starts casting Mega Death, and the mists turn into green puddles when they cast Necropurge.
Note: There isn’t much time to reach the puddle once it appears because the mist’s cast time for Necropurge isn’t long. Make sure to stand next to the mists right when they appear so you can get the debuff on time.
Overview of Skills and Abilities
| Skill/Action* | Description | Amt of Damage | AoE? |
|---|---|---|---|
| Necropurge | Avoid standing in green puddles unless boss is casting Mega Death | Small | |
| Megiddo Flame | Multiple column AoEs | High-Death | X |
| Punishing Ray | One person stands on each red pillar | Small-Death | |
| Evil Mist | Unavoidable room-wide damage and avoid mists unless boss is cast Mega Death | Medium | |
| Void Call | Summons three adds; Kill succubus first | ||
| Brand of the Fallen | Marked players group together | Low-High | |
| Hell Wind | Unavoidable room-wide damage | High | X |
| Dark Eruption | - Orange target marker - Dump the fire puddles away from everyone |
Medium | |
| Mega Death | Immediately stand on green puddle to avoid death or stand next to an orb | Death |
*Italicized words are names of casts that are shown in the cast bar.
 Security Corridor
Enemies: Headstone
This is a mini-boss.
Each alliance should split between the three main platforms. When Void Fire spawns on both ends, the parties on both sides must kill the fire quickly before it finishes casting Big Burst. Then kill the add, Parthenope. Each side will get cut off with a wall until all Parthenopes are killed.
When the mini boss starts casting Flaring Epigraph, the red circle on each side and the middle needs to be stepped on to create a shield in the middle platform. Everyone should get in the shield to avoid death.
The boss changes into three different forms throughout the fight that use different skills and actions in each form:
- Sphere form
- Pyramid form
- Cube form
Note: This area has no invisible walls, and you can walk over the edge to your death at any time. So, make sure you don’t fall off to your death!
Phase 1
For the first phase, the boss attacks in sphere form then changes to a pyramid or cube form, then changes back to the sphere form and starts the next phase.
Note: You must pay attention to each form because this boss doesn’t provide any AoE markers and cast bars for any of its AoE attacks.
Sphere Form
This is the default form, which is the "safe" form. During this phase, it targets one person from each party with a red-black spread marker. Marked players should go to the left side of the ring by default. These markers place proximity markers where the target players stand, and Singularity Fragments spawn at these marker locations. Make sure the black circles aren’t overlapping too much. If Singularity Fragments spawn too close to each other, they explode, hitting everyone with Debris Burst, an unavoidable, room-wide damage, and gives the Damage Down debuff. Debris Burst is also proximity based so any parties close to the explosion receive high damage and even death.
Kill the adds when they spawn and avoid their AoEs when they cast Tornado. In the last phase, the boss targets two players in each party so spread out by going to the left side of the ring and the back of the rectangular platform. If there aren’t many players alive, it targets random players across all parties so a party may even end up with four targeted players.
Note: If a targeted player falls off the platform, the marker is placed in the back of the rectangular platform where the players spawn points are located. This could potentially cause Debris Burst, if another targeted player places their marker in the back, which ends up with two markers placed right next to each other.
The boss also randomly targets a player with a stack marker that gives Magic Vulnerability Up.
Note: If you take too long to kill the boss, it can target another player with the stack marker. The alliance can’t survive more than one Meteor attack so it’s very important to kill the boss quickly.
Pyramid Form
Once the boss changes to pyramid form, immediately go to the ring section to the left and right of the rectangular platform. It shoots a large, line AoE across the rectangular platforms and gives you the Poison and Timer debuff. It can also shrink you for 12 seconds with the Minimum debuff. Healers can use Esuna to remove Poison and Timer but not Minimum.
Afterwards, it randomly hits players with Bleeding which splashes to nearby players and can stack, so healers should heal and remove it with Esuna.
It also casts Acceleration Bomb giving random players the Acceleration debuff. Starting at three, a dice marker is placed on top of the player and counts down. Sheathe your weapon immediately and stop moving before the countdown ends. Movement and using any skills including auto-attack by the time the countdown ends can cause high damage and even death. Sheathing your weapon should stop all attacks and skills.
Note: The default key is Z to sheathe your weapon.
Cube Form
Once the boss changes to cube form, immediately stand right next to the boss on the rectangular platform (inside of the ring). It casts a large, donut AoE on the ring platform. Anyone caught in the AoE gets a Vulnerability Up stack. Right after its AoE attack, tanks must separate from the party as the boss targets and shoots lasers at the tanks. The lasers cleave anyone caught in its path. Meanwhile, tanks should soak the orbs called Ozmasphere that float around the ring and everyone else should be in the back or front of the rectangular platform. When soaked, Ozmaspheres explode with high damage to you and anyone nearby so healers should pay attention to both tanks and anyone absorbing the orbs. If you leave the Ozmaspheres alone, they randomly attack you.
The boss also casts Holy, which deals a moderate amount of damage and knocks players back a bit. Make sure to stand close to the boss on the rectangular platform to not fall off.
Phase 2: Ozmashade
The boss casts Black Hole and swallows everyone inside it. This phase is a DPS check, so everyone must destroy Ozmashade to create a portal before the Doomsday timer is finished, which wipes the raid. There are two parts to this phase.
Each party is separated into three platforms with a Singularity Echo. At least one player must stand on the circle and the party must kill the Echo quickly and any spawned adds (Singularity Trace, Singularity Ripple). After the Echos and the adds are killed, jump down to fight Ozmashade.
Note: If players aren’t standing on the circle, the other parties can’t kill their Echo. It’s the same strategy used in The Labyrinth of the Ancients when attacking Atomos.
Jump down and quickly destroy Ozmashade. When Ozmashade casts Assimilation, look away. If you didn’t and got the Assimilation debuff, turn your character away from the boss until the debuff is gone or you get trapped in a Singularity Gaol. Other players have to destroy the gaol to free you. Ozmashade also marks random players with red spread markers. Run to a corner away from everyone to place the proximity marker. After destroying Ozmashade, go to the center where the portal takes you back to the main platform. If you don’t destroy Ozmashade before the Doomsday timer runs out, it casts Doomsday and wipes the raid.
Phase 3
This phase is the same as Phase 1, but more mechanics are introduced and the boss cycles through all forms.
Overview of Skills and Ability
| Skill/Action* | Details | Amt of Damage | AoE? | Esuna? |
|---|---|---|---|---|
| red spread marker | Place at the back of the rectangular platform or left side of ring. Don’t overlap! |
Small-High | ||
| Black Hole | Sucks all players inside. | None | ||
| pyramid form (Execration) |
Move to the ring. | Medium | X | X |
| Acceleration Bomb | - Countdown marker - Sheathe your weapon and stop moving until countdown is over. |
High-Death | ||
| Bleeding | Randomly gives Bleeding that splashes to nearby players. | Small DoT | X | |
| cube form (Flare Star) |
- Stand right next to the boss. - Tank and party separate to avoid cleave. |
Medium | X | |
| orbs (Ozmasphere) |
Tanks should soak. | High | ||
| Holy | Room-wide damage and small knockback. | Small | ||
| Assimilation | Gaze — look away. | |||
| Doomsday | Must kill before finish casting. | Death | ||
| stack marker (Meteor) |
Stack but party can't survive more than one. | High |
*Italicized words are names of casts that are shown in the cast bar.
Phase 1
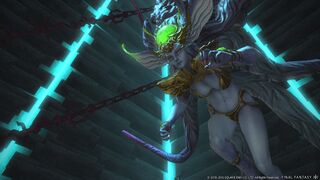
- Haircut sweeps the left or right side of the boss and is visually indicated when either side of her hair turns into a stinger blade. ("Calofisteri's hair begins to take on another shape..."). When struck this applies a Flesh Wound that can be cleansed.
- Avoid the Extension telegraphs which will still pull you in when standing near them. If the Entanglement tentacles spawning from extension are not killed in time, the players trapped inside will die (Garrote).
Phase 2: Bijous and Living Locks
This phase is signaled with "Calofisteri is drawing power from her jewel".
- She summons Bijous and Grand Bijous. Focus the smaller Bijous down first as they finish their Energize cast sooner, and then the Grand Bijous. Every Energize cast powers up her next raidwide AoE (Dancing Mad).
- Random players will also be targeted with a chasing AoE marker and should run along the edge of the arena to avoid damaging other players.
- When the axe and bulb flowers spawn (untargetable Living Locks), look for the axe flower and stay near them to avoid their donut AoE. The bulb flowers will knockup any nearby players into the air ( Evil Tress).
- Penetration will pull you towards the center into three bulb flowers if you're looking at the boss, and will push you away if you're not. ("Calofisteri's hair begins to take root!"). Try to position yourself to be pushed towards the empty spots of the arena to avoid these.
- Depth Charge will make the boss charge towards the wall, followed by a Haircut. Make sure to watch where her blade is to avoid it. Tanks might want to reposition her back in the middle of the platform.
- Two blade shaped flowers will spawn that shoot a red beam from the sides of the platform across the center .
Notes
 Her auto attack move Bloodied Nail is a frontal cleave so avoid turning the boss directly infront of the raid. While either side of her hair turns into a blade, the auto attack Split End will cleave the side of her blade.
 Try to keep the boss around the middle of the arena, as it will often pick a side and do a huge AoE with Haircut. Tanks can also anticipate this and direct the AoE away from the raid by turning the boss. Avoid tanking her on the edge, as you might have just a tiny safe spot and will most likely result in a wipe.
Gallery
-
Haircut
-
Axe and bulb flowers
Loot
| Name | Type | Item Level | Rarity | Quantity |
|---|---|---|---|---|
| Yafaemi Boots of Aiming | Feet | 230 | Blue | 1 |
| Yafaemi Boots of Casting | Feet | 230 | Blue | 1 |
| Yafaemi Boots of Healing | Feet | 230 | Blue | 1 |
| Yafaemi Circlet of Fending | Head | 230 | Blue | 1 |
| Yafaemi Circlet of Maiming | Head | 230 | Blue | 1 |
| Yafaemi Circlet of Scouting | Head | 230 | Blue | 1 |
| Yafaemi Circlet of Striking | Head | 230 | Blue | 1 |
| Yafaemi Hat of Casting | Head | 230 | Blue | 1 |
| Yafaemi Hat of Healing | Head | 230 | Blue | 1 |
| Yafaemi Sabatons of Fending | Feet | 230 | Blue | 1 |
| Yafaemi Sabatons of Maiming | Feet | 230 | Blue | 1 |
| Yafaemi Sandals of Scouting | Feet | 230 | Blue | 1 |
| Yafaemi Sandals of Striking | Feet | 230 | Blue | 1 |
| Yafaemi Turban of Aiming | Head | 230 | Blue | 1 |
| Name | Type | Item Level | Rarity | Quantity |
|---|---|---|---|---|
| Yafaemi Brais of Aiming | Legs | 230 | Blue | 1 |
| Yafaemi Chain Hose of Fending | Legs | 230 | Blue | 1 |
| Yafaemi Chain Hose of Maiming | Legs | 230 | Blue | 1 |
| Yafaemi Gaskins of Scouting | Legs | 230 | Blue | 1 |
| Yafaemi Gaskins of Striking | Legs | 230 | Blue | 1 |
| Yafaemi Gauntlets of Fending | Hands | 230 | Blue | 1 |
| Yafaemi Gauntlets of Maiming | Hands | 230 | Blue | 1 |
| Yafaemi Gloves of Scouting | Hands | 230 | Blue | 1 |
| Yafaemi Gloves of Striking | Hands | 230 | Blue | 1 |
| Yafaemi Halfgloves of Aiming | Hands | 230 | Blue | 1 |
| Yafaemi Halfgloves of Casting | Hands | 230 | Blue | 1 |
| Yafaemi Halfgloves of Healing | Hands | 230 | Blue | 1 |
| Yafaemi Trousers of Casting | Legs | 230 | Blue | 1 |
| Yafaemi Trousers of Healing | Legs | 230 | Blue | 1 |
| Name | Type | Item Level | Rarity | Quantity |
|---|---|---|---|---|
| Yafaemi Boots of Aiming | Feet | 230 | Blue | 1 |
| Yafaemi Boots of Casting | Feet | 230 | Blue | 1 |
| Yafaemi Boots of Healing | Feet | 230 | Blue | 1 |
| Yafaemi Cyclas of Scouting | Body | 230 | Blue | 1 |
| Yafaemi Cyclas of Striking | Body | 230 | Blue | 1 |
| Yafaemi Jacket of Casting | Body | 230 | Blue | 1 |
| Yafaemi Jacket of Healing | Body | 230 | Blue | 1 |
| Yafaemi Mail of Fending | Body | 230 | Blue | 1 |
| Yafaemi Mail of Maiming | Body | 230 | Blue | 1 |
| Yafaemi Sabatons of Fending | Feet | 230 | Blue | 1 |
| Yafaemi Sabatons of Maiming | Feet | 230 | Blue | 1 |
| Yafaemi Sandals of Scouting | Feet | 230 | Blue | 1 |
| Yafaemi Sandals of Striking | Feet | 230 | Blue | 1 |
| Yafaemi Tabard of Aiming | Body | 230 | Blue | 1 |
| Name | Type | Item Level | Rarity | Quantity |
|---|---|---|---|---|
| Coffin Lid | Material | N/A | Basic | 1 |
| Wind-up Calofisteri | Minion | N/A | Basic | 1 |
| Calofisteri Card | Triple Triad Card | N/A | 1 |
Rewards
When originally released, players could receive only one reward item per week for completing duties in The Weeping City of Mhach. Weekly limits were lifted in patch 3.4.
Each party in the alliance will receive its own treasure chest, the contents of which will be identical regardless of the route taken.
- Players cannot open a treasure chest belonging to another party.
Achievements
This duty is associated with the following achievements:
| Name | Points | Task | Reward | Patch |
|---|---|---|---|---|
| Ex Mhachina | 10 | Complete the Weeping City of Mhach. | - | 3.3 |
| Mapping the Realm: The Weeping City of Mhach | 10 | Discover every location in the Weeping City of Mhach. | - | 3.3 |
Music
| Section | Theme |
|---|---|
| Main | Teardrops in the Rain |
| Bosses 1-3 | Ominous Prognisticks |
| Ozmashade Phase | A Thousand Faces |
| Final Boss | Six Fulms Under |
Trivia
- From the spot where players load into this duty, Ozma is visible on top of the pyramid in the distance.
Images
Gear Images
Raid Images
Concept Art
Duty Dialogue
Cait Sith: My dear Yafaem...
What a wretched morass it has become.
Cait Sith: Do you spy that wreckage up ahead?
Could it be one of the Talons' downed vessels?
Arachne Eve: Gaha! There were more of you blood—filled morsels!?
How well I will sup this day!
Arachne Eve: Nasty little insects!
You will not scurry so within my web!
Arachne Eve: Bah! Not strong enough! Not strong enough!
I must feed on more than flesh!
Arachne Eve: See what you have done!
My poor web is in tatters!
Arachne Eve: Are you frightened, my precious prey?
Gaze into my eyes and know true terror!
Arachne Eve: What manner of prey...bites back?
I must warn...Lord Forgall...
Cait Sith: Is this not a tributary of the White Maiden?
We should come upon Mhach if we follow it downstream!
Cait Sith: <cough> <splutter> I am not terribly fond of water...
Cait Sith: We aim for that pyramidal structure, but ware the voidsent.
The air is thick with their otherworldly stench...
Forgall: Ah, some of you survived. How convenient.
I am in need of fresh souls to shatter the ward.
Forgall: Even empty husks have their uses.
See how they jerk and dance at my command!
Forgall: I will teach those who oppose me the extent of their folly...
Forgall: Your pititful lives will be mine in due time.
But first, you must be punished for your insolence!
Forgall: Solitutde weakens the spirit and warps the flesh...
Stray from the pack at your peril!
Forgall: My undead toys are so easily broken.
Mayhap my minions will prove the sturdier...
Forgall: How tiresome. I had thought to spare my energies for the ward.
But you insisit on gripping to life so very tightly...
Forgall: Embrace your fate! By my stygian light be your doom revealed!
Forgall: My lord warned that mortals of power might interfere...
But you are not threat to me! I reign in the court of the void!
Forgall: Will you glimpse the realm that awairs you after death?
Drink deep from the chalice of oblivion!
Forgall: Ah, how sweet the rancid breeze of the underhells...
It's winds will strip you to the bone!
Forgall: <cough> After so long...I am arisen...
I will not...be buried here...
Cait Sith: Ah, the wonders of Mhachi architecture. Fifteen centuries and a flood later, and still it stands.
Headstone: Body of rock, from rough stone hewn...
Chipped with chisel and marked by rune...
Headstone: Departing now, the maker's spark...
A shattered face, stone eyes grown dark...
Cait Sith: Barring our way is a terrible sphere that has devoured entire cities.
We must prove the stronger if we are to reach the Nullstone.
Cait Sith: This is it: the Tomb of the Nullstone.
There will be a guardian. There is always a guardian...
Calofisteri: Know your slayer, intruders. I am Calofisteri, and by the blood of voidsent have I ascended to the sublime...
Calofisteri: Behold my magnificent mane!
These curls are blades that cut, and roots that drain!
Calofisteri: Shall I share my luscious locks with you?
Calofisteri: Unkempt thieves! Slovenly marauders!
You will not have the Nullstone!
Calofisteri: Have you ever witnessed such coifed perfection!?
The edges of my tresses are sharper than swords!
Calofisteri: ...Why do you yet stand? I have supped on the void!
What ungodly power swims in your veins?
Calofisteri: Do you dare face the halo of my unleashed glory?
Or turn your back and risk the sting of my rejection?
Calofisteri: My pride is clipped... My strength is shorn...
The Nullstone is yours...

