Abyssos: The Fifth Circle
Abyssos: The Fifth Circle
- Level
- 90 (Sync: 90)
- Item Level
- 585
- Difficulty
- Normal
- Party size
- Full Party
8 man • 2 2
2  4
4 
- Unsyncing
- Allowed
- Time limit
- 90 minutes
- Phoenix Down
- Not Available
- Duty Finder
- Normal Raids (Endwalker)
- Roulette
- Normal Raids
- Tomestones
 10
10 - Req. quest
- Masks of the Father
- Entrance
- The Gates of Pandaemonium (X:21.4, Y:22.0)
- Location
- The Caustic Purgatory
- Region
- The World Unsundered
- Stone, Sky, Sea
- Available
- Patch
- 6.2
While the identity of Pandæmonium's assailant is yet unknown, Erichthonios makes no effort to hide his doubts concerning Lahabrea, who he suspects is using the infernal prison for private experimentation. As if to confirm to the warder's suspicions, a familiar appears in the halls of Asphodelos, claiming to be none other than the chief keyward himself. The creature mocks you with cryptic warnings before vanishing, leaving naught but questions in its wake. Their answers beckon from the shadows of Abyssos, daring brave souls to seek them out.
— In-game description
Abyssos: The Fifth Circle is a level 90 raid introduced in patch 6.2 with Endwalker. The raid is also known as P5N.
Phases & Abilities
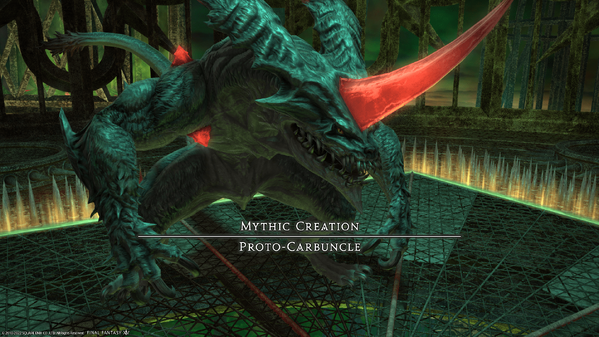
 Mythic Creation: Proto-Carbuncle
Phase 1
Please note that the arena is surrounded by spikes that will instantly kill any player who touch them. Also note that failing any mechanic will debuff with a stacking Vulnerability Up.
- Crunch: A light tankbuster.
- Sonic Howl: Raid-wide damage.
- Ruby Glow: A strong raid-wide attack that spawns glowing walls, either divides the room in half diagonally, or into quadrants (walls vertically and horizontally across the arena). These walls can be walked through without harm. Any magic ability (indicated by glowing staves circling around the Proto-Carbuncle or the mechanic) that Proto-Carbuncle uses that hits a wall will affect the entire half or quadrant of the room in which the mechanic went off, rather than the area it would normally hit.
- Searing Ray: The Proto-Carbuncle will jump to a corner of the room, then charge up a large area of effect attack which will strike the entire arena, except the area immediately behind the Carbuncle. The AoE comes from the center of its hitbox and affects a 180 degree area in front of the boss, so simply stand behind the boss. If used after Ruby Glow, the attack will instead strike the entire segment of the room that the Carbuncle is in, so players should move to the opposite side of the glowing wall from the boss.
- Topaz Stones: Proto-Carbuncle drops several stones that deal magic damage in an area of effect around them or spawn a growing poison circle under them. This has a number of possible variations used over the course of the fight:
- (Phase 1) Several exploding stones drop that deal damage in a small telegraphed AoE circle under them. This is the first usage of this attack, and is easily avoided.
- (Phase 1) Used after Ruby Glow divides the room into quadrants. Spawns exploding stones that will leave either 1 or 2 of the quadrants as safe zones.
- (Phase 2) 4 stones spawn, one at the center of each quadrant of the room. 3 of them will have a green poison circle under them that grows to cover slightly more than that entire quadrant of the room, while 1 will an exploding crystal with just a small normal AoE telegraph under it. The one with the normal AoE circle is the safe zone to avoid the growing poison circles.
- (Phase 2) Used after Ruby Glow divides the room into quadrants. Spawns exploding stones in succession, exploding in the same order they spawned, requiring players to move between quadrants as the explosions go off.
- (Phase 2) Used after Ruby Glow divides the room in half, with a stone spawned in each half. One will be a poison stone, the other an exploding stone. Players should stand in the half with the poison stone, but far enough away to avoid the poison circle as it grows. The Proto-Carbuncle will use Searing Ray immediately after this, which will be reflected by the walls as well.
- (Phase 2) Used after Ruby Glow divides the room into quadrants. Two quadrants will have exploding stones, one will have a poison stone, leaving one quadrant safe. The Proto-Carbuncle will use Venom Squall immediately after this.
- Acidic Slaver: A weak raidwide transitioning into the second phase of the fight. Stuns the party and triggers a cutscene.
Phase 2
The boss retains all abilities from Phase 1, except for Acidic Slaver and Crunch, and gains additional poison-themed abilities, including the additional Phase 2 variants of Topaz Stones listed above. The arena is slightly larger than before and is now surrounded by a poison that will instantly kill any player who touches it.
- Toxic Crunch: Replaces Crunch from Phase 1. A strong tankbuster that applies Poison that cannot be removed with Esuna. Can be tank-swapped, but can also simply be healed through.
- Venom Squall: A set of three attacks. First, places grounded AoEs under some players. Next, applies AoE markers on all players. Finishes with a stack AoE. Stack up to bait the grounded AoEs, spread out for the markers, and come back in for the stack AoE.
- Starving Stampede: Places a blue marker in the center of the room and 4 more around the edges of the room. A red bite marker will travel to each one in succession, either clockwise or counter-clockwise around the edge markers before moving to one in the center, which indicates the order in which the boss will jump to them. Upon each jump, the boss will deal AoE damage in a large circle covering roughly a quarter of the room around that marker, dealing damage and stunning anyone hit. Proto-Carbuncle becomes untargetable starting with the first jump, allowing players to focus on dodging. The recommended way to avoid the attack is for players to stand near the 4th marker that will be hit around the edge of the arena (the last one that the bite marker goes to before going into the center), then once the first jump occurs, players should move to where the first marker was, ensuring they stay away from the center of the arena where the final jump will occur. The radius of the AoE is just slightly larger than the distance between the center marker and the edge markers, and less than the distance between adjacent edge markers. Once the Proto-Carbuncle has completed the 5 jumps, it will consume anyone that was stunned by the attack, then spit them back out into the arena, instantly killing them, as well as anyone else near where they were spit out at.
After the final Topaz Stone variation above, the boss simply begins to repeat mechanics until killed, with the exception of Starving Stampede, which is only cast once during the fight. The boss does not appear to have an enrage timer.
Loot
 10 Allagan Tomestone of Poetics
- 494,988
 Experience Points
Treasure Coffer 1
| Name | Type | Item Level | Rarity | Quantity |
|---|---|---|---|---|
| Unsung Helm of Abyssos | Other | N/A | Basic | 1 |
| Unsung Armor of Abyssos | Other | N/A | Basic | 1 |
| Unsung Gauntlets of Abyssos | Other | N/A | Basic | 1 |
| Unsung Ring of Abyssos | Other | N/A | Basic | 1 |
Treasure Coffer 2
| Name | Type | Item Level | Rarity | Quantity |
|---|---|---|---|---|
| Unsung Helm of Abyssos | Other | N/A | Basic | 1 |
| Unsung Chausses of Abyssos | Other | N/A | Basic | 1 |
| Unsung Greaves of Abyssos | Other | N/A | Basic | 1 |
| Unsung Ring of Abyssos | Other | N/A | Basic | 1 |
Treasure Coffer 3
| Name | Type | Item Level | Rarity | Quantity |
|---|---|---|---|---|
| Silent Scream Orchestrion Roll | Other | N/A | Basic | 1 |
Dialogue
The ruby keras creates cells of light!
Light gathers around the proto-Carbuncle's head!
Light scatters within the cells!
Proto-Carbuncle: Must feed...
Proto-Carbuncle: Unnngh... Hungry...
The ruby keras creates cells of light!
Light scatters within the cells!
Light gathers around the proto-Carbuncle's head!
Proto-Carbuncle: So hungry... Must feed—must feast!
The proto-Carbuncle feasts upon the lively bait, sating its hunger!
The ruby keras creates cells of light!
Light scatters within the cells!
Proto-Carbuncle: Grrruuugh... Graaahhh!
The hungry proto-Carbuncle begins its hunt!
Music
| Section | Theme |
|---|---|
| Main | Silent Scream |


