Eden's Promise: Anamorphosis
Eden's Promise: Anamorphosis
- Level
- 80 (Sync: 80)
- Item Level
- 485
- Difficulty
- Normal
- Party size
- Full Party
8 man • 2 2
2  4
4 
- Unsyncing
- Allowed
- Time limit
- 90 minutes
- Phoenix Down
- Not Available
- Duty Finder
- Normal Raids (Shadowbringers)
- Roulette
- Normal Raids
- Tomestones
 20
20 - Req. quest
- Voice of the Soul
- Entrance
- The Core (X:23.4, Y:23.2)
- Location
- Bygone Gaol
- Region
- Norvrandt
- Stone, Sky, Sea
- Available
- Patch
- 5.4
Having been forcibly fused with Mitron, Gaia is on the verge of being lost to you and Ryne forever. To make matters even worse, the Ascian draws on Ryne's memories to summon forth a foe born from her greatest hopes and fears. Though you have no way of knowing what powers it may possess, it must be vanquished if you are to stand any chance of freeing Gaia.
— In-game description
Eden's Promise: Anamorphosis is a level 80 raid introduced in patch 5.4 with Shadowbringers. The raid is also known as E11N.
Guide
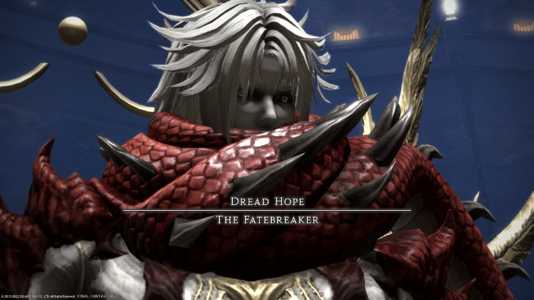
 Dread Hope: Fatebreaker
This fight, you need to pay attention to what element Fatebreaker is channeling, as it will affect the behavior of the spell. There is no spell name difference for the elements, so you need to use the visuals of the bosses auras to know how to prepare for the attacks!
The colors of the aura indicate:
- Red aura: Fire Imbued
- Blue aura: Lightning Imbued
Abilities
- Burnt Strike A line AoE telegraph down the middle of the battlefield will appear
- - Fire Imbued: After the explosion, you will get pushed away from the AoE zone...so make sure you're nice and close to avoid getting blown off the map!
- - Lightning Imbued: IMMEDIATELY after the explosion, another even wider explosion will occur. To avoid this, make sure you're standing close to the edge of the map, as there isn't enough time to move after the initial explosion
- - Light Imbued (Sub 50% Boss HP Only): After the explosion, everyone in the raid will have a targeted AoE telegraph directly under them, simply move out of the way.
- Bound of Faith This will target only one player in the raid and stun them
- - Fire Imbued: The player will have a stacking telegraph placed on them, so the raid will need to stack there to share the damage
- - Lightning Imbued: The player will be hit with a very heavy DoT effect. Healers need to babysit this person for the duration, as it will quickly kill if left unchecked
- Burnished Glory Unavoidable raid-wide AoE, just make sure you're ready to heal everyone up after it casts.
- Powder Mark Tankbuster that comes in two phases. The first initial hit will just be a standard heavy damage, single target attack. It will then give the tank a debuff that will tick down for 12 seconds. Towards the end of this timer, the tank will be targeted with a very wide AoE marker. Make sure you're not near the rest of the raid once this part happens to avoid excess damage!
- Turn of the Heavens The boss will summon nine circles of either fire or lightning that will heavily damage you if you stand in them, and eventually explode.
- - Fire Imbued: The red circles will have a much wider blast radius. Make sure you're standing either right inbetween two blue circles or on the outer edge of the battlefield on the blue circle side.
- - Lightning Imbued: The blue circles will have a much wider blast radius. Make sure you're standing either right inbetween two red circles or on the outer edge of the battlefield on the red circle side.
- Shifting Sky This is a sequence of attacks in a row.
- - 1st Part: A battlefield-wide knockback telegraph will appear. Stand in the middle of this to avoid getting thrown off the map.
- - 2nd Part: The snake pet will stand in the middle of the room and telegraph a cone AoE that will hit 3/4's of the room. Stand behind the snake to avoid (ample time to move here)
- - 3rd Part: Two clones of the boss will position themselves onto the edge of the battlefield, and one will cast Fire Imbued Burnt Strike and the other will cast Lightning Imbued Burnt Strike. You dodge these the same way as before, but you need to be ready for the Fire Imbued knockback!
- Prismatic Deception The boss will leave the battlefield with his two clones. Pay attention to your "Targets" in the UI, as you'll eventually see the clones added to the list. The three of them are hiding somewhere around the perimeter of the battlefield, but you can only see them if you run past them on the edge of the battlefield. Run around the edge of the battlefield until you are confident you know where either the left-most or right-most copy of the boss is standing. All three of them are going to shoot out a straight line, fairly wide AoE. Position yourself a few yalms to the outer edge of either the left-most or right-most clone to avoid the damage.
Loot
Treasure Coffer 1
| Name | Type | Item Level | Rarity | Quantity |
|---|---|---|---|---|
| Helm of Lost Antiquity | Other | N/A | Basic | 1 |
| Armor of Lost Antiquity | Other | N/A | Basic | 1 |
| Chausses of Lost Antiquity | Other | N/A | Basic | 1 |
| Bangle of Lost Antiquity | Other | N/A | Basic | 1 |
Treasure Coffer 2
| Name | Type | Item Level | Rarity | Quantity |
|---|---|---|---|---|
| Armor of Lost Antiquity | Other | N/A | Basic | 1 |
| Gauntlets of Lost Antiquity | Other | N/A | Basic | 1 |
| Chausses of Lost Antiquity | Other | N/A | Basic | 1 |
| Bangle of Lost Antiquity | Other | N/A | Basic | 1 |
Treasure Coffer 3
| Name | Type | Item Level | Rarity | Quantity |
|---|---|---|---|---|
| The Legendary Beast Orchestrion Roll | Other | N/A | Basic | 1 |
Music
| Section | Theme |
|---|---|
| Main | The Legendary Beast |
Dialogue
All lines are voice acted.
Fatebreaker: I'm the only one fit to protect her...
Ryne: To think that this could be born from my memories...
Ryne: That creature is passing on its aether!
Fatebreaker: Have at you!
Fatebreaker: You're not going anywhere! Fall!
Fatebreaker: A feeble shield protects nothing!
Fatebreaker: You're not going anywhere! Fall!
Fatebreaker: Light claim you!
Fatebreaker: Come, show me your strength!
Fatebreaker: Beast of my blood, answer my call!
Ryne: I sense a surge in aether...
Fatebreaker: Come! Show me your strength!
Fatebreaker: Let's try something else.
Ryne: The blade is imbued with Light!
Fatebreaker: Have at you!
Fatebreaker: You're not going anywhere! Fall!
Fatebreaker: The Light will cleanse your sins!
Ryne: The Light's so strong, I can't sense anything else...


