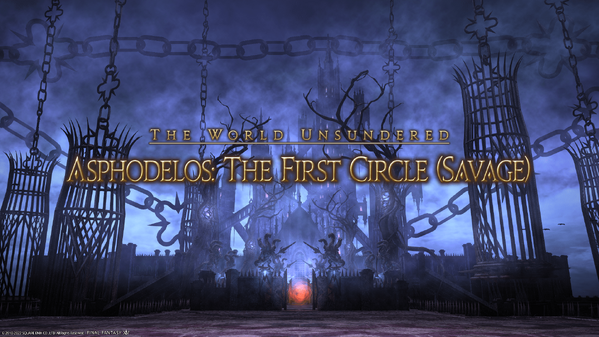
Asphodelos: The First Circle (Savage)
Asphodelos: The First Circle (Savage)
- Level
- 90 (Sync: 90)
- Item Level
- 570
- Difficulty
- Savage
- Party size
- Full Party
8 man • 2 2
2  4
4 
- Unsyncing
- Allowed
- Time limit
- 90 minutes
- Phoenix Down
- Not Available
- Duty Finder
- Savage Raids (Endwalker)
- Tomestones
 15
15 - Req. quest
- Talk to Nemjiji after completing Who Wards the Warders?
- Location
- The Gates of Pandaemonium
- Region
- The World Unsundered
- Stone, Sky, Sea
- Available
- Patch
- 6.05
 The Echo
- Permanent +20%
Nemjiji sequesters you in Aphoria for what she insists will be a simple session of dictation, but what the glint in her eye promises will be so much more. Whether or not her written account of your triumph over Erichthonios at the Gates of Pandaemonium will be strictly veracious... well, a little creativity never hurt anyone, right?
— In-game description
Asphodelos: The First Circle (Savage) is a level 90 raid introduced in patch 6.05 with Endwalker. The raid is also known as P1S.
Phases & Abilities
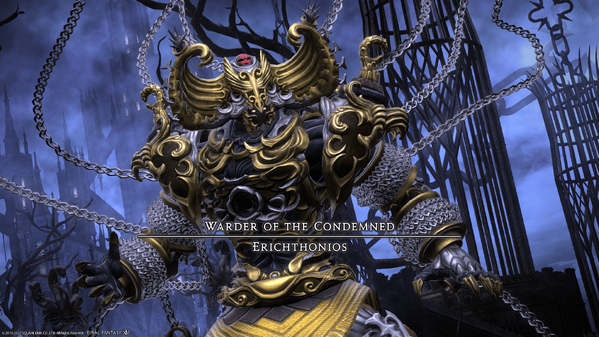
 Warder of the Condemned: Erichthonios
Before the fight, it is a good idea to set markers and assign positions for players. The most common positioning is tanks and melee DPS at cardinal directions right around the center of the area (about the boss' hitbox across) and healers and ranged DPS at intercardinal directions in the far corners. These positions will be used for spreading before Aetherial Shackles and picking a starting and ending square during Intemperate Torment.
Phase 1
Heavy Hand: A single target Tankbuster.
Warder's Wrath: An unavoidable room-wide Physical AoE. Mitigate and heal through.
Aetherial Shackles: Places a red Shackles of Loneliness or purple debuff on two random players. The red shackles debuff will target the 3 players standing farthest away and hits each with fairly large AoE, while the purple shackles debuff targets the three closest players and hits each with a smaller AoE. A player getting hit by both debuffed players will take massive damage. The player with the red debuff should stand in a corner away from the boss while the player with the purple debuff should stand right beside the boss in a cardinal direction, with all other players standing in each other corner and cardinal direction around the boss. Shortly after placing the debuffs but before the attack goes off, Erichthonios casts Warder's Wrath, which should be healed before players spread to their appropriate positions.
Gaoler's Flails: Erichthonios throws out two flails one by one, then attacks with them in the same order. He'll either throw out both a spike ball and a chakram, or two hooks. The spike ball is a point blank AoE centered around the boss and slightly larger than his hitbox. The chakram is the inverse with a donut AoE starting just outside his hitbox. The hook hits everything except for a 90 degree area on the opposite side of the boss.
Pitiless Flails of Grace/Purgation: Tankbuster with knockback. The tank hit with this attack will also be given a magic vulnerability debuff. Tanks should swap right after the knockback as the second hit can be lethal with the debuff.
Right after this hits:
- If it is a Flails of Purgation attack, a strong proximity-based AoE will go off from the location of the current tank.
- If it's a Flails of Grace attack instead, the current tank will be hit with a follow-up attack that should be shared with the rest of the party.
Phase 2
Intemperance: Changes the arena to a 3x3 grid with 3 fire, ice, or purple (lightning) crystals above each of the outer squares.
Intemperate Torment: Erichthonios destroys the crystals above each square one by one, giving everyone either the Overwhelmed by Fire or Overwhelmed by Cold debuff. If you are overwhelmed by the element you are struck with, you will take extra damage, so players with the red debuff want to be hit by the blue attack, and vice versa. If you are on the purple cross between the zones or hit by a poison crystal, you will take heavy damage. Additionally, if every outer square isn't occupied by a player while the first and last crystals are destroyed, or the north and south squares aren't occupied while the second crystal is destroyed, the entire raid will receive massive damage. Before destroying the first crystal, one of Erichthonios' hands will start glowing in a high or low position to indicate if respectively the top or bottom crystal will be destroyed first.
The first and third crystal that are destroyed are always either a fire or ice crystal. The second crystal is always a poison crystal for eastern and western squares, fire for the northern square, and ice for the southern square. After receiving the debuff from your square's first crystal, you must run to either the north or south square to receive the opposite debuff if your top crystal matches your bottom one, or wait in the middle to avoid all crystals if your first and last crystals are different elements. Once the last crystal is destroyed, the arena will return to normal.
Shortly after breaking the first and second crystal, the boss will cast Warder's Wrath for raid-wide damage.
Shining Cells: This attack deals unavoidable raidwide damage, slightly shrinks the play field, and then divides the arena into alternating red and blue wedges.
Aetherflail: Colored orbs will circle Erichthonios while he telegraphs two back to back attacks, similar to his Gaoler's Flails attack, but this time always mixing a hook flail with either the spike ball or chakram flail. This means the hook flail has safe zones in the 4 wedges opposite the flail's side, while the spike ball hits all inner wedges and the chakram hits all outer wedges. Colored orbs will also circle Erichthonios, indicating which color wedges will explode with each flail attack, giving everyone a single safe wedge to stand in for both attacks. When the cast completes, all wedges that match the color of his orbs will explode and he'll swing his first flail. He'll then swing the second flail while the same wedges explode again.
Shackles of Time: Surrounds a player with purple chains. After the boss casts a following tankbuster, all wedges of the same color the debuffed player is standing on will explode.
Slam Shut: Ends the Shining Cells phase, dealing unavoidable raidwide damage.
Fourfold Shackle: Similar to Aetherial Shackles, but this time going off four times in a row. Every player will be randomly assigned a red or purple debuff with a 3, 8, 13, and 18 second timer on each, and must quickly get to corners and cardinal directions around the boss. It's recommended to preassign each location with a debuff timer value as there's a small window for everyone to get into position. Once each debuff expires, just like with Aetherial Shackles each red debuffed player will target the 3 furthest players while the purple debuff targets the 3 closest players, each for a small amount of damage. If any single player is targeted by both at once, they will instead take massive damage.
Phase 3
Intemperate Torment (Second Cast): Similar to the first cast, but this time rather than casting Warder's Wrath between destroying crystals, Erichthonios will instead cast Gaoler's Flails with the spike ball and chakram flails. He starts attacking with the flails immediately after the second crystal is destroyed, and shortly after the second flail swing, the final crystal will be destroyed. All players will need to return to their original square while avoiding the flail attacks.
Shining Cells (Second Cast): During the second Shining Cells phase, Erichthonios will start by casting a Pitiless Flails variant or Aetherial Shackles while colored orbs circle him to indicate which wedges are unsafe. When he casts Pitiless Flails, a random player will be marked with the Shackles of Time debuff, and the party will need to resolve the Grace or Purgation mechanic while standing on an opposite colored wedge as the debuffed player. When Aetherial Shackles casts, players will need to arrange themselves on safe wedges while also placing the red debuffed player and 3 others on the outer sections of the arena while the purple debuffed player and 3 others are on inner wedges.
Following this, the boss will repeatedly cast Aetherflail and Warder's Wrath until he enrages and casts Lethe around 10 minutes into the fight, which will result in a full raid wipe.
Loot
 15 Allagan Tomestone of Poetics
- 1 Asphodelos Mythos I (Guaranteed)
- Erichthonios Card (Drops at a fixed rate.)
Treasure Coffer 1
| Name | Type | Item Level | Rarity | Quantity |
|---|---|---|---|---|
| Asphodelos Earring Coffer (IL 600) | Other | N/A | Basic | 1 |
| Asphodelos Necklace Coffer (IL 600) | Other | N/A | Basic | 1 |
| Asphodelos Bracelet Coffer (IL 600) | Other | N/A | Basic | 1 |
| Asphodelos Ring Coffer (IL 600) | Other | N/A | Basic | 1 |
Treasure Coffer 2
| Name | Type | Item Level | Rarity | Quantity |
|---|---|---|---|---|
| Asphodelos Earring Coffer (IL 600) | Other | N/A | Basic | 1 |
| Asphodelos Necklace Coffer (IL 600) | Other | N/A | Basic | 1 |
| Asphodelos Bracelet Coffer (IL 600) | Other | N/A | Basic | 1 |
| Asphodelos Ring Coffer (IL 600) | Other | N/A | Basic | 1 |
Music
| Section | Theme |
|---|---|
| Main | Ancient Shackles |


