Copperbell Mines
Copperbell Mines
- Level
- 17 (Sync: 20)
- Difficulty
- Normal
- Party size
- Light Party
4 man • 1 1
1  2
2 
- Unsyncing
- Allowed
- Time limit
- 90 minutes
- Phoenix Down
- Available
- Duty Finder
- Dungeons (A Realm Reborn)
- Roulette
- Leveling
- Req. quest
- Into a Copper Hell
- Entrance
- Western Thanalan (X:27, Y:17)
- Region
- Thanalan
- Modes
 Duty Support
 Explorer
- Base EXP
 30,309
- Patch
- 2.0
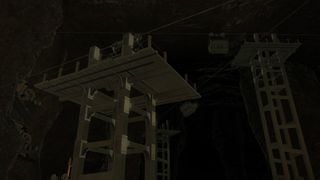
Abandoned once purged of ore, the Copperbell Mines laid abandoned for nigh on three centuries until Amajina and Sons Mineral Concern reclaimed the shafts - the guild's sights set on expanding the mines downward in an attempt to tap yet undiscovered veins of valuable metal. Unfortunately, it was not riches the powder kegs uncovered, but sheer terror, for when the smoke cleared, out poured an army of raging giants from the darkest recesses of the mines. The hecatoncheires - thralls of the lost Thorne dynasty - were, at last, free from their lightless prison; three hundred years of hate fueling their madness.
— In-game description
Copperbell Mines is a level 17 dungeon introduced in patch 2.0.
Duty Support
| Eager Marauder | Eager Conjurer | Eager Thaumaturge | Eager Lancer | |
|---|---|---|---|---|

|

|

|

| |
| Class | ||||
| Role | Tank | Healer | DPS | DPS |
Objectives
- Clear Shaft B4 of rubble: 0/1
- Clear Shaft E1 of rubble: 0/1
- Arrive in Shaft E2: 0/1
- Defeat Gyges the Great: 0/1
Walkthrough
Throughout the dungeon, the party must collect six-onze pinches of firesand as explosive ammo needed to clear debris in the way.
In the first room of enemies, defeat them and pick up the Tiny Key needed to unlock the Sealed Blasting Door. Pull the Lift Lever in the next room and ride the lift down.
The next area consists of a narrow path with two branches. These are generally ignored and do not contain any bonus treasure coffers. Unlike in most dungeons, any aggroed enemies will "de-aggro" if they are pulled to a long enough distance from where they originally spawned. Therefore, it is possible to pull all enemies in this corridor until the room before the first boss, with limited risk. This should be communicated beforehand however, and is not recommended for inexperienced tanks or healers.
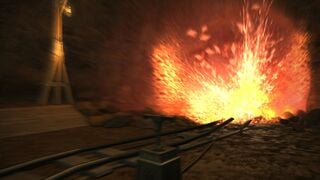
The room before the first boss contains two Firesands, one between the torches and the other on top of the mound. These should be collected and placed in the Powder Chamber. Afterwards, interact with the Blasting Device to open the way.
Defeat Kottos, the first boss, pick up the Tiny Key, and open the door. Ride the lift down at the end of the passage.
Upon reaching the intersection, the two Blasting Caps at the left and right rooms must be defeated to obtain two Firesands. Both will need to be pulled separately, as they will de-aggro if they leave their starting rooms. Fill the powder chamber and use the blasting device to open the way.
Remember to pick up the Firesand in the hallway before the second boss. After defeating the Ichorous Ire, pick up the Firesand and open the path with the blasting device.
Proceed through the next room and to the final boss, Gyges the Great. Note that not all enemies need to be aggroed.
Enemies
- Copperbell Coblyn
- Spriggan Copper Copper
- Hecatoncheir Stonehauler
- Lightning Sprite
- Spriggan Copper Carrier
- Blasting Cap (uses blue mage spell Self-destruct)
- Errant Soul
- Ichorous Drip
- Living Fossil
- Pit Hippocerf
- Hecatoncheir Stonebreaker
Bosses
- Grand Slam: Tankbuster. Tanks should use mitigation to lower the damage.
- Lumbering Leap: Kottos will jump to 3 areas, causing a massive circle AoE to appear at the location. Players should move to the small safe spot at the edge of the arena.
- Colossal Slam: A large cone AoE targeted on a random player.
- Catapult: Kottos will throw a rock at a random player, dealing moderate damage.
- Fluid Spread: Tankbuster.
- Syrup: Circle AoEs will appear below all players, requiring them to move out of it.
- Divide: After 50% HP, Ichorous Ire will split up into many Ichorous Drips, which will each cast Burst, a circle AoE centered on the enemy.
- Grand Slam: Tankbuster.
- Gigantic Swing: A massive donut AoE centered on the boss. Players must move into the boss' hitbox to avoid excess damage.
- Gigantic Smash: The boss will recenter and cast a circle AoE in the center along with 5 more on the outside of the arena. Players should move into the safe spots in between the AoEs.
- Colossal Slam: A large cone AoE targeted on a random player.
Loot
 6,060 Experience Points
| Name | Type | Item Level | Rarity | Quantity |
|---|---|---|---|---|
| Acolyte's Halfgloves | Hands | 17 | Green | 1 |
| Aetherial Brass Gorget | Necklace | 16 | Aetherial | 1 |
| Aetherial Brass Wristlets | Bracelets | 16 | Aetherial | 1 |
| Foestriker's Mitts | Hands | 17 | Green | 1 |
| Plundered Cavalier's Hat | Head | 17 | Green | 1 |
| Plundered Celata | Head | 17 | Green | 1 |
| Plundered Ear Cuffs | Earrings | 17 | Green | 1 |
| Plundered Earrings | Earrings | 17 | Green | 1 |
| Plundered Gauntlets | Hands | 17 | Green | 1 |
| Plundered Goggles | Head | 17 | Green | 1 |
 10,610 Experience Points
| Name | Type | Item Level | Rarity | Quantity |
|---|---|---|---|---|
| Acolyte's Robe | Body | 17 | Green | 1 |
| Acolyte's Skirt | Legs | 17 | Green | 1 |
| Foestriker's Skirt | Legs | 17 | Green | 1 |
| Foestriker's Tabard | Body | 17 | Green | 1 |
| Plundered Cuirass | Body | 17 | Green | 1 |
| Plundered Trousers | Legs | 17 | Green | 1 |
 13,639 Experience Points
| Name | Type | Item Level | Rarity | Quantity |
|---|---|---|---|---|
| Acolyte's Thighboots | Feet | 17 | Green | 1 |
| Below Orchestrion Roll | Other | N/A | Basic | 1 |
| Foestriker's Boots | Feet | 17 | Green | 1 |
| Gladiator's Plundered Arms (Lv. 15) | Other | N/A | Green | 1 |
| Plundered Battleaxe | Marauder's Arm | 17 | Green | 1 |
| Plundered Cane | Two-handed Conjurer's Arm | 17 | Green | 1 |
| Plundered Grimoire | Arcanist's Grimoire | 17 | Green | 1 |
| Plundered Guisarme | Lancer's Arm | 17 | Green | 1 |
| Plundered Knives | Rogue's Arm | 17 | Green | 1 |
| Plundered Knuckles | Pugilist's Arm | 17 | Green | 1 |
| Plundered Sabatons | Feet | 17 | Green | 1 |
| Plundered Shortbow | Archer's Arm | 17 | Green | 1 |
| Plundered Staff | Two-handed Thaumaturge's Arm | 17 | Green | 1 |
Treasure Coffers
 Treasure Coffer 1 (X: 12.5 Y: 10.4)
| Name | Type | Item Level | Rarity | Quantity |
|---|---|---|---|---|
| Plundered Sabatons | Feet | 17 | Green | 1 |
| Foestriker's Boots | Feet | 17 | Green | 1 |
| Acolyte's Thighboots | Feet | 17 | Green | 1 |
| Plundered Ear Cuffs | Earrings | 17 | Green | 1 |
| Plundered Earrings | Earrings | 17 | Green | 1 |
| Aetherial Brass Gorget | Necklace | 16 | Aetherial | 1 |
| Aetherial Brass Wristlets | Bracelets | 16 | Aetherial | 1 |
 Treasure Coffer 2 (X: 13.1 Y: 12.6)
| Name | Type | Item Level | Rarity | Quantity |
|---|---|---|---|---|
| Plundered Celata | Head | 17 | Green | 1 |
| Plundered Goggles | Head | 17 | Green | 1 |
| Plundered Cavalier's Hat | Head | 17 | Green | 1 |
| Plundered Gauntlets | Hands | 17 | Green | 1 |
| Foestriker's Mitts | Hands | 17 | Green | 1 |
| Acolyte's Halfgloves | Hands | 17 | Green | 1 |
 Treasure Coffer 3 (X: 9.2 Y: 13.4)
| Name | Type | Item Level | Rarity | Quantity |
|---|---|---|---|---|
| Plundered Cuirass | Body | 17 | Green | 1 |
| Foestriker's Tabard | Body | 17 | Green | 1 |
| Acolyte's Robe | Body | 17 | Green | 1 |
| Plundered Trousers | Legs | 17 | Green | 1 |
| Foestriker's Skirt | Legs | 17 | Green | 1 |
| Acolyte's Skirt | Legs | 17 | Green | 1 |
 Treasure Coffer 4 (X: 9.9 Y: 14.5)
| Name | Type | Item Level | Rarity | Quantity |
|---|---|---|---|---|
| Gladiator's Plundered Arms (Lv. 15) | Other | N/A | Green | 1 |
| Plundered Battleaxe | Marauder's Arm | 17 | Green | 1 |
| Plundered Guisarme | Lancer's Arm | 17 | Green | 1 |
| Plundered Knuckles | Pugilist's Arm | 17 | Green | 1 |
| Plundered Knives | Rogue's Arm | 17 | Green | 1 |
| Plundered Shortbow | Archer's Arm | 17 | Green | 1 |
| Plundered Staff | Two-handed Thaumaturge's Arm | 17 | Green | 1 |
| Plundered Grimoire | Arcanist's Grimoire | 17 | Green | 1 |
| Plundered Cane | Two-handed Conjurer's Arm | 17 | Green | 1 |
| Nightprowler's Targe | Shield | 17 | Green | 1 |
| Pirate's Bandana | Head | 17 | Green | 1 |
| Plundered Haubergeon | Body | 17 | Green | 1 |
| Plundered Jacket | Body | 17 | Green | 1 |
| Plundered Bliaud | Body | 17 | Green | 1 |
| Plundered Moccasins | Feet | 17 | Green | 1 |
| Plundered Duckbills | Feet | 17 | Green | 1 |
Achievements
This duty is associated with the following achievements:
| Name | Points | Task | Reward | Patch |
|---|---|---|---|---|
| Mapping the Realm: Copperbell Mines | 10 | Discover every location within Copperbell Mines. | - | 2.0 |
Music
| Condition | Theme |
|---|---|
| Main | Below |
| Battle | The Promise of Plunder |
| Mid-Bosses | A Fine Death |
| Final Boss | Nemesis |
Images
Lore
Rise Of The Hecatoncheires
Situated in Western Thanalan, these mines were abandoned three hundred years ago when their veins dried up, and monsters moved in to replace the miners who moved out. Recently, however, Amajina & Sons Mineral Concern reclaimed the Shafts and, employing new excavation techniques, proceeded to expand downwards in an attempt to tap yet undiscovered veins of valuable metal.
Unfortunately, it was not riches the powder kegs uncovered, but sheer terror, for when the smoke cleared, out poured an army of raging giants from the darkest recesses of the mines. The hecatoncheires—thralls of the lost Thorne Dynasty—were freed from their lightless prison,centuries of hate fueling their madness. In dealing with this unexpected disturbance, the Concern turned to the Adventurers’ Guild, who dispatched a band of their bravest to exterminate the rampaging creatures.
Gyges the Great
Of the hecatoncheires who were unleashed in Copperbell Mines, few could claim to be as imposing as Gyges the Great. What enchantments were once woven into his golden helm to ensure his obedience had long since failed, allowing him to turn his massive hammer on hapless fools instead of rock.
Return Of The Hecatoncheires
Owing to the efforts of courageous adventurers, the hecatoncheires were put down and Copperbell Mines were safe once more...or so it was thought. While conducting a survey of the deep shafts, a crew of engineers watched in horror as more of the enraged giants rose forth from the darkness, and the mines fell into chaos anew. Again adventurers were called upon, and again they triumphed, finally putting paid to a sordid centuries-old tale of slavery and rebellion. Yet though the trouble was settled underground, it continued overground as Amajina & Sons Mineral Concern demanded reparation from the Adventurers’ Guild for losses resulting from the unfulfilled first cull. The dispute was brought before the Order of Nald’thal, the arbiters of Ul’dahn law, and the matter was settled with the two parties sharing the burden equally.
Ouranos
Leader of the hecatoncheires imprisoned in Copperbell Mines and a king among his kind. Those adventurers who did battle with Ouranos reported that he commanded an abyss worm as a hunter might command a hound. Since his existence came to light, he has become a source of fascination for alchemists, at least one of whom wished to study him for the secrets of his astounding virality.


