Sastasha
Sastasha
.png)
- Level
- 15 (Sync: 18)
- Difficulty
- Normal
- Party size
- Light Party
4 man • 1 1
1  2
2 
- Unsyncing
- Allowed
- Time limit
- 90 minutes
- Phoenix Down
- Available
- Duty Finder
- Dungeons (A Realm Reborn)
- Roulette
- Leveling
- Req. quest
- It's Probably Pirates
- Entrance
- Western La Noscea (X:28, Y:21)
- Region
- La Noscea
- Modes
 Duty Support
 Explorer
- Base EXP
 31,290
- Patch
- 2.0
- Links
- EDB GT TC
After a period of relative silence following the Calamity, the Serpent Reavers have once again taken to terrorizing the inland hamlets of La Noscea, killing the men, kidnapping the women and children, plundering the storehouses and burning what little they leave behind. For years, it was not known how the pirates were able to raid areas so far from the coast, until a local shepherd sighted a band of painted ruffians entering the Sastasha Seagrot, carrying large quantities of sacks and crates. Could it be that there is more to this cave than meets the eye?
— In-game description
Sastasha is a level 15 dungeon introduced in patch 2.0. The dungeon may sometimes be referred to as the Sastasha Seagrot in the game.
Duty Support
| Eager Marauder | Eager Conjurer | Eager Thaumaturge | Eager Lancer | |
|---|---|---|---|---|

|

|

|

| |
| Class | ||||
| Role | Tank | Healer | DPS | DPS |
Objectives
- Activate the coral trigger: 0/1
- Open the hidden door: 0/1
- Discover the pirate captain: 0/1
- Obtain the Waverider Gate key: 0/1
- Defeat Denn the Orcatoothed: 0/1
Walkthrough
Early on in the dungeon, there will be a room off the main path that contains a Bloody Memo (X:17.6, Y:8.5). The note will have a special quote that will give the color of the correct switch for later.
| Quote | Switch |
|---|---|
| The Capten likes his wine Redd. | Red |
| The Capten likes his cabege Green. | Green |
| The Capten likes his sees Bloo. | Blue |
The party will soon encounter an open area containing several Giant Clams, which can only be damaged when they are open. These enemies will be accompanied by several weak Shade Seekers. Note that the clams do not need to be killed and can be ignored. Experienced parties will sometimes skip the clams for a faster run.
To summon the first boss, players must interact with one of the three coral formations (Red, Blue, or Green) in the room. Interacting with the incorrect switch will spawn a weak Cave Aurelia. In practice, many parties will ignore the Bloody Memo and will brute force the switches until finding the correct one. Interacting with the correct switch will reveal an Inconspicuous Switch. Pressing this switch will summon Chopper, the first boss. After defeating the boss, press the switch again to open a passage to the next section.
Defeat the enemies and fight Captain Madison, who will run away.
The next section consists of an open area containing several side rooms. Most parties will skip these. Defeat the enemies at the south part of the room and collect the Captain's Quarters Key from the Shallowscale Reaver. Use it to open the door to the Captain's Quarters, the southern room. Inside, defeat the lone Shallowtail Reaver and collect the Waverider Gate Key.
Return to the central room and go to the southwest exit. Defeat the two enemies and unlock the Waverider Gate.
The rest of the dungeon is straightforward. The party will fight Captain Madison again, proceed through a final room of enemies, and confront the last boss. Not all enemies in the final room need to be aggroed, only the ones in the main path.
Visiting the side rooms is required for the Mapping the Realm: Sastasha achievement. Players who wish to obtain this achievement should use Duty Support, communicate with their Duty Finder party that they would like to visit the side rooms, or run the dungeon solo with Unrestricted Party (unsyncing) settings when they are of sufficiently high level.
Enemies
Bosses
- Charged Whisker: an AoE centred around the boss that does no damage, but inflicts
 Paralysis if hit.
- Players will encounter Captain Madison twice.
First Encounter:
- Two adds from Captain Madison's crew will accompany him.
- Heavy Swing: additional light damage to the main target.
Second Encounter:
- Two adds from Captain Madison's crew will accompany him.
- Heavy Swing: additional light damage to the main target.
- Fast Blade: additional light damage to the main target.
- Sandslinger: inflicts the main target with a cleansable
 Accuracy Down.
 - At 50% HP, several Scurvy Dog adds will join the fight.
- True Thrust: additional light damage to the main target.
- Hydroball: a conal AoE directed to the main target. Inflicts
 Silence if hit.
- The boss room features 4 grates with bubbling water at each corner of the room. During the boss fight, adds will spawn from the bubbling water.
- Players can interact with the grate when it is bubbling to prevent an add from spawning. To this extent, ranged DPS can position themselves to be in range to attack, while still able to quickly interact with the grates when they bubble. Should adds spawn, try to keep their numbers down to prevent the tank from being overwhelmed. If a caster is targeted by the adds, they should run to the tank so that the tank can remove hate while staying by the boss.
- In most runs, the grates and the adds they spawn are generally ignored, and all damage is focused on the boss.
Loot
- 4,656 Experience Points
| Name | Type | Item Level | Rarity | Quantity |
|---|---|---|---|---|
| Plundered Celata | Head | 17 | Green | 1 |
| Plundered Goggles | Head | 17 | Green | 1 |
| Plundered Cavalier's Hat | Head | 17 | Green | 1 |
| Plundered Gauntlets | Hands | 17 | Green | 1 |
| Foestriker's Mitts | Hands | 17 | Green | 1 |
| Acolyte's Halfgloves | Hands | 17 | Green | 1 |
| Plundered Ear Cuffs | Earrings | 17 | Green | 1 |
| Plundered Earrings | Earrings | 17 | Green | 1 |
| Aetherial Brass Gorget | Necklace | 16 | Aetherial | 1 |
| Aetherial Brass Wristlets | Bracelets | 16 | Aetherial | 1 |
- 4,700 Experience Points (First fight)
- 4,700 Experience Points (Second fight)
| Name | Type | Item Level | Rarity | Quantity |
|---|---|---|---|---|
| Plundered Cuirass | Body | 17 | Green | 1 |
| Foestriker's Tabard | Body | 17 | Green | 1 |
| Acolyte's Robe | Body | 17 | Green | 1 |
| Plundered Trousers | Legs | 17 | Green | 1 |
| Foestriker's Skirt | Legs | 17 | Green | 1 |
| Acolyte's Skirt | Legs | 17 | Green | 1 |
- Sahagin Card (Drops at a fixed rate)
- 17,234 Experience Points
| Name | Type | Item Level | Rarity | Quantity |
|---|---|---|---|---|
| Gladiator's Plundered Arms (Lv. 15) | Other | 1 | Green | 1 |
| Plundered Battleaxe | Marauder's Arm | 17 | Green | 1 |
| Plundered Guisarme | Lancer's Arm | 17 | Green | 1 |
| Plundered Knuckles | Pugilist's Arm | 17 | Green | 1 |
| Plundered Knives | Rogue's Arm | 17 | Green | 1 |
| Plundered Shortbow | Archer's Arm | 17 | Green | 1 |
| Plundered Staff | Two-handed Thaumaturge's Arm | 17 | Green | 1 |
| Plundered Grimoire | Arcanist's Grimoire | 17 | Green | 1 |
| Plundered Cane | Two-handed Conjurer's Arm | 17 | Green | 1 |
| Plundered Sabatons | Feet | 17 | Green | 1 |
| Foestriker's Boots | Feet | 17 | Green | 1 |
| Acolyte's Thighboots | Feet | 17 | Green | 1 |
| From the Depths Orchestrion Roll | Other | 1 | Basic | 1 |
Treasure Coffers
 Treasure Coffer 1 (X:13.8, Y:9.2)
| Name | Type | Item Level | Rarity | Quantity |
|---|---|---|---|---|
| Plundered Sabatons | Feet | 17 | Green | 1 |
| Foestriker's Boots | Feet | 17 | Green | 1 |
| Acolyte's Thighboots | Feet | 17 | Green | 1 |
| Seagrot Water | Material | 15 | Basic | 1 |
Treasure Coffer 2 (X:11.2, Y:14.7)
| Name | Type | Item Level | Rarity | Quantity |
|---|---|---|---|---|
| Plundered Celata | Head | 17 | Green | 1 |
| Plundered Goggles | Head | 17 | Green | 1 |
| Plundered Cavalier's Hat | Head | 17 | Green | 1 |
| Plundered Gauntlets | Hands | 17 | Green | 1 |
| Foestriker's Mitts | Hands | 17 | Green | 1 |
| Acolyte's Halfgloves | Hands | 17 | Green | 1 |
Treasure Coffer 3 (X:10.9, Y:13.2)
| Name | Type | Item Level | Rarity | Quantity |
|---|---|---|---|---|
| Plundered Cuirass | Body | 17 | Green | 1 |
| Foestriker's Tabard | Body | 17 | Green | 1 |
| Acolyte's Robe | Body | 17 | Green | 1 |
| Plundered Trousers | Legs | 17 | Green | 1 |
| Foestriker's Skirt | Legs | 17 | Green | 1 |
| Acolyte's Skirt | Legs | 17 | Green | 1 |
Treasure Coffer 4 (X:7.9, Y:13.7)
| Name | Type | Item Level | Rarity | Quantity |
|---|---|---|---|---|
| Gladiator's Plundered Arms (Lv. 15) | Other | 1 | Green | 1 |
| Plundered Battleaxe | Marauder's Arm | 17 | Green | 1 |
| Plundered Guisarme | Lancer's Arm | 17 | Green | 1 |
| Plundered Knuckles | Pugilist's Arm | 17 | Green | 1 |
| Plundered Knives | Rogue's Arm | 17 | Green | 1 |
| Plundered Shortbow | Archer's Arm | 17 | Green | 1 |
| Plundered Staff | Two-handed Thaumaturge's Arm | 17 | Green | 1 |
| Plundered Grimoire | Arcanist's Grimoire | 17 | Green | 1 |
| Plundered Cane | Two-handed Conjurer's Arm | 17 | Green | 1 |
| Nightprowler's Targe | Shield | 17 | Green | 1 |
| Pirate's Bandana | Head | 17 | Green | 1 |
| Plundered Haubergeon | Body | 17 | Green | 1 |
| Plundered Jacket | Body | 17 | Green | 1 |
| Plundered Bliaud | Body | 17 | Green | 1 |
| Plundered Moccasins | Feet | 17 | Green | 1 |
| Plundered Duckbills | Feet | 17 | Green | 1 |
Achievements
This duty is associated with the following achievements:
| Name | Points | Task | Reward | Patch |
|---|---|---|---|---|
| Mapping the Realm: Sastasha | 10 | Discover every location within Sastasha. | - | 2.0 |
Music
| Condition | Theme |
|---|---|
| Main | From the Depths |
| Battle | The Promise of Plunder |
| Mid-Bosses | A Fine Death |
| Final Boss | Nemesis |
Gallery
Gear Images


As of patch 7.5, not all armor from this dungeon can be made into an outfit glamour.


Dungeon Images
-

-
-
-
-
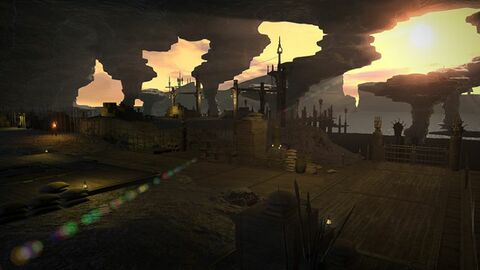
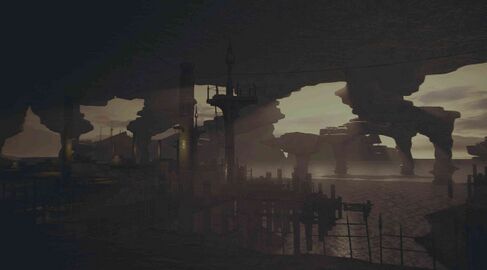 Sastasha see during the game credits


Lore
A Secret Port Of Call
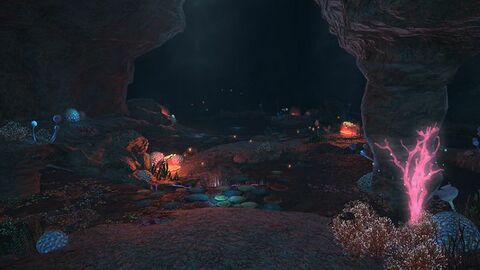
On the coastline of western La Noscea, carved out of a rocky cliff by the sea’s ceaseless thrashing, there weaves a natural network of caverns called the Sastasha Seagrot. Meaning “many shells” in the Sahagin tongue, its name harks back to its former purpose as the beast tribe's gathering grounds.
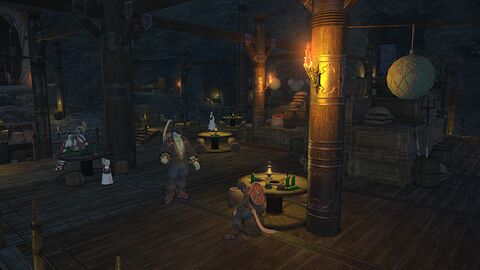
Rumor holds that, some fifty years past, the pirate king Mistbeard drove out the Sahagin inhabitants, whereupon he built docks for vessel repair and loading, quarters for his crew, and a tavern where they might rest after a hard day's plundering. This port thrived in secret until twenty-two years ago when Mistbeard abruptly vanished, leaving the facilities untended and in disrepair.
At around the time of the Calamity, the Sahagin, desiring a foothold for their conquest of La Noscea, bade their minions reclaim the area. Known as the Serpent Reavers, these villainous pirates came to terrorize the region, vexing Lominsan authorities to no end and earning the Seagrot considerable notoriety.
Denn the Greatoothed
A renowned warrior of the Sahagin, his path is an allusion to the orca's viciousness and the tenacity with which it paces it prey. Favoring strategy over strength, his was the mind behind the utilization of men to achieve Sahagin ends.
Return Of The Reavers
The dastardly Serpent Reavers were eventually vanquished at the hands of dauntless adventurers, after which the 4th Levy Yellowjackets were garrisoned in the Seagrot to maintain a security presence. Ere long, however, the soldiers found themselves overwhelmed by mysterious invaders whose appearance straddled that of man and monster.
So it was that adventurers again ventured into the caverns to deal with these abominations, who were discovered to be none other than members of the Serpent Reavers. Examining their remains, the aetherial researcher Ceana posited that the pirates' monstrous forms were the result of repeated exposure to their master Leviathan’s corrupting aether—a theory which has gone on to gain traction in academia.
Captain Madison
Formerly the navigator aboard a merchant vessel, Madison orchestrated his own disappearance some ten years ago in order to escape a prodigious gambling debt. Of his trail he left no trace until he reemerged as a member of the newly formed Serpent Reavers. Thriving, in the pirating trade, he swiftly climbed to the post of captain, but his failure to defend the Sastasha Seagrot earned him the ire of his Sahagin masters. For his punishment, he was given to Leviathan once more and transformed into a hideous fiend.
Dialogue
Duty Support Dialogue
- Depending on the player's role, only 3 of these members are accessible at a time.
Eager Marauder: This is it.
Eager Conjurer: This cavern is strangely beautiful.
Bloody Memo: You find a bloodstained scrap of parchment with a message scrawled upon it in faded ink.
"The Capten lykes his wyne Redd." (If Red Coral)
"The Capten lykes his sees Bloo." (If Blue Coral)
"The Capten lykes his cabege Green." (If Green Coral)
Eager Marauder: An ambush!?
Eager Conjurer: The door's guardian, no doubt.
Captain Madison: How did ye find this place!?
Bird: Squawk!
Captain Madison: Me loyal pups!
Bird: Cap'n is strong! Cap'n is strong! Squawk!
Bird: Scurvy dog! Scurvy dog! Squawk!
Bird: Batten down the hatches! Batten down the hatches! Squawk!
Captain Madison: Come closer. I'll slit your throat and toss yer corpse to the mad serpent.
Captain Madison: Wh-where are my men?! Wh-where are my maidens?!
Captain Madison: Try 'n catch me, you two-legged lubber!
Bird: Two legged lubber! Two legged lubber! Squawk!
Eager Lancer: Hmph. The coward ran off.
Eager Conjurer: Where has he run off to...? Best we keep on our guard.
Lalafell Maidens: You must save us!
Lalafell Maidens: Who are you!?
Miqo'te Maidens: I'm not one of them! I swear it on what little remains of my virtue!
Miqo'te Maiden: What shall it be tonight, Cap- You're not the captain!
Deckhand's Quarters Pirate: Get them gropers off me grog!
Deckhand's Quarters Pirate: Sod off! I drink what I want.
Deckhand's Quarters Pirate: I'll cut ye a new gob so's that ye can drink all grog ye like!
Deckhand's Quarters Pirate: Not before I cut you a new piss'ole!
The Hole Lalafell Maiden: I don't think I can last another night in the Deckhand's Quarters...
The Hole Lalafell Maiden: Forgive me, my lord! I did not mean to offend!
The Hole Lalafell Maiden: Am I... free?
The Hole Miqo'te Maiden: Thank the Twelve! This nightmare is over!
The Hole Miqo'te Maiden: Please, milord, I'm ever so sore...
The Hole Miqo'te Maiden: Mother... Father... What did I do to deserve this?
Captain Madison: Back for more, eh? I sharpened me blade, just fer this very occasion.
Bird: Squawk!
Captain Madison: What do you see now? Nothin'! Nothin' at all! (Accuracy Down)
Captain Madison: Eat 'em alive! (Dogs)
Captain Madison: M-M-Might ye consider a parley?
Bird: Parley! Parley! Squawk!
Eager Thaumaturge: He won't escape next time!
Captain Madison: The boss ain't goin' to like this one bit...
Denn the Orcatoothed: Pshhh! Finleshhh fools!
Denn the Orcatoothed: The Lord of the Whorl shhhall sssup upon your sssouls!
Eager Marauder: Surely, he's no match for us.
Duty Support Combat
Eager Lancer: Time to put this technique to use! (Limit Break)
| A Realm Reborn (Lv. 15-50) | |||||
|---|---|---|---|---|---|
| Heavensward (Lv. 51-60) | |||||
| Stormblood (Lv. 61-70) | |||||
| Shadowbringers (Lv. 71-80) | |||||
| Endwalker (Lv. 81-90) | |||||
| Dawntrail (Lv. 91-100) | |||||
| Seasonal |
| ||||