
The Forked Tower: Magic

The Forked Tower: Magic

- Level
- 100 (Sync: 100)
- Item Level
- 690 (Sync: 700)
- Know. Level
- 40
- Difficulty
- Normal
- Party size
- Flexible • 1-48

- Unsyncing
- Not Allowed
- Time limit
- 60 minutes + extensions
- Phoenix Down
- Available
- Req. quest
- In the Shadow of the Tower
- Entrance
- The Occult Crescent: North Horn (X:15.0, Y:29.9)
- Location
- Tower of Magic
- Region
- ???
- Patch
- 7.55

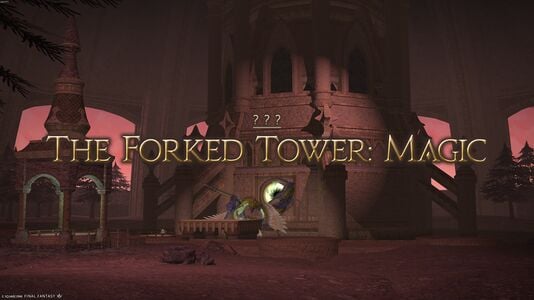
A shimmering spire presides over the warped landscape of the North Horn. Has the time come for your long-awaited encounter with the isle's architect?
— In-game description
The Forked Tower: Magic is a level 100 field operation introduced in patch 7.55 with Dawntrail. Instead of being a separate instance, it exists within The Occult Crescent: North Horn. Unlike The Forked Tower: Blood, the Tower of Magic is designed to be a normal-difficulty duty that can be completed by random groups of players or even solo, without any preparation or coordination. Completing this duty is required to unlock Wisdom's End, the final quest in the Occult Crescent storyline.

This duty is considered a Critical Encounter and will count towards achievements involving those. Players can freely switch regular jobs or phantom jobs out of combat, so this duty is useful for leveling their phantom jobs. EXP is only rewarded upon defeating the final boss for the player's current phantom job, so players are free to use any phantom job(s) prior to that.
Requirements & Entrance
Complete In the Shadow of the Tower to unlock this duty. Players must be knowledge level 40 to enter.
To enter:
- Stand atop the aetherial node at (X:15, Y:29) when the weather changes to
 Auroral Mirages to register interest in the duty. In a typical populated instance, the weather spawns approximately every 35 minutes since the conclusion of the previous tower (see below for exact conditions).
 - If more players than can enter the duty are atop the node, participants will be selected at random. When boarding the aetherial node as a party, all members will be selected or refused entry together. Furthermore, players who are members of a selected party but are not standing on the aetherial node, or have yet to unlock the Forked Tower: Magic, will not be transported.
- Should you fail to be selected, your next entry will be given priority.
Spawn conditions for the auroral mirages weather are as follows:
- There is at least 1 player in the North Horn instance with knowledge level 40 and has unlocked the tower.
- In a newly spawned (fresh) instance, the weather will appear after 5 minutes if the above condition is met.
- Afterwards, the weather will respawn on a hidden 60 minute timer.
- The timer starts when there is no Forked Tower in the instance currently ongoing (indicated by the lack of the
 tower icon in the minimap).
 - The timer is reduced by 5 minutes for each successful completion of a Critical Encounter.
- The timer is reduced by 1 minute for each successful completion of a FATE.
- The timer starts when there is no Forked Tower in the instance currently ongoing (indicated by the lack of the
When both the player count/progression requirement is met, the timer expires, any ongoing Critical Encounters conclude, and the instance is not locked (i.e. players can still join the instance), the auroral mirages weather will appear.
The weather will last for 5 minutes, after which players on the platform will be selected for entry indicated the platform glowing brightly. 30 seconds later, the selected players will be teleported into the tower.
- Players may use the 5 minute grace period for other activities before needing to stand on the platform.
Alternatively, a preformed alliance of at least 24 players who enters the North Horn will be guaranteed an exclusive instance to them that is closed for public entry until any of the following conditions have been met:
- Five minutes pass, and the alliance does not meet entry requirements for the Forked Tower: Magic.
- Ten minutes pass
- The alliance enters the Forked Tower: Magic
Phantom Job Recommendations
Unlike the extreme mode, there are no required phantom jobs in this duty.
However, to expedite the run, players are recommended to use strong DPS phantom jobs during bosses (e.g.  Phantom Samurai) and strong AoE DPS jobs (e.g.
  Phantom Cannoneer) during the trash pulls between bosses. For bonus loot, at least one
  Phantom Thief is needed to uncover hidden treasure coffers and unlock doors hiding more treasure coffers. All encounters benefit from using Vigilance on Thief pre-combat and switching to a higher DPS phantom job.

Although no coordination is required, it may be helpful to communicate with others so that there is a  Phantom Mystic Knight and either a Phantom Cannoneer or
  Phantom Dancer per boss, as they have access to debuffs that can greatly increase total damage done.
The third boss starts with a five-hit raidwide attack, so it is beneficial to pre-buff with Battle Bell from  Phantom Geomancer for all players, even if they are not the main tank.

Before pulling the final boss, players should switch to a phantom job they are currently leveling, as phantom job EXP is only awarded from that.
Objectives
- Clear the Herpetology Forum
- Clear the tower base
- Clear the Choreology Room
- Clear the Agnoiology Room
- Clear the Thanatology Room
- Clear the Horology Room
- Clear the Epistemology Theater
Enemies and Bosses
Boss HP will scale based on the number of players inside the raid, starting from 1.
Being hit with any avoidable AoEs during boss encounters will inflict a stack of  Vulnerability Up that lasts indefinitely until the end of the boss or until the player dies.
After defeating a boss, players have a random chance of receiving the  Battle High status for 15 minutes, increasing their Critical Hit and Direct Hit Rate and providing healing-over-time.
Players may fall off the arena to their deaths. The arena consists of four columns, which are used in some mechanics.
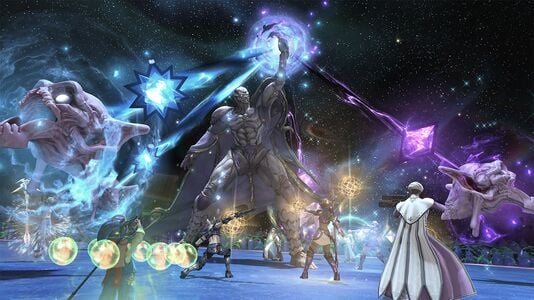
The Two-headed Aevis has two targetable parts, the Blue Head (left) and Green Head (right). The Blue Head is weak to  fire-aspected phantom job actions, while the Green Head is weak to
  wind-aspected phantom job actions. For most of the battle, players will only be able to damage one of the heads. The heads have separate health bars but will frequently equalize their health.
| Name | Description |
|---|---|
| Buffet | The Blue Head will tether all players on the left half of the platform, while the Green Head will tether all players on the right half. Blue Head tethers will give  Fated Hero while Green Head gives Fated Hero while Green Head gives  Epic Hero, allowing players to only damage their boss until one of the heads is defeated. The Blue and Green Heads will also receive Epic Hero, allowing players to only damage their boss until one of the heads is defeated. The Blue and Green Heads will also receive  Fated Villain and Fated Villain and  Epic Villain, repectively. Epic Villain, repectively.
This assignment does not necessarily divide the raid into even groups. It is only based on where players are standing when they are tethered. |
| Poison Breath | One of the heads prepares to strike... The Blue Head will aim a massive, late-telegraphed circle AoE at the center of the arena. This will also be indicated by a blue circle marker by the head and a tether to the center of the AoE. |
| Storm's Breath | One of the heads prepares to strike... The Green Head will aim a late-telegraphed radial knockback AoE at the center of the arena. This will also be indicated by a knockback marker by the head and a tether to the center of the AoE. |
| Thunderfrost Tempest | Magical raid-wide damage cast by both heads, for two hits in total. |
| Two Terrors | Each head will move in front of one column, denoting where it will use a late-telegraphed line AoE hitting the entire column. This will either leave the two inner or two outer columns safe. This attack is repeated to show both patterns. |
| Hissing Reprise | Each player will be randomly given a 12-second  Easterly Reprise or Easterly Reprise or  Westerly Reprise. When the debuff expires (which will also be indicated by an overhead timer), players will be knocked around half the width of the arena in the direction of their arrow marker. Shortly after the knockback, the boss will also use either Poison Breath or Storm's Breath, so players should prepare to be knocked in a way to avoid these, or use knockback immunity. Westerly Reprise. When the debuff expires (which will also be indicated by an overhead timer), players will be knocked around half the width of the arena in the direction of their arrow marker. Shortly after the knockback, the boss will also use either Poison Breath or Storm's Breath, so players should prepare to be knocked in a way to avoid these, or use knockback immunity.
|
| Summon | The boss summons four lightning or ice orbs, one per intercardinal. All orbs will be the same element. |
| Ice Cluster + Lightning Cluster | The heads will tether locations on opposite cardinals and hit them telegraphed large circle AoEs. The Blue Head will use an ice attack, while the Green Head will use a lightning attack. The two orbs that are hit by the same element attack will subsequently explode as large, late-telegraphed circle AoEs. Afterwards, the boss will cast Thunderfrost Tempest and trigger explosions from the remaining orbs. Summon is then repeated to show the effects from the other element orb. |
| Blazeloop | One of the heads will tether a location on the arena and hit it with a small, telegraphed circle AoE that is immediately followed by a late-telegraphed donut AoE. This attack is then repeated, with each head using it sequentially. |
| Summon | Now spawns two lightning and two ice orbs. |
| Hissing Reprise + Ice Cluster + Lightning Cluster | The knockback debuffs are identical as before, but players will need to play closer attention to which orbs will explode, as there are now two different orbs. The exploading orbs will be on two opposite intercardinals. The boss will again trigger the remaining explosions with Thunderfrost Tempest. |
| Arcane Revelation | Spawns two lines of green portals, north-south and east-west. The portals will use two sets of crisscrossing line AoEs that cover the entire arena. |
| Archaeofury | Two telegraphed AoE tankbusters hitting the highest enmity target of each head, which can also be the same player for each. |
Once one of the heads is defeated, the Fated/Epic Hero debuffs will fall off, and players can attack the other head. The defeated head will lock at 1 HP.
After the boss is defeated, players should remember to loot the personal spoils coffer before using the teleportation sigil.
Tower Base
This area consists of hallways with trash pulls, some environmental hazards, and one hidden treasure coffer located in one dead end. Using Trap Detection on Phantom Thief will reveal a coffer if it is nearby. There are four dead ends where a coffer may spawn; once it has been located, there is no need to scan the other possible locations. The enemies do not pose much threat and can be mass pulled, especially in large groups. There are no hidden explosive traps in normal mode.

At the start of the Tower Base area, proceed left past the knowledge crystal. The right path is blocked in normal mode. Use the teleportation sigil to arrive to alternating laser floors (Phantom Laser). Being hit by these will inflict high but non-lethal damage, so players can either patiently dodge them or heal through. The laser floors cannot be bypassed with Suspend. At the end of the path, defeat the two Tower Mantises and Tower Barmuu to create a path.

The next section contains two dead ends with potential hidden coffers. Players may mass pull the three Tower Idols, two Towerhanders up the stairs, where there is another dead end halfway through. At the top of the stairs are three Tower Pots and two Tower Catoblepas. The Tower Pots will use Mysterious Light, a telegraphed gaze attack. Past these enemies are two sets of laser floors, three Tower Barmuus, and the fourth dead end. Only the Barmuus need to be defeated to open the path. Once the path opens, interact with the Control Sigil and drop down. Any stray enemies will de-aggro after dropping down. Proceed up the stairs to the second boss.
Shortly after pulling the boss, the arena will be surrounded with an AoE that will instantly kill anyone who touches it. The arena consists of a middle circle and three concentric rings.
The Sword Dancer is weak to  lightning-aspected phantom job actions.
| Name | Description |
|---|---|
| Sword Storm | Physical raid-wide damage. |
| Throwing Swords | The boss uses two telegraphed line AoEs of different lengths, spawning an untargetable Dancing Sword add at the end of each. The swords will use telegraphed curved line AoEs (Turn) that will hit a quarter of the ring they are on. The Dancing Swords will rotate in opposite directions. |
| Martial Mystique | The boss will jump to one cardinal and tether one of the Dancing Swords, then use a late-telegraphed left or right half-room AoE hitting the side where the sword is located. This will also remove the Dancing Sword from the fight. The boss will then jump to a different cardinal and ring and repeat the same attack with the remaining Dancing Sword. |
| Cycloswords Unsheathed | The boss summons a circle with Dancing Swords that rotate either:
The boss will then use Cycloswords to execute the AoE. This combination is repeated to show both patterns. |
| Sword Dance | Four hits of physical raid-wide damage. Each hit will leave a blue gash through the middle of the arena, forming a starburst formation. The fourth gash will always be adjacent to the first gash. The gashes will explode in order as late-telegraphed wide line AoEs. Start at the tip of the fourth gash and dodge to where the first exploded. |
| Leaping Lift | The boss will use a telegraphed circle AoE at each cardinal, each leaving a Dancing Sword. It will then become untargetable and jump to each sword once, then return to the middle and become targetable again. |
| Swordpointe | The Dancing Swords will use a late-telegraphed radial knockback (Steelsbreath) in the order the boss jumped on them, each doing minor magical damage. Players will need to position to avoid being knocked into the death wall. If timed correctly, knockback immunities can prevent two of the knockbacks. |
| Surgeswords Unsheathed | Midway through the knockbacks, the boss will spawn a row of Dancing Swords pointing in alternating opposite directions. After the knockbacks all resolve, the swords will use a late-telegraphed line AoE (Rush) in the direction of the blade side, leaving the hilt side safe. |
| Throwing Swords + Martial Mystique | Similar to before, but the boss will also summon a line of Dancing Swords in addition to four turning ones. The line of swords will face the same direction and use Rush.
Each time the boss uses Martial Mystique, another line of swords will spawn, pointing in alternating opposite directions, so players will need to dodge the half-room and be behind the hilt of one sword to avoid their line AoEs. |
| Cycloswords Unsheathed + Cycloswords | Now spawns two overlapping circles of swords, forming a venn diagram, along with a line of swords pointing in alternating opposite directions, creating three concurrect AoE sets to dodge at once. |
| Sword Dance + Surgeswords Unsheathed | Similar to before, but introduces line AoEs from the swords that resolve at the same time as the fourth gash explosion. |
Central Mezzanine
This is another hallways section that is even more straightforward than the previous hallways due to the lack of environmental hazards.
Proceed up the stairs and pull the four Tower Skatenes and Tower Humbaba, then the four Tower Armors past them. There are three dead ends on the west side of this area, one of which will contain a hidden treasure coffer that can be revealed by a thief.
After the adds are defeated, the path to the next section will open. Using the teleportation sigil will transport players past the Storm Generators, which are not fought in normal mode. Continue past the knowledge crystal and use the next teleporter to reach the third boss.
Shortly after pulling the boss, the arena will be surrounded with an AoE that will instantly kill anyone who touches it.
Necrophobia is weak to  ice-aspected phantom job actions.
| Name | Description |
|---|---|
| Hail of Hellflares | Five hits of magical raid-wide damage. The first hit deals more damage than the remaining four hits. |
| Ancient Fire III | A massive telegraphed point-blank AoE. |
| Ancient Blizzard III | Two large telegraphed perpendicular line AoEs, leaving the intercardinals safe, away from melee range. |
| Corpse Mangler | Telegraphed single-target physical tankbuster. |
| Death Shroud | The boss summons four untargetable Severing Head adds, then imbues all of them with fire. |
| Heads Roll | The heads will move to different locations on the arena. The directions they are facing will be denoted with orange arrows. |
| Severed Fire III | The boss and each head will use Ancient Fire III, which will now have late telegraphs. Move far away from each to dodge. There is a safe spot at the wall away from them. |
| Death Shroud + Heads Roll | Similar to before, but three of the heads will have fire, while one will have ice imbued. |
| Severed Fire III | Similar to before, but only the boss and the three heads that had fire will use Ancient Fire III. This will be indicated by a fire effect around the entities in normal mode. The safe spot is at the wall halfway between any two fire heads. |
| Severed Blizzard III | The boss and remaining head will each use Ancient Blizzard III. Move to the intercardinal opposite from the ice head to dodge. |
| Vacuum Wave | The boss faces a random player and uses a telegraphed 180 degree cleave. |
| Deathly Ray (no cast bar) | The boss summons a line of Severing Heads, each facing a different direction (front or back). A few seconds later, each head will use a late-telegraphed line AoE in the direction it is facing, leaving behind safe. The heads will then reposition to a new line and repeat this attack, while the boss uses Vacuum Wave. |
| Dark Current | The boss faces a random direction and uses a telegraphed line AoE through its hitbox, which will cascade outward as two sets of late-telegraphed line AoEs. |
| Ancient Thunder III | Four telegraphed conal AoEs, leaving the cardinals safe. |
| Death Shroud + Heads Roll | Similar to before, but two of the heads will have one random element, while two will have a different random element (two elements total). |
| Severed Dark Current | The boss will release fire (red), ice (blue), or lightning (purple), causing the respective heads to use Ancient (Spell) III in the direction it is facing. The boss itself does not copy the spell, but instead uses Dark Current, requiring players to dodge the head attacks, then the moving line AoEs from the boss. The boss will then rotate and use the other imbued element.
If fire is used, the initial safe spots are far away from the fire heads. If ice is used, the initial safe spot is opposite both ice heads and not in line with either one. If lightning is used, the initial safe spot is either a few yalms directly to the left or right of one lightning head, on the side that is closer to the other lightning head. |
| Death Shroud + Heads Roll | Similar to before, but two of the heads will have one random element, while two will have a different random element imbued (two elements total). Severing Fire III is dodged similarly as before. The safe spot for Severed Thunder III is directly south of the boss (needs confirmation). The safe spot for Severed Blizzard III is directly on the northeast head (needs confirmation). |
Horology Room and Pinnacle of Knowledge
Players will reach a room containing several Tower Curseclocks of different sizes. In normal mode, these have no unique mechanics; simply AoE them all down. Once they have been killed, a treasure coffer can spawn, and players can proceed to the final area.
The final area is another hallways section with no enemies but two locked doors. A maximum level thief is needed to open the doors, each containing an optional treasure coffer. At the top of the stairs, open the door to the final boss room past the teleportation sigil.
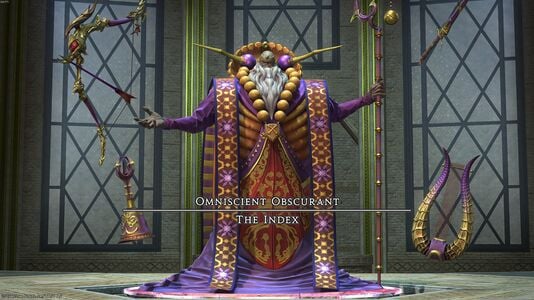
 Omniscient Obscurant: The Index
Players may fall off the arena to their deaths, including the hole in the middle.
The arena consists of a central hexagon divided into six sectors, with a hexagonal hole in the middle where the boss is floating on top of. Initially, the south, northwest, and northeast sectors are connected to an outer square section. At certain points in the battle, the remaining sectors will also connect to outer squares.
The Index is weak to fire and wind-aspected phantom job actions.
| Name | Description |
|---|---|
| Sealed Implements | Arcane power coalesces within the Index's weapon... One of the boss's weapons will begin glowing green, denoting an AoE attack that does not have a ground indicator.
Initially, this attack is done four times in a row to demonstrate each weapon twice. The bell and katana are unused until later. |
| Flare | Magical raid-wide damage. |
| Omni-elements | Magical raid-wide damage and spawns three outer square platforms on the remaining sectors. Each sector will have an elemental crystal (fire: orange cube; ice: blue sphere; lightning: yellow pyramids) and have a floor color imbued to that element. Opposite sectors will be the same element, and there are two sectors per element. |
| Elementary Evocation | The boss will summon two elemental crystals of the same element and tether to them. The crystals will then begin rotating clockwise. When they contact the crystals on the square platforms of the same element, the entire sectors will explode and be unsafe to stand on. |
| Elementary Expansion | Three colored elemental rings will begin expanding from the boss. When a ring reaches the crystals on the square platforms, the sectors corresponding to the ring's element will explode and be unsafe to stand on. Each element will be used once. |
| Elementary Chemistry | Magical raid-wide damage and destroys the southwest, southeast, and north square platforms. |
| Propulsive Prophecy | Three telegraphed radial knockback AoEs, each centered on each square platform. Some parts of the AoEs will overlap. The knockback can be resisted with knockback immunities. This is used at the same time as a random Sealed Implements. |
| Summon | Summons three Summoned Bomb adds at the edge of each square platform. The will begin moving towards the boss and explode for high raid-wide damage if they reach the middle, so they should be defeated before then. The adds are weak to ice-aspected phantom job actions.
|
| Duology of Implements | While the adds are active, the boss will use two sets of telegraphed conal AoEs from its bell and katana. The conal AoEs will hit alternating sectors and the entirety of any connected square platforms.
|
| All-knowing Flames | Three sets of telegraphed circular spread AoEs on random players, dealing magical damage. The number of sets and players targeted will scale with the number of participants. |
| Predict | Spawns three phantom oracle sigils. Two of them will have a circle AoE marker and one will have a donut marker. The sigils will tether and travel to a point on the arena (all at the front of the square platforms), then execute their AoE attack when they reach the destination (circle: Starfall; donut: Cleansing). This is immediately followed with a random in/out Sealed Implements. |
| Dualcast + Flare | The boss gains a buff that will cause its next Flare to hit twice. |
| Omni-elements | Functions identically as before. |
| Elementary Expansion | Similar as before, but the rings will spawn at a faster rate. There are six rings in total, and each element is used twice. The same element will not be used twice in a row. Afterwards, the boss will use a random in/out Sealed Implements, followed by another set of six rings. |
| Elementary Evocation | Now spawns three pairs of opposite tethered crystals. Identify the tether color that is most directly counterclockwise to the same color crystal, then dodge into it once that sector color explodes to avoid the remaining two. |
Loot
- 800
 Enlightenment Silver Obols
 - 2880
 Phantom EXP
  80 Allagan Tomestones of Mathematics
 40 Allagan Tomestones of Mnemonics
This duty uses personal loot, so players will need to interact with and loot treasure coffers themselves. A full clear with all chests yields 14 Arcane Amulets.


| Name | Type | Item Level | Rarity | Quantity |
|---|---|---|---|---|
Notes on the Two-headed Aevis 
|
Other | 1 | Basic | 1 |
| Arcane Amulet
|
Currency | 1 | Basic | 1 |

 Tower Base
A coffer is hidden on a randomly selected circular platform connected to the main path. A Phantom Thief has to use Trap Detection to reveal it.
| Name | Type | Item Level | Rarity | Quantity |
|---|---|---|---|---|
| Arcane Amulet
|
Currency | 1 | Basic | 1 |
| Name | Type | Item Level | Rarity | Quantity |
|---|---|---|---|---|
| Notes on the Sword Dancer
|
Other | 1 | Basic | 1 |
| Arcane Amulet
|
Currency | 1 | Basic | 1 |

Central Mezzanine
Located on the west side of the area on one of the three circular platforms, a Phantom Thief has to use Trap Detection to reveal it.
| Name | Type | Item Level | Rarity | Quantity |
|---|---|---|---|---|
| Arcane Amulet
|
Currency | 1 | Basic | 1 |
| Name | Type | Item Level | Rarity | Quantity |
|---|---|---|---|---|
| Notes on Necrophobia
|
Other | 1 | Basic | 1 |
| Arcane Amulet
|
Currency | 1 | Basic | 2 |

Horology Room
| Name | Type | Item Level | Rarity | Quantity |
|---|---|---|---|---|
| Arcane Amulet
|
Currency | 1 | Basic | 1 |
Pinnacle of Knowledge
Two coffers are located in each of the locked rooms connected to the path leading to the final boss, requiring a Phantom Thief to open.
| Name | Type | Item Level | Rarity | Quantity |
|---|---|---|---|---|
| Arcane Amulet
|
Currency | 1 | Basic | 2 |
| Name | Type | Item Level | Rarity | Quantity |
|---|---|---|---|---|
| Arcane Amulet
|
Currency | 1 | Basic | 2 |
 The Index
| Name | Type | Item Level | Rarity | Quantity |
|---|---|---|---|---|
| Notes on the Index
|
Other | 1 | Basic | 1 |
| Arcane Amulet
|
Currency | 1 | Basic | 3 |
| Duck-billed Porter Whistle | Other | 1 | Basic | 1 |


Achievements
This duty is associated with the following achievements:
| Name | Points | Task | Reward | Patch |
|---|---|---|---|---|
| A Show of Fork I | 10 | Complete the Forked Tower: Magic for the first time. | - | 7.55 |
| A Show of Fork II | 10 | Complete the Forked Tower: Magic 5 times. | - | 7.55 |
| A Show of Fork III | 10 | Complete the Forked Tower: Magic 20 times. | - | 7.55 |
| A Show of Fork IV | 20 | Complete the Forked Tower: Magic 50 times. |  Omniscient Obscurant Omniscient Obscurant
|
7.55 |


Lore
A collection of intricately carved circular sigils line the wall. Judging by the arcane patterns that adorn them, the discs would likely react to an influx of aether. Given the highly dangerous nature of the knowledge stored within these walls, however, you decide not to put that theory to the test...
— Wall-mounted Sigils
You cast your eyes over the array of gleaming equipment, including what appears to be a cane and some bracelets. On closer inspection, each artifact is carved with intricate patterns that bespeak their occult nature. These were likely crafted during the War of the Magi, when the practice of imbuing arms and armor with arcane properties was at its zenith.
— Metallic Accoutrements
The display case is filled with lustrous minerals, their dense aetheric signature reminiscent of the crystals used to power familiars. Perhaps they were used as such during the Fifth Astral Era?
— Resplendent Minerals
As you peruse the tablet's inscription, a wave of nausea compels you to avert your gaze. No doubt the document is imbued with some magical contrivance, shielding it from eyes deemed unworthy of the knowledge within.
— Ancient Tablet
There appears to be no unifying characteristic among the bones and fossils on display─save for the vague sense of unease you feel examining each specimen. What strange, warped beasts could these relics originate from?
— Assorted Specimens
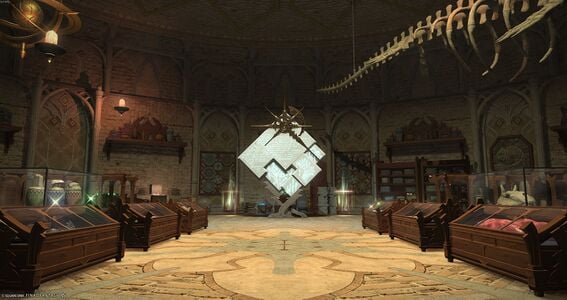
Being the Archive's personal repository, one would expect to find it teeming with technological marvels. Yet the majority of its contents─simple arcane catalysts, rune-covered relics, spellbound specimens─are the rudimentary materials of a fledgling mage. Was his intention merely to document the genesis of magic in the Fifth Astral Era? Or was it to caution against the path which led mankind to a ruinous war?
— Occult Record: Concealed Collection
Dialogue
Boss 1
Boss 4

Music
| Section | Theme |
|---|---|
| Main | Exdeath's Castle (Dawntrail) |
| Boss 1-3 | FINAL FANTASY V: Battle 1 (Dawntrail) |
| Final Boss | Omega Squared |


Gallery
Screenshots
-
-
-
-
 Final room


Maps
Trivia
- The dungeon is inspired by the Fork Tower dungeon from FFV.
- Each room containing a major encounter is named for a field of study related to the boss or enemies present:
- Herpetology: Study of amphibians and reptiles
- Choreology: Study of dance
- Agnoiology: Study of ignorance (room is flown over with no encounter in this version)
- Thanatology: Study of death
- Horology: Study of timekeeping
- Epistemology: Philosophical study of knowledge


| Stormblood: The Forbidden Land, Eureka (Lv. 70) | |||||
|---|---|---|---|---|---|
| Shadowbringers: Save the Queen: Blades of Gunnhildr (Lv. 71-80) | |||||
| Dawntrail: Occult Crescent (Lv. 100) | |||||


