The Jade Stoa
The Jade Stoa
- Level
- 70 (Sync: 70)
- Item Level
- 325
- Difficulty
- Normal
- Party size
- Full Party
8 man • 2 2
2  4
4 
- Unsyncing
- Allowed
- Time limit
- 60 minutes
- Phoenix Down
- Not Available
- Duty Finder
- Trials (Stormblood)
- Roulette
- Trials
- Tomestones
 12
12 - Req. quest
- An Auspicious Encounter
- Entrance
- Yanxia (X:31.4, Y:6.1)
- Location
- The Jade Stoa
- Region
- Othard
- Patch
- 4.2
 The Echo
- On wipe: +10% (max +50%)
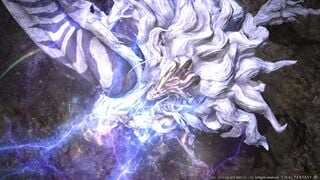
At the heart of every auspice is a duality: the aramitama, the primal rage; and the nigimitama, the boundless calm. Byakko of the Four Lords is on the verge of being consumed by his aramitama, and should this come to pass, he will forever be no more than a feral beast. And so it falls to you and yours to face the legendary auspice in battle─to quell the madness within and save his soul!
— In-game description
The Jade Stoa is a level 70 trial introduced in patch 4.2 with Stormblood.
Strategy
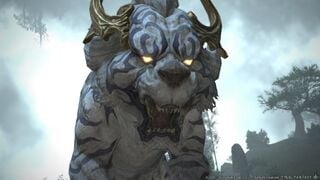
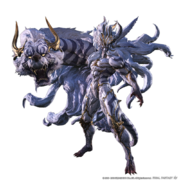
Players will enter a circular arena and witness Byakko's transformation from a White Tiger into a more humanoid form. The outer edges of the arena are safe during the first and second phase, but not during the Free-Fall Phase in-between.
Phase 1
Below are a list of Byakko's abilities (in the order they are used during the encounter).
- Storm Pulse - causes Byakko to blast the raid with unavoidable damage.
- Heavenly Strike - a vicious tank-buster against Byakko's primary target that should be mitigated via cooldowns whenever possible.
- State Of Shock - causes Byakko to lunge towards a random target and scoop them up in his tiger-fist. Shortly afterward, a stack-marker will appear within the arena, indicating where Byakko will slam the grabbed target. Teammates should make an effort to stand within the stack-mark location to help soak the slam, as failure to do so will lead to victim being slain.
- Sweep the Leg - Byakko prepares to kick all players in-front and beside him via a frontal-cone AoE that covers the entire platform, except for a safe cone directly behind him. Simply move behind Byakko as soon as possible to avoid tremendous damage. Bear in mind that Sweep Of The Leg will always happen directly after State Of Shock.
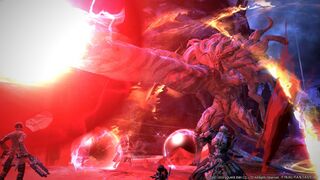
- Unrelenting Anguish - Byakko teleports to the arena centre and begins to emit patterns of outward-travelling red orbs that all raid participants must avoid. Melee players must be especially careful as they will be extremely close to where the orbs spawn, though they do travel very slowly and can still be avoided. During Unrelenting Anguish, Byakko will unleash multiple casts of Fire & Lightning.
- Fire & Lightning - a massive straight-line AoE aimed at a random player that everyone must avoid. Initially, Byakko will execute multiple casts at the arena centre, forcing players to avoid massive AoE's and the orbs at the same time. Eventually, Byakko will leap to the outer-edge of the arena and cast another Fire & Lightning while the remaining orbs begin to expire.
- Hakutei - having successfully avoided the onslaught, players will witness Byakko leap from the arena while Hakutei - the White Tiger usually connected to Byakko's own arm - enters the fray. Hakutei is a mini-boss that must be picked up by a tank and turned away from the group. If not done so, players risk being swiped by Hakutei's vicious cleave attacks. Whilst dealing with Hakutei, players will also have to dodge AoE attacks that bombard the arena, leaving behind persistent puddles that inflict bleed on anyone who remains within them.
- White Herald - causes Hakutei to leap from the arena and place a proximity marker (flare) on its primary target. After a delay, Hakutei will inflict heavy damage by slamming down onto the marked player. Unmarked players must move away from the marked player beforehand to avoid taking too much proximity damage from the AoE slam.
- Fire & Lightning - executed immediately after White Herald. On landing, Hakutei will charge a straight-line AoE towards a random player, forcing the raid to move out of the way to avoid damage.
On reaching this point, Hakutei will leap to the arena centre and begin to charge Roar Of Thunder, indicating the arrival of the next phase. However, the damage inflicted by Roar Of Thunder will depend on how much health Hakutei has remaining, so players must burn down Hakutei as fast as possible to avoid tremendous damage (or a potential wipe). Survivors will be stunned and eventually launched high into the air, indicating the arrival of the next phase.
Free-Fall Transition
After being launched into the air, the raid will begin free-falling. No actions (e.g. attacks or healing) can be performed at this time. During the phase, the outer ring of the arena will kill any player who touches it. Additionally, Byakko will begin firing orbs from far below which players must avoid. Periodically, Byakko will leap up and cast a doughnut AoE which must be avoided by moving into the centre. Lastly, Hakutei (the White Tiger) will occasionally cast a straight line AoE through the centre, forcing players to move out.
Should you survive the onslaught, the raid will land in a new arena, briefly knocked down. There is a short time to heal back up from any damage taken during the free-fall, before Byakko uses a big raidwide.
Phase 2
- Hundredfold Havoc - a set of outward-firing AoE lightning patterns that are telegraphed by an arrow icon, displaying the direction they will travel from Byakko (arena centre). Two patterns will be fired simultaneously (the second being slightly delayed), giving players enough time for the first pattern to fire outward so that they can move into the now safe area to avoid the delayed pattern. Simultaneously, the raid must contend with Bombogenesis.
- Bombogenesis - Byakko places AoE markers on four random players, forcing them to split up if they wish to avoid overlapping damage onto unmarked targets.
- Distant Clap - spawns a lightning-based donut AoE around Byakko's current location, forcing the raid to move towards Byakko to avoid taking damage. Alternatively, if Byakko is positioned at the outer-edge of the arena before casting Distant Clap, players can also move away from the donut to avoid damage, seeing as Distant Clap is not wide enough to cover the entire arena.
From this point onward, Byakko will begin to cycle through previous displayed mechanics with various overlaps, including more Hundredfold Havoc (outward travelling lightning AoE's), Fire & Lightning (straight-line AoE's), State Of Shock (body-slam stack-markers), Storm Pulse (unavoidable AoE), and Unrelenting Anguish (outward travelling red orbs), and more, until Byakko has been defeated (or the raid suffers a wipe). Aside from forming slightly more challenging overlaps, all mechanics are handled in the exact same manner as they were before.
Loot
 15 Allagan Tomestone of Poetics
- Byakko Card (Drops at a fixed rate.)
Dialogue
Cutscene
Byakko: It begins. Receive of me my fury, children of man, and quell it!
Duty
Byakko: There is no turning back!
Byakko: Steel yourself!
Byakko: Roar! Writhe! Rage!
Byakko: Twofold is my wrath, twice-cursed my foes!
Byakko: All creation trembles before my might!
Byakko: Behold fury given form!
Byakko: My wrath is a ceaseless torrent!
Byakko: No more games!
Byakko: To ashes with you!
Byakko: Impressive. Very well, I shall bring all to bear!
Byakko: Lightning, sear!
Byakko: Tempest, surge!
Byakko: Lightning, sear!
Byakko: Steel yourself!
Byakko: You're mine!
Byakko: Tempest, surge!
Byakko: Roar! Writhe! Rage!
Byakko: You are stronger than I dared to hope.
Byakko: Tempest, surge!
Music
| Section | Theme |
|---|---|
| Phase 1 | Answer on High |
| Intermission | Todoroki |
| Phase 2 | Amatsu Kaze |

