The Forbidden Land, Eureka
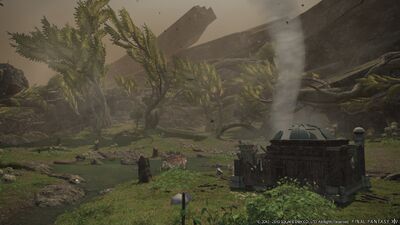
![]() The Forbidden Land, Eureka is a level 70 field operation series released in the Stormblood expansion. Eureka, formerly known as the Isle of Val, is a mysterious and deadly island where the elemental forces are constantly in flux. It may be explored in parties of up to eight players, or solo. A given zone within Eureka may be occupied by up to 144 players, allowing players to form parties inside the zones.
The Forbidden Land, Eureka is a level 70 field operation series released in the Stormblood expansion. Eureka, formerly known as the Isle of Val, is a mysterious and deadly island where the elemental forces are constantly in flux. It may be explored in parties of up to eight players, or solo. A given zone within Eureka may be occupied by up to 144 players, allowing players to form parties inside the zones.
While players will be synced down to level 70 and all equipped gear will be Item Level synced to 300, character progression inside Eureka zones is determined by elemental level, which can be increased by defeating monsters and completing FATEs (notorious monster battles). Players can also obtain gear with Elemental Bonus to greatly augment their power. To help facilitate character progression, a 150% The Echo buff is automatically applied to players upon entering the four exploration zones.
In addition to rewarding exclusive mounts and minions, many Eureka-associated items can be sold on the Market Board for profit, including some very rare items that can be sold for a premium. Moreover, Eureka is centrally tied to the level 70 relic weapon series: Eurekan Weapons. Participating in Eureka content is the only way to upgrade these relic weapons. Finally, Eureka content allows players to earn three armor sets: Anemos Armor (dyeable Lv 70. Artifact Armor), Elemental Armor with unique glowing models, and Kirin's Osode Armor.
Requirements
- Quest: And We Shall Call it Eureka
- Disciple of War or Magic level 70
- Starting Location: Rhalgr's Reach (X:9.8 Y:12.5)
- Starting NPC: Galiena
- Prerequisite: Players must first complete the main scenario quest Stormblood.
Entering
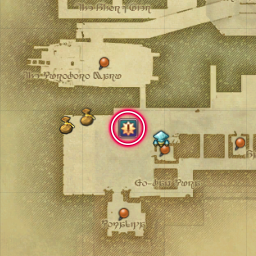
Players can enter Eureka by speaking to the NPC Rodney in Kugane (X:8.5 Y:14.2). If entering as a party, the leader must speak to the NPC.
- When registering to enter, all party members must be in Kugane.
Parties
Unlike other instanced duties, Eureka allows the use of party functions such as inviting party members, disbanding the party, and leaving the party without exiting Eureka. You may use the Adventurer List to seek out players close in elemental level to form parties and explore Eureka together. It is also possible to change your online status to "Looking for Party." The most common way of party recruitment is to use /shout chat.
- Please note that if you enter Eureka as a member of a party, even if you leave it while within Eureka, you will be returned to the party upon exiting Eureka.
Quests
While there are four primary quests, most story content in Eureka is derived from quests within each instanced zone. These quests, which are denoted by the ![]() icon above the relevant NPCs, do not appear in the in-game journal, and many quest objectives are not marked in the minimap. For more information, see the pages for each individual zone under "Quests". Completing each zone's questline and achieving the elemental level cap for the zone will unlock the next feature quest and subsequently the next zone.
icon above the relevant NPCs, do not appear in the in-game journal, and many quest objectives are not marked in the minimap. For more information, see the pages for each individual zone under "Quests". Completing each zone's questline and achieving the elemental level cap for the zone will unlock the next feature quest and subsequently the next zone.
Zones
Eureka consists of four instanced exploration zones of increasing elemental levels. Players must complete the questline in one zone to unlock the next. The Baldesion Arsenal is an optional, high-difficulty, large-scale raid within the last zone.
| Duty | Elemental Level | Elemental Level Sync | Enemy Elem. Level(s) | Time Limit |
|---|---|---|---|---|
| The Forbidden Land, Eureka Anemos | 1 | 20 | 1—25 | 180 min |
| The Forbidden Land, Eureka Pagos | 20 | 35 | 20—40 | 180 min |
| The Forbidden Land, Eureka Pyros | 35 | 50 | 35—55 | 180 min |
| The Forbidden Land, Eureka Hydatos | 50 | 60 | 50—65 | 180 min |
| The Baldesion Arsenal (Within Hydatos) | 60 | 60 | 65—66 | 25 min + extensions |
Changing Class and Jobs
You may change between Disciple of War and Magic classes and jobs inside of each zone's starting camp.
- This includes classes and jobs that have not reached level 70.
- Players cannot change to Limited Jobs.
- Players cannot summon their chocobo companion within Eureka.
Riding Mounts
Previously, fulfilling certain requirements and completing specific quests was required to earn the ability to ride mounts in Eureka. Patch 5.1 of Shadowbringers changed it so that story completion is no longer necessary, and mounts can be ridden immediately.
- Mounts cannot fly in Eureka.
- There are no permanent speed boosts or riding maps for Eureka, with the exception of the logos action Wisdom of the Breathtaker.
Leveling
Elemental Level
Player strength in Eureka is measured by elemental level, which may be increased by defeating enemies and gaining ![]() elemental experience points. Elemental level is character-wide and is shared by all of the player's jobs. Elemental level and EXP accrued will be retained between visits—progress will not be lost when you depart Eureka. Increasing elemental level will increase elemental bonus, which increases damage dealt and reduces damage taken. It does not affect HP.
elemental experience points. Elemental level is character-wide and is shared by all of the player's jobs. Elemental level and EXP accrued will be retained between visits—progress will not be lost when you depart Eureka. Increasing elemental level will increase elemental bonus, which increases damage dealt and reduces damage taken. It does not affect HP.
Elemental Experience Points
Defeating enemies in Eureka grants ![]() elemental experience points, which raises the elemental level. The amount of elemental experience points earned varies according to factors such as the number of party members and the difference in elemental level of the enemy and the player. Specifically:
elemental experience points, which raises the elemental level. The amount of elemental experience points earned varies according to factors such as the number of party members and the difference in elemental level of the enemy and the player. Specifically:
- Players will earn more elemental EXP from defeating enemies that are a higher level relative to theirs. However, the experience peaks at 6 levels higher than the player's. Players will not receive elemental EXP if the difference between enemy level and player level is greater than 8.
- In a party, the difference between highest and lowest party member level cannot be greater than 8 (e.g., in Anemos, barring level sync to a notorious monster, you cannot be lower than 12 to level with a level 20+ capped player).
- The experience gain is lowered as party size increases, with a greater dropoff at 7 and 8 players.
Regular experience points are not awarded in Eureka. Due to this, normal experience boosting effects do not work in Eureka. The only ways to increase Elemental Experience gain are Potion of Harmony, and a buff from Eureka Elementals.
Penalties incurred when KO'd
When you are KO'd in the Forbidden Land, Eureka, you will lose elemental EXP. However, if you are revived by another player within ten minutes of being KO'd, you will receive no elemental EXP penalty. Furthermore, if your current elemental level is five or below, you will not lose elemental EXP when KO'd. If your elemental level is eleven or higher, this penalty may reduce your elemental EXP total below zero. Should this happen, you will lose an elemental level.
Magia Board and Magicite
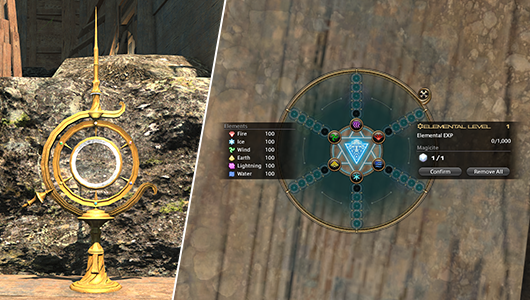
The magia board enhances elemental affinity to give an advantage against enemies in Eureka.
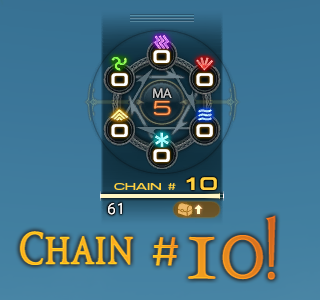
The magia board is divided into six sections, each representing a different element. Melding magicite to the board will enhance the player's affinity to a given element. Players can allocate up to a total of seven magicite and up to five magicite for one element.
- The first five magicite slots are earned by progressing through the Eureka Anemos story.
- The sixth slot is obtained by trading three rare drops from certain Eureka Pyros notorious monsters: Lamebrix's Dice, Ying-Yang's Tissue, and Skoll's Claw, with the Expedition Engineer in the Pyros camp.
- The seventh and final slot is obtained by trading three rare drops from certain Eureka Hydatos notorious monsters: Molech's Horn, Goldemar's Horn, and Ceto's Claw, with the Expedition Engineer in the Hydatos camp.
- The last two slots may be unlocked in any order. The requisite items can also be purchased from the Market Board.
Magicite can be repositioned or reset at the magia melder in the starting camp of each Eureka zone.
Magia Board Interface
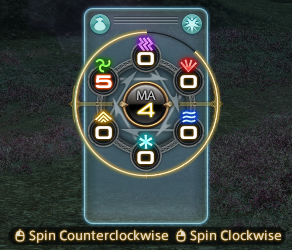
Although the magia melder can only be used in the camp, the magia board can be spun to adjust elemental affinity anywhere in Eureka. It is possible to spin the magia board using text commands (see "Text commands" section below).
Players may repeatedly spin the magia board indefinitely. However, a few seconds after a spin, the magia board will be "locked in", applying the current elemental affinity and decreasing the current magia aether (MA) by one. Players cannot spin the magia board if they have no magia aether. This resource gradually refills over time, as indicated by the circular yellow gauge, and can be completely restored by accessing the magia melder. In addition, the logos action Refresh L will greatly increase the rate at which magia aether is restored.
In Pyros, Hydatos, and the Baldesion Arsenal, two new icons appear on the Magia Board that are related to Logos Actions. The upper left (bag) icon will toggle display of the player's mneme inventory, which is needed to synthesize logos actions. The upper right (star) icon will toggle display of the logos actions window, allowing the player to equip logos actions as duty actions.
Text commands
The following text commands affect the magia board and can be assigned via a macro:
/magiaright: Spins the magia board one position clockwise./magialeft: Spins the magia board one position counterclockwise./magiaattack: Spins the magia board to match the elemental weakness of the specified or current target, increasing the damage from the player's attacks./magiadefense: Spins the magia board to match the elemental affinity of the specified or current target, decreasing the damage the enemy does to the player./magiaauto [subcommand]: Automatically spin the magia board to match the elemental weakness or affinity of the current target. The subcommand can beatk(attack),def(defense), oroff(disable).
Eureka Effect
Within Eureka, players may obtain gear that provides a "Eureka Effect", which are stat bonuses that are only active inside Eureka zones. While some gear pieces provide bonuses to primary attributes (e.g., strength, dexterity, intelligence, mind, vitality), the most desirable gear provides Eureka-specific increases to Elemental Bonus and Haste:
- Elemental Bonus: Increases affinity for all elements, which otherwise can only be increased by increasing one's elemental level or by allocating magicite at the Magia Melder. With no magicite allocated, an elemental level 60 player has 1779 elemental bonus. With a full set of best-in-slot Eureka gear, it provides an additional +871 elemental bonus, for a total of 2650 elemental bonus. This is the most important stat inside Eureka. Best-in-slot gear approximately corresponds to 5 additional elemental levels in power, making the player significantly stronger in all levels of Eureka content, even if synced down. With magicite allocated, the maximum achievable bonus for one element is 4429. The following gear provides Elemental Bonus:
- Kirin's Osode Armor and Vermilion Cloaks (for DoW and DoM jobs, respectively): Best-in-slot chest armor that can be purchased from the Market Board, making it useful for new players starting Eureka. Can normally be obtained from the Nostalgic Fellow in Kugane (7.8, 14.2) using materials dropped from the high-end raid The Baldesion Arsenal.
- Physeos Weapons: The final-stage Eurekan Weapons that are obtained through a lengthy upgrade process involving all four zones and the Baldesion Arsenal.
- Elemental Armor +2: The final-stage Elemental Armor that are obtained through an upgrade process involving Pyros, Hydatos, the Baldesion Arsenal.
- Haste: Decreases the global cooldown (GCD), similar to spell speed or skill speed. While useful, it only has a minor impact compared to elemental bonus. Each point of haste reduces the base GCD by 1%. The maximum Haste a player can achieve from gear is +12, although practical best-in-slot sets only provide +3 Haste. With the exception of Kirin's Osode Armor, the other three items that provide Haste: Optical Hat, Cassie Earring, and Blitzring are very difficult or expensive to obtain.
Eureka Elementals
Scattered throughout each of the four zones are passive Elemental NPCs (sometimes referred by players as fairies) that will provide two buffs: Elemental Blessing: Damage and Elemental Blessing: EXP. The first buff increases damage dealt by 10% and provides healing-over time, while the second buff increases the amount of elemental EXP the player receives by 10%. Each buff lasts for one hour. These buffs will be removed if the player exits the instance.
Elementals will spawn in fixed locations around the map, but the specific location is random. When a player comes within range of an elemental, it will cast Breath of the Wild Ones, a telegraphed point-blank AoE that will give each buff to all players within range. Periodically, or once the the elemental has used its AoE a certain number of times, the elemental will disappear and respawn in a new location. The final buff AoE that an elemental will use before it disappears will be indicated by a longer cast and a much larger AoE.
While enemies do not directly attack elementals and they cannot be harmed by player attacks, any stray enemy AoEs that hit elementals will likely kill them.
Elementals vary in appearance depending on the zone: Anemos Elementals are green, Pagos Elementals are lavender, Pyros Elementals are orange, and Hydatos Elementals are cyan.
Often, players will announce the locations of elementals in /shout chat to allow others to receive the buffs.
Logos Actions
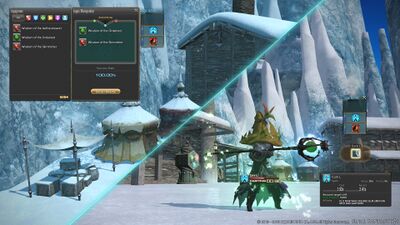
Logos Actions are special duty actions available in The Forbidden Land, Eureka Pyros, The Forbidden Land, Eureka Hydatos, and The Baldesion Arsenal that can greatly increase the power or alter the playstyle of jobs.
Enemies
Enemy Affinity
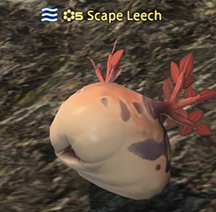
All enemies encountered in the Forbidden Land, Eureka, are aspected to one of six elements. Players can use the magia board in conjunction with magicite to strengthen their own elemental affinity and improve their combat effectiveness.
The affinity of enemies is indicated by an icon to the left of their display names.
Effects of Affinity
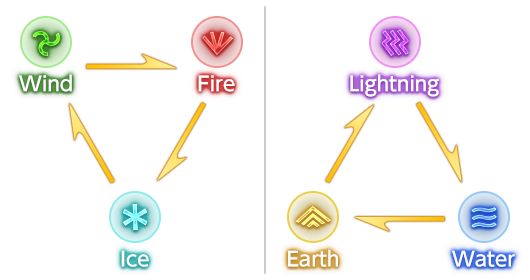
An element is "strong" against the one located two positions clockwise in the magia board. Increasing one's affinity with a given element will increase the damage dealt to certain enemies, as well as reduce the damage received from others.
For example, if you wish to deal more damage to an enemy aspected to fire, you should strengthen your affinity to wind. However, should you wish to suffer less damage from the same enemy, you must strengthen your affinity to fire. Elemental affinity is changed via a magia melder, or by spinning the magia board to make adjustments while in the field.
Elemental strengths do not apply from the enemy's perspective: for example, increasing your affinity to wind using the magia board will not cause fire-aspected enemies to deal more damage.
| Enemy element | Offensive element | Defensive element |
|---|---|---|
Passive Enemy Bonuses
In the third and fourth zones, Pyros and Hydatos, regular enemies receive a passive enhancement based on their element. These enhancements apply regardless of the elemental level difference between the player and enemy.
 Wind: Higher evasion, causing your attacks to miss more often. Arguably the most annoying since it breaks combos. Can be countered with Feint L.
 Fire: Higher damage.
 Ice: Higher HP.
 Lightning: Paralysis immune.
 Water: Stun immune.
 Earth: Heavy immune.
FATE enemies may not necessarily have these enhancements.
Aggression
Enemies in Eureka may aggro to players by different means. While most enemies have sight or promixity aggro, the following aggro types are relevant in Eureka:
- Sound: Will aggro to players who generate "sound", such as running close to the enemy. This can be prevented by switching to walking. An example of this is the sleeping Frozen Void Dragons in the Forbidden Land, Eureka Pagos.
- Spell/Magic: Sprites in Eureka, which only spawn in certain weather conditions, will aggro to a player who uses an action classified as a spell near them.
- Low Health: Undead enemies (ashkin) in Eureka, which only spawn at night, will aggro to a nearby player at low/critical HP.
Enemies that are two elemental levels or lower compared to the player will only aggro if the player attacks them.
Adaptation and mutation
Starting from Pagos, enemies have a chance of transforming under certain conditions, making them stronger and increasing the amount of elemental EXP they provide. There are two types of transformations:
- Adaptation: The enemy becomes larger but retains its current element.
- Mutation: The enemy transforms into a different model, changing its element. Mutated enemies have a chance of dropping warped lockboxes depending on their zone ( Cold-warped Lockbox, Heat-warped Lockbox, Moisture-warped Lockbox).
Enemies will only adapt or mutate during combat if enemy-specific conditions are met, such as during a certain weather condition. The adaptation or mutation is a short cast from the enemy, so defeating the enemy before the cast finishes will stop the process.
If conditions are met, the chance of adaptation/mutation depends on the zone:
- Pagos: low chance
- Pyros: moderate chance
- Hydatos: guaranteed
EXP Chains
Upon defeating an enemy of equal or greater elemental level, you will have a limited window in which you may attempt to defeat another. If successful, you will initiate an EXP chain. Defeating subsequent enemies while an EXP chain is active will earn you additional elemental EXP. You will also have an increased chance to receive rewards, as well as higher quantities of said rewards, at EXP chain 10 and 20. After EXP chain 30 is achieved, your chain will end.
Notorious Monsters
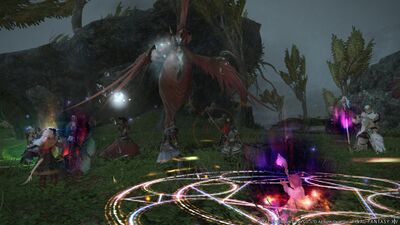
In the Forbidden Land, Eureka, you may encounter especially powerful enemies called notorious monsters. You would do well to engage these enemies together with other adventurers if you wish to defeat them. Some notorious monsters will not appear unless certain conditions are met. Speak with other adventurers and share information that you might determine what these conditions are.

Notorious Monsters (NMs) are FATE-like boss encounters that are the primary source of loot in Eureka, including lockboxes, Allagan Tomestone of Poetics, crystals and materials needed for Eurekan Weapon upgrades, and very rare items that can be used to increase player power within Eureka and can be sold for a premium on the Market Board. NMs also provide a large amount of elemental EXP for leveling. To spawn a NM, players must defeat a sufficient number of a single, specific enemy that is 5 levels above the NM of interest. The number of enemies needed is unknown and variable: a more accurate interpretation is that defeating a requisite enemy has a low chance of spawning the NM. If the NM is still on cooldown or does not have the correct weather, defeating enough spawning mobs will "queue" the NM to spawn in the next window. The requisite enemy listed alongside the NM in the tables on the zone pages. Some NMs also have weather requirements, and requisite spawning enemies may have weather or nighttime requirements.
After being spawned, each NM has a 2 real-life hour cooldown window before it can be spawned again. This cooldown is instance-specific. Because NM respawn timers are not displayed in the game, it is not possible to tell whether a given NM is off cooldown in a given instance without asking other players, or if one is confident that the instance is newly created ("fresh"). Therefore, players use a tracker website (see Resources) for the instance to determine which NMs can be spawned ("prepped") and which ones are on cooldown. This is considered an essential tool for Eureka content and will often be discussed in /shout chat.
Similarly to FATEs in the overworld, most Eureka NMs have an elemental level sync that all players need to activate in order to participate if they are more than three levels above the NM level. Players that are two levels or lower compared to the NM level will not receive any rewards except a reduced amount of elemental EXP that the NM usually drops.
NM health scales to the number of players in the instance.
Players will usually specify a pull time (PT) to ensure that people in the instance can participate in the NM and receive rewards. This may either be in Eorzea Time or when there is a certain number of minutes remaining in the FATE timer, e.g., "PT 27" is commonly used, meaning begin fighting the boss when there is 27:00 left.
For particularly desirable NMs ("money NMs") with a low chance of dropping items that can be sold for a premium on the Market Board, players in some data centers are more likely to pull the boss immediately upon spawning it. To maximize's one's chances of earning rewards, be near the FATE spawn area a few minutes before its cooldown resets and if the correct weather will occur. It is recommended to use a tracker if available for the instance, although some Eureka-oriented Discord servers have notifications for these and other high-value FATEs (these only notify an upcoming weather window; the cooldown is instance-specific).
In order to qualify for maximal rewards, players need to achieve a gold ranking on the NM. This is easy to do if in a party (usually attacking the boss once is sufficient), so most players will form parties to fight NMs.
Rewards
Rewards Obtained From Combat
When you defeat enemies in battle, you may receive a variety of rewards. Lockboxes such as [cold-warped lockbox] may drop from mutated enemies. Among these possible rewards are Eurekan crystals, which may be used to strengthen and enhance Eureka gear and relic weapons. In Pyros and Hydatos, logograms may drop from enemies (sprites are guaranteed to drop several logograms).
Specific items are required to enhance Eureka gear.
The quantity and frequency with which crystals, logograms and lockboxes can be obtained will increase with the elemental level of enemies, the greatest yields coming from enemies with a higher elemental level than you or above.
Resources
- The Forbidden Land, Eureka Gear Guide
- Spreadsheet containing links to Eureka Discord servers and other resources
- Eureka Comprehensive Guide for New Players by Prise (updated for patch 6.5)
- Eureka Bestiary
- Eureka Tracker
Lore
The Uncharted Isle
Unmarked on any navigational chart, this island appeared in the vastness of the Glass Ocean seemingly overnight. The East Aldenard Trading Company welcomed the discovery as a potential waypoint for their interests in the region, and sent an expedition to evaluate the possibility of building a port. What greeted the explorers was an environment warped by elemental forces and populated with violent monstrosities.
Thus was a second expedition formed, its ranks bolstered by veteran adventurers, and once more did it depart for the shores of “Eureka”—a tentative name for a forbidden land, taken from Allagan legend. The expedition landed safely, and, thanks to the Students of Baldesion who accompanied it, soon unraveled the first thread of the island’s mystery. Eureka was not, as first thought, a new landmass, but the miraculously relocated Isle of Val.
How had the isle, once believed obliterated by powerful magicks, shifted across the world from the coast of Sharlayan to the Glass Ocean in the Far East? To find the answer to this question and more, the assembled members of the expedition continue to survey the dangerous expanses of Eureka.
Trivia
- The design of Eureka mimics older-style MMORPGs such as Final Fantasy XI, with a focus on killing enemies in open world zones, grinding for items (including very rare drops), and completing quests that provide little guidance to the player, in contrast to the rest of FFXIV.
- Several enemies and items are direct references to various enemies and other material from Final Fantasy XI.

