Thaleia
Thaleia
- Level
- 90
- Item Level
- 625
- Difficulty
- Normal
- Party size
- Alliance
24 man • 3 6
6  15
15 
- Unsyncing
- Allowed
- Time limit
- 120 minutes
- Phoenix Down
- Not Available
- Duty Finder
- Alliance Raids (Endwalker)
- Roulette
- Mentor
- Tomestones
- Req. quest
- The Heart of the Myth
- Entrance
- The Omphalos (X:6.8, Y:8.4)
- Region
- ???
- Patch
- 6.5
It was out of their undying love for mankind that the Twelve constructed the monument at the heart of the Omphalos, that they might never lose sight of their purpose. To answer that love, you must sally forth into their sanctum one last time to grant them their heart's desire. Oschon—or Deryk, as you had known him—awaits with his brethren Thaliak and Llymlaen in their heavenly domain. Brave torrential waters, weather stormy winds, and vanquish these remaining deities, and you shall finally arrive at the truth of their mysterious objective.
— In-game description
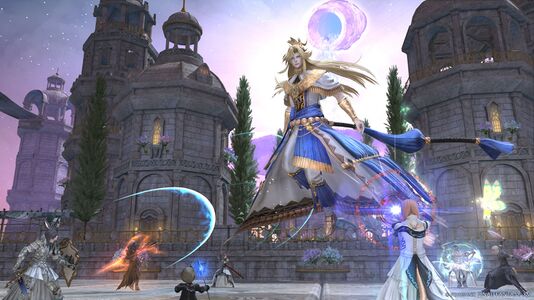
Thaleia is a level 90 raid introduced in patch 6.5 with Endwalker. It is the third and final part of Myths of the Realm.
Objectives
- Clear the Way of the Wise: 0/1
- Clear the River of Knowledge: 0/1
- Clear the briny deep: 0/1
- Clear the windward pass: 0/1
- Clear the stairway to the seventh: 0/1
- Clear the highest heaven: 0/1
Bosses
Being hit with any avoidable AoEs will either inflict a stack of Vulnerability Up or Sustained Damage, along with possibly other effects.
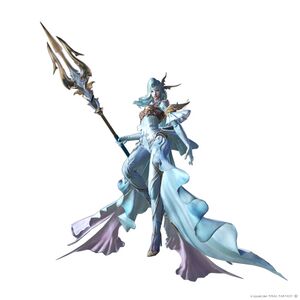
Note that players can fall off the arena to their death. The arena is initially a 4x4 square grid, which is important for some mechanics.
- Katarraktes: Raidwide damage and bleeding damage-over-time.
- Rheognosis: Summons an untargetable clone of the boss which will go to the east or west side of the room, above the water. After a lengthy animation, it will use a briefly telegraphed knockback, so go to the wall towards the clone to avoid being knocked off, or use knockback immunity.
- Thlipsis: Stack marker on random player.
- Left Bank / Right Bank: A half-room cleave based on the attack name or which side the glowing orb is located. Has a very brief AoE indicator.
- Hydroptosis: Spread markers on random players. Inflicts Water Resistance Down, making overlap lethal.
- Rhyton: Line AoE tankbusters targeting all 3 tanks, or whoever is top enmity if not all tanks are alive.
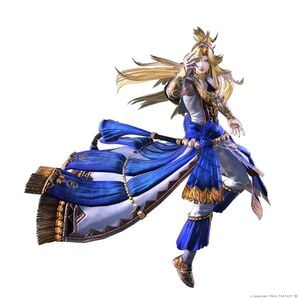
- Tetraktys: Transforms the arena into a triangle, with a dangerous AoE surrounding it. The triangle is divided into 9 smaller triangle panels.
- Blue triangles will begin expanding and cover an entire panel, indicating it will explode and is not safe to stand on.
- Green triangles will expand and cover four panels before exploding.
- Tetraktuos Kosmos: Summons a triangular tower on a panel. The walls of the tower will fall down from where they are facing as briefly telegraphed line AoEs. This attack repeats, but now two towers will spawn, and both will collapse at the same time, leaving a smaller safe area.
- Rheognosis Petrine: Summons the same knockback clone as in Rheognosis, but two spheres of water will charge through two rows in the arena. Anyone hit by these will be Stunned.
- Hieroglyphika: Covers all but two tiles of the arena with a green AoE telegraph. The boss will also telegraph either a clockwise or counterclockwise rotation, indicating what direction the safe tiles will be rotated by 90 degrees. Players should stand on a tile that will be safe after the rotation. All players will be inflicted with
 Inscribed, preventing them from moving after the debuff expires, until the AoEs resolve.
- This attack is then repeated, but the boss will also slowly cast Left Bank or Right Bank. Players should resolve the rotating AoEs, then find the safe half the room. One of the safe tiles should also be safe from the half-room cleave, but there is enough time to adjust from the other one as well.
- Tetraktys and Tetraktuos Kosmos are used again, but are slightly faster this time.
Note that the arena is surrounded by a wall of damaging water.
- Tempest: Raidwide damage.
- Seafoam Spiral: Telegraphed donut AoE.
- Wind Rose: A point-blank AoE with only a brief ground indicator.
- Navigator's Trident: Telegraphs a left cleave then a right cleave (or vice versa) then uses those attacks.
- This is followed by a telegraphed lethal line AoE through the middle, with knockbacks to both sides of the AoE. This knockback can be prevented with knockback immune. The line AoE will also a reveal an additional long segment of the arena that becomes relevant soon.
- Surging Wave: A purple knockback circle spawns, which will kill anyone inside it. Everyone else will be knocked back a great distance and should position to be knocked into the long passageway. This knockback cannot be prevented. There will be a narrow green indicator designating the correct spot to stand in. The knockback will briefly stun the party.
- The water at the back of the passageway will begin closing in, so players must quickly run back to the main arena. Anyone caught in the torrent will die. Meanwhile, the passageway will contain several water sphere (Sea-foam) that should be avoided.
- Left Strait / Right Strait: A half-room cleave based on the attack name. Has no AoE indicator.
- Deep Dive: Stack marker on a random player.
- Torrential Tridents: Sequentially summons six Tridents. Each one will do light raidwide damage (Landing) will appear. Tridents will do large point-blank AoEs in the order they appeared, so start at the last trident, and move into the first explosion.
- Afterwards, the boss will spawn circle AoEs under random players and mark others with spread telegraphs. Dodge and spread accordingly.
- Denizens of the Deep: The boss will summon two untargetable adds (Perykos and Thalaos) to assist with the rest of the battle.
- Wind Rose is used again, but the adds will do line AoEs each covering a third of the arena at the same time. These are telegraphed by the white splashing water on the outside.
- The adds will telegraph two more line AoEs, leaving a third of the arena safe, while the boss casts Left Strait / Right Strait. This is followed by two more line AoEs perpendicular to each other, and multiple baited circle AoEs on players.
- Godsbane: Raidwide damage that inflicts Dropsy damage-over-time.
- Navigator's Trident is used again, but the adds will also telegraph perpendicular line AoEs during the knockback. Position to be knocked back safely (or use knockback resist) while avoiding the wide line AoEs.
- Surging Wave is used again, but instead of dodging Sea-foam adds, the boss will telegraph three half-room cleaves (To the Last) that should be dodged while running back to the main room.
- Deep Dive is used again but the adds present (Hard Water), and now is a 3-hit stack AoE.
- Navigator's Dagger: Later in the fight, if a player uses the emotes Blow Kiss, Hug, or Dote on the boss when she is not casting an action, she will face them, say "Oi, cut it out, you!", and hit them for massive damage with a strong knockback.[1]
Note that the arena is surrounded by a dangerous AoE.
Phase 1
- Sudden Downpour: Raidwide damage.
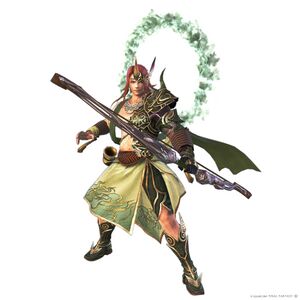
- Trek Shot: The boss telegraphs a wide frontal cone AoE along with an area that he will jump to and face before firing the AoE. Move to the wall with the arrow telegraph to dodge.
- Reproduce: Summons an untargetable Oschon's Avatar add. The add will use Swinging Draw, which is very similar to Trek Shot and can be dodged in the same way. This attack repeats once.
- Flinted Foehn: Multi-hit stack AoE.
- Soaring Minuet: 270 degree frontal cleave from the boss. Only has a brief AoE indicator.
- The Arrow: Telegraphed AoE tankbusters on all three tanks.
- Reproduce is used again but now summons two clones. Dodge in the corner of the room between the two arrow telegraphs.
- Downhill: Summons several circle AoE telegraphs. This is used with Climbing Shot, a knockback from the middle. Position to be knocked back to a safe area, or use knockback resist. (Soaring Minuet is used after, so knockback resist will require less movement.)
Phase 2
- Lofty Peaks: The boss will become untargetable and emit four hits of light raidwide damage. The party will be flung to a new arena and the boss will transform to a much larger form and recover all his health. It is now possible to fall off the edge of the arena.
- Piton Pull: The boss places a hook on two quadrants of the arena, telegraphing massive circular AoEs with only a brief indicator. Move to a corner without a hook to dodge.
- Altitude: Several green circle AoE telegraphs will briefly appear and disappear. The AoEs will resolve a few seconds later.
- Flinted Foehn: Functions as before.
- Wandering Shot: The boss will summon two green arrow telegraphs converging on a blue circle. This indicates the origin of a massive circular AoE. Anyone hit will be knocked up.
- The Arrow: Similar tankbusters as before but the AoEs are much larger.
- Arrow Trail: Arrows will travel down several columns in the arena, telegraphed by red areas. Move into a safe area once the arrows pass by. This is combined with baited circle AoEs on random players.
- Downhill: Spawns several circle AoEs at the edge of the arena, leaving some gaps. This is combined with Wandering Volley, consisting of a horizontal knockback from the middle and the massive AoE telegraph in Wandering Shot. Position to be knocked back into a safe area, or use knockback resist.
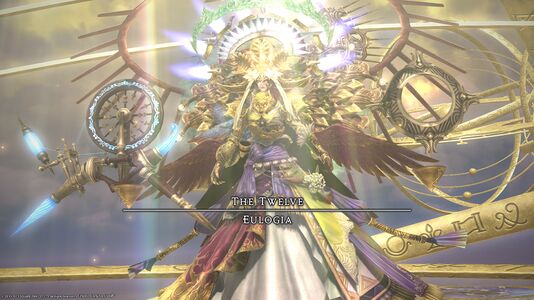
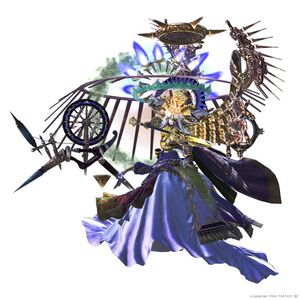
 The Twelve: Eulogia
Note that players can fall off the arena to their death.
- Dawn of Time: Raidwide damage.
- First Form: The boss spawns a blue arrow telegraph from where it is currently located, along with an orange arm telegraph on one of its sides. The blue arrows indicate where the boss will move to and face, and the orange arms telegraph a left or right side cleave from where it is facing after it moves to the end of the arrow.
- Second Form: Similar to First Form, but the second blue arrow originates from where the first ended.
- Third Form: Similar to First Form, but the third blue arrow originates from where the second ended.
- Quintessence: The boss will move to the end of the first arrow, use its previously telegraphed left/right cleave, and continue for the remaining two arrows. To dodge these, players will need to remember the AoE telegraphs and keep in mind that the cleaves are relative to where the boss is now facing.
- This series of attacks is then used again. The boss also introduces a new telegraph, a circle of rotating hands on its back, which indicates a donut AoE. Players should follow the boss closely as it moves and dodge inside its hitbox.
- Sunbeam: Telegraphed AoE tankbusters on all 3 tanks.
- The Whorl: Raidwide damage that transitions the arena. There is now an AoE at the edge that will instantly kill anyone who touches it.
For the majority of the fight, the boss will use mechanics from all previous bosses in the Myths of the Realm raid series.
- Love's Light (Menphina): Summons four adjacent moons at the edge of the arena, each with an increasing "phase". Each moon will begin to wax (become more filled) and use a large line AoE (First Blush) through the middle once they are full. The party can dodge these by rotating clockwise or counterclockwise.
- Solar Fans (Azeyma): Two fans will start from the boss and move to opposite walls with a line AoE trailing behind them.
- The fans will repeatedly move 90 degrees around the edge of the arena, leaving an arc AoE trailing them.
- Radiant Finish: Both fans will explode in two massive circle AoEs. Once they start moving, players need to quickly move towards the cardinal directions without the fans.
- Hydrostasis (Nymeia): Summons three water puddles numbered 1-3, indicating the original order in which a ball of water will drop on them, inflicting a knockback from the puddle's location.
- Time and Tide (Althyk): Tetherstether the Hydrostasis puddle numbered 3, causing it to resolve first. The puddle previously numbered 1 will resolve second, followed by the one previously numbered as 2. Arm's Length and Surecast can be used to mitigate two of the three knockbacks if timed properly. Otherwise, players should aim their knockback to the next puddle to resolve to avoid being knocked into the wall.
- Destructive Bolt: Stack marker on random player.
- Hieroglyphika (Thaliak): Spawns a 4x4 grid of green AoE telegraphs, with two empty tiles. The boss will also telegraph either a clockwise or counterclockwise rotation, indicating what direction the safe tiles will be rotated by 90 degrees. Players should stand on a tile that will be safe after the rotation. All players will be inflicted with
 Inscribed, preventing them from moving after the debuff expires, until the AoEs resolve.
 - Hand of the Destroyer (Rhalgr): When the tiles are still rotating, two colored portals will appear, splitting the arena in two. The boss will pull back one of its hands and prepare to punch one colored portal, hitting the same colored half with a massive fist AoE, knocking back anyone hit. This resolves a few seconds after Hieroglyphika.
- Matron's Breath (Nophica): Summons a blue circle and yellow circle on the arena, followed by four beacons that are either blue or yellow. Each beacon will have a shrinking circle and a number of dots, indicating when it will resolve. Standing in the circles will inflict either
 Blooming Blue or
  Blooming Gold depending on the color. Players must be in the same color circle as the beacon when it resolves to avoid taking damage.
 - Torrential Tridents (Llymlaen): Sequentially summons six Tridents in a circle. Each one will do light raidwide damage (Landing) will appear. Tridents will do large point-blank AoEs in the order they appeared, so start at the last trident, and move into the first explosion.
- Byregot's Strike (Byregot): Knockback from a random point around the middle of the arena. The blue center itself deals lethal damage. This attack is combined with Byregot's Strike. Around the boss will sprout 4 thin conal lightning AoEs. They will not start from the boss's current position but will be translated into the center of the Byregot's Strike's knockback circle.
- Thousandfold Thrust (Halone): Several red targeting circles will appear around the boss. They will then converge into a single one and spread out, indicating where the boss will use a 180 degree multi-hit cleave.
- As Above, So Below (Nald'thal): Unavoidable raidwide damage that transitions the arena. A line of alternating color traveling AoEs. These will be orange or blue. Only the AoEs the same color as the ewers surrounding the boss or the background sky will be real, while the other color's indicators are fake. When the Climbing Shot cast finishes, the active AoEs will travel in the directions indicated by their arrows. The inactive AoEs will not resolve and disappear.
- Climbing Shot (Oschon): A knockback from the middle. This can be prevented with knockback immune. Otherwise, position to be knocked back into the safe color AoE telegraphs that will disappear.
- Soaring Minuet (Oschon): 270 degree frontal cleave from the boss. Only has a brief AoE indicator.
- Eudaimon Eorzea: A lengthy cast and animation. During the cast, the party will take 12 successive hits of light raidwide damage (The Builder's Art, The Destroyer's Might, The Warden's Radiance, The Traders' Equity, The Matron's Plenty, The Keeper's Gravity, The Fury's Ambition, The Lover's Devotion, The Scholar's Wisdom, The Spinner's Cunning, The Navigator's Command, and The Wanderer's Whimsy), followed by a final hit. Heal and mitigate through.
The fight will transition back to the original arena, where the fight essentially loops until the boss is defeated.
Loot
| Name | Type | Item Level | Rarity | Quantity |
|---|---|---|---|---|
| Theogonic Circlet of Aiming | Head | 650 | Blue | 1 |
| Theogonic Circlet of Casting | Head | 650 | Blue | 1 |
| Theogonic Circlet of Healing | Head | 650 | Blue | 1 |
| Theogonic Circlet of Scouting | Head | 650 | Blue | 1 |
| Theogonic Circlet of Striking | Head | 650 | Blue | 1 |
| Theogonic Headgear of Fending | Head | 650 | Blue | 1 |
| Theogonic Headgear of Maiming | Head | 650 | Blue | 1 |
| Theogonic Sandals of Casting | Feet | 650 | Blue | 1 |
| Theogonic Sandals of Healing | Feet | 650 | Blue | 1 |
| Theogonic Shoes of Aiming | Feet | 650 | Blue | 1 |
| Theogonic Shoes of Scouting | Feet | 650 | Blue | 1 |
| Theogonic Shoes of Striking | Feet | 650 | Blue | 1 |
| Theogonic Sollerets of Fending | Feet | 650 | Blue | 1 |
| Theogonic Sollerets of Maiming | Feet | 650 | Blue | 1 |
| Name | Type | Item Level | Rarity | Quantity |
|---|---|---|---|---|
| Theogonic Armlets of Casting | Hands | 650 | Blue | 1 |
| Theogonic Armlets of Healing | Hands | 650 | Blue | 1 |
| Theogonic Breeches of Fending | Legs | 650 | Blue | 1 |
| Theogonic Breeches of Maiming | Legs | 650 | Blue | 1 |
| Theogonic Gauntlets of Fending | Hands | 650 | Blue | 1 |
| Theogonic Gauntlets of Maiming | Hands | 650 | Blue | 1 |
| Theogonic Hose of Aiming | Legs | 650 | Blue | 1 |
| Theogonic Hose of Scouting | Legs | 650 | Blue | 1 |
| Theogonic Hose of Striking | Legs | 650 | Blue | 1 |
| Theogonic Longkilt of Casting | Legs | 650 | Blue | 1 |
| Theogonic Longkilt of Healing | Legs | 650 | Blue | 1 |
| Theogonic Vambraces of Aiming | Hands | 650 | Blue | 1 |
| Theogonic Vambraces of Scouting | Hands | 650 | Blue | 1 |
| Theogonic Vambraces of Striking | Hands | 650 | Blue | 1 |
| Name | Type | Item Level | Rarity | Quantity |
|---|---|---|---|---|
| Theogonic Corselet of Aiming | Body | 650 | Blue | 1 |
| Theogonic Corselet of Scouting | Body | 650 | Blue | 1 |
| Theogonic Corselet of Striking | Body | 650 | Blue | 1 |
| Theogonic Mail of Fending | Body | 650 | Blue | 1 |
| Theogonic Mail of Maiming | Body | 650 | Blue | 1 |
| Theogonic Robe of Casting | Body | 650 | Blue | 1 |
| Theogonic Robe of Healing | Body | 650 | Blue | 1 |
| Theogonic Sandals of Casting | Feet | 650 | Blue | 1 |
| Theogonic Sandals of Healing | Feet | 650 | Blue | 1 |
| Theogonic Shoes of Aiming | Feet | 650 | Blue | 1 |
| Theogonic Shoes of Scouting | Feet | 650 | Blue | 1 |
| Theogonic Shoes of Striking | Feet | 650 | Blue | 1 |
| Theogonic Sollerets of Fending | Feet | 650 | Blue | 1 |
| Theogonic Sollerets of Maiming | Feet | 650 | Blue | 1 |
 60 Allagan Tomestone of Causality
 20 Allagan Tomestone of Comedy
- Thaleia Coin (Drops at a fixed rate)
| Name | Type | Item Level | Rarity | Quantity |
|---|---|---|---|---|
| Wind-up Oschon | Minion | N/A | Basic | 1 |
| Fair Winds to Guide Orchestrion Roll | Other | N/A | Basic | 1 |
| Course Uncharted Orchestrion Roll | Other | N/A | Basic | 1 |
| Myths of the Realm Orchestrion Roll | Other | N/A | Basic | 1 |
| Eulogia Card | Triple Triad Card | N/A | 1 |
Rewards
You can receive only one reward item per week for completing duties in Thaleia. In the event you are awarded an item from the loot list, you relinquish your right to vie for all remaining items regardless of whether you selected Need or Greed.
- Reward eligibility is reset every Tuesday at 1:00 a.m. (PDT)
Each party in the alliance will receive its own treasure chest, the contents of which will be identical regardless of the route taken.
- Players cannot open a treasure chest belonging to another party.
Completion Reward
Upon completing Thaleia, players can also earn a separate reward once per week: two Cracked Anthoclusters and one Thaleia Coin. The Thaleia Coin can be exchanged with Nesvaaz in Radz-at-Han (X:10.6 Y:10.0) for items used to enhance equipment purchased with ![]() Allagan Tomestone of Comedy.
Allagan Tomestone of Comedy.
Achievements
This duty is associated with the following achievements:
| Name | Points | Task | Reward | Patch |
|---|---|---|---|---|
| Divine Satisfaction | 5 | Complete Thaleia. | - | 6.5 |
| Mapping the Realm: Thaleia | 10 | Discover every location within Thaleia. | - | 6.5 |
Images
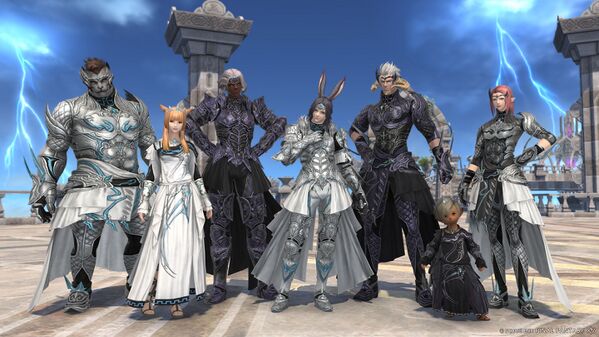
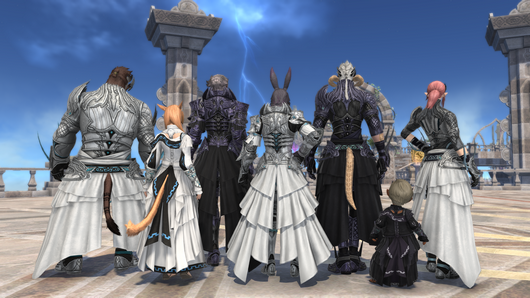
Gear Images
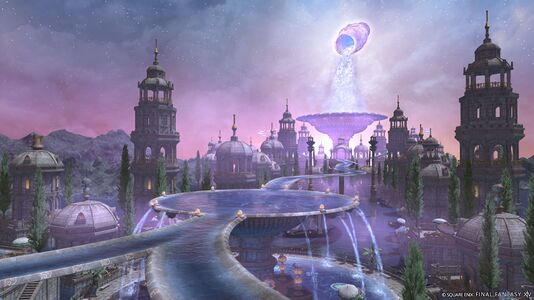
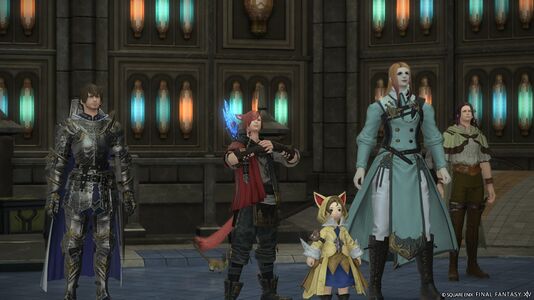
Raid Images
Concept Art
Lore
To create the river which runs through the Heaven of Water, Nymeia melted a star, to which Thaliak added the essence of knowledge and then poured it forth from his Ewer. Here reside the scholars and inventors, the teachers and the entrepreneurs.
— The Hell and Heaven of Water, Encyclopædia Eorzea Volume I, p. 19
In the Heaven of Wind rises a towering mountain range atop which Oschon looks out upon an endless sea ruled by Llymlaen. Here rest explorers and adventurers, mountain climbers, saints and those who rescued the aforementioned souls from peril.
— The Hell and Heaven of Wind, Encyclopædia Eorzea Volume I, p. 19
Every god and goddess of the Twelve is associated with one of the six controlling elements. When the deities deemed Their work on Eorzea complete, They proceeded to create the firmament, the result being six astrally aligned heavens aspected to each of the six elements, and a final seventh heaven to rule them all. However, a residual product of these heavens were six similarly aspected hells, ruled by an all-encompassing, umbrally aligned seventh hell. The six "lower heavens" are represented in the sky by six constellations—star formations which astrologians also perceive as gates that, when opened, can allow a person to become attuned with the heavens and manipulate their aether. These constellations revolve around the pole star which is believed to be the gate to the seventh and final heaven.
— Hells and Heavens, Encyclopædia Eorzea Volume I, p. 19
Trivia
The background text during the battle with Thaliak, when the arena is a triangle, has the following[2]:
- Light in darkness
- Heat in the cold
- Fluid yet solid
- Tempestuous calm
- Prosper in strife
- In death, live on


