The Diadem/Old
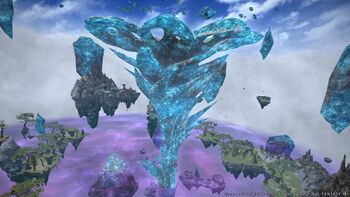
As airship technology spread throughout Eorzea, pioneers took to the skies to challenge a new frontier. There they came upon a breathtaking sight: a chain of pristine isles clustered about a massive floating crystal─no less a diadem fit for gods. These isles promise untold wealth and danger, and to lay claim to one you must brave the other. But ware those who would aid House Haillenarte in its explorations, for recent storm winds have littered the Diadem with artifacts of ancient origin. With these unstable relics twisting the aether and corrupting the wildlife, you can only guess at what new terrors now lurk in the darkness...
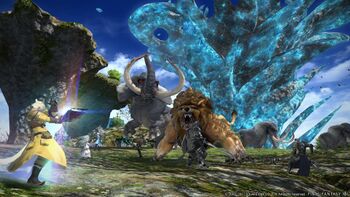
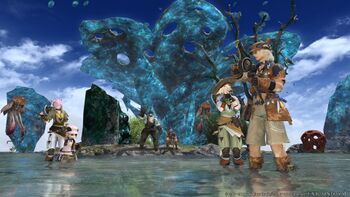

Players can explore the Diadem to complete mission objectives and participate in special FATEs that occur randomly in the field. Up to nine parties (72 players) can explore in a single instance.
Participating
Players can undertake exploratory missions via free company workshops or from the airship landing in Ishgard.
Free Company Exploratory Missions
When undertaking exploratory missions using a free company airship, players must form a party of at least two people. Players can also form an alliance of up to twenty-four players. There are no role requirements for entering the Diadem as an alliance. Each party or alliance member must have a tank of Mission Ceruleum in their possession, which can be purchased in exchange for ![]() Company Credits. One tank is required for each mission.
Company Credits. One tank is required for each mission.
- When entering as a single party, the party leader must be a member of the free company whose airship will be used.
- All participating players must be inside the free company workshop when undertaking exploratory missions. When entering as an alliance, the leader of each party must be a member of the free company whose airship will be used. Furthermore, an airship for each party of the alliance is required.
- Upon undertaking an exploratory mission, the airship used must wait five minutes from the time you began before it can be used for exploratory voyages.
- Players cannot add members while undertaking exploratory missions.
Ishgardian Exploratory Missions
Players can also journey to the Diadem via Ishgardian airships. Players can register to undertake Isghardian exploratory missions solo or in a party of up to eight people. Each player of the party must have a Mission Ceruleum Voucher in their possession, which can be purchased from the NPC Jaquoinie in the Pillars (X:14.5 Y:10.9) for ![]() gil. One voucher is required for each mission. There are no role requirements when entering as a full party.
gil. One voucher is required for each mission. There are no role requirements when entering as a full party.
- Depending on the type of exploratory mission undertaken, there may be role restrictions for parties with less than eight players. See below for details.
- Players cannot dismiss or add members while undertaking exploratory missions.
Entry Limitations
Before undertaking an exploratory mission, whether via company workshops or the airship landing in Ishgard, at least thirty minutes must have elapsed since last entering the Diadem. This timer is shared between both types of exploratory missions.
Entering the Diadem
The difficulty levels for exploratory missions have been removed. Instead, players may now choose from two types of missions: Trials of the Fury, designed for Disciples of War and Magic, or Trials of the Matron, designed for Disciples of the Land.
Trials of the Fury requires an average item level of 220 or higher, while Trials of the Matron requires an average item level of 179 or higher.
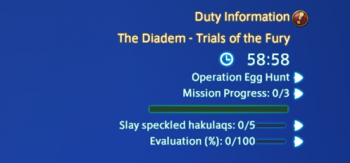
The Diadem - Trials of the Fury
- Entry Requirement - Disciple of War or Magic level 60
- Item Level Requirement - Average item level 220 or above
Entering via company workshops - There are no role requirements.
Entering the Diadem via Ishgardian airships - Parties with less than eight players must adhere to the composition of 1 tank, 2 healers, 5 DPS. There are no role requirements when entering as a full party.
- Players can change to gathering classes after completing all mission objectives.
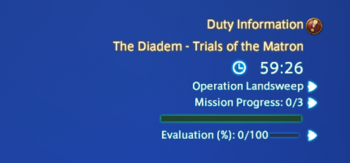
The Diadem - Trials of the Matron
- Entry Requirement - Disciple of War or Magic level 60
- Item Level Requirement - Average item level 179 or above
Entering via company workshops - There are no role requirements. Entering via Ishgardian airships - There are no role requirements.
- Players can change to gathering classes immediately after entering the Diadem.
Loot Rules
When undertaking exploratory missions via a free company workshop, or with a full party via Ishgard, parties may set loot rules to Normal, Greed Only, or Loot Master. When undertaking exploratory missions via Ishgard with less than eight players, the loot rules will be set to Greed Only.
Flying Mounts
Flying mounts can be used as soon as you enter the Diadem.
Rewards
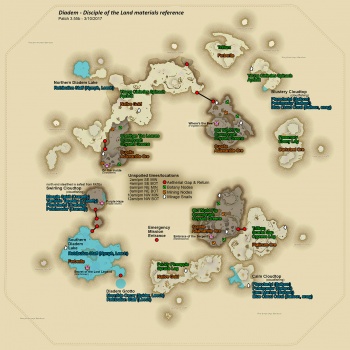
Players will obtain different items in the Trials of the Fury and Trials of the Matron.
Rewards for Trials of the Fury
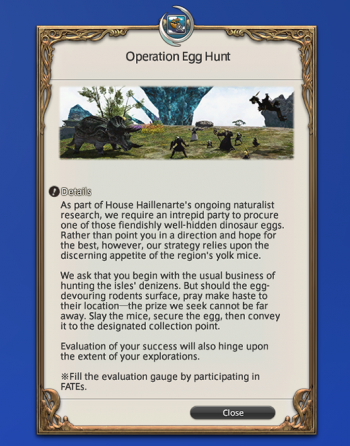
Mission Objective Rewards
Players can obtain Lockboxes and other rewards by completing the objectives displayed when they enter the Diadem. Players can open their lockboxes by handing them over to the Picker of Locks NPC found in one of the settlements of the Diadem.
- Mission objectives are set randomly upon entering the Diadem.
- The Picker of Locks NPC can also be found in the Pillars in Ishgard (X:14.6 Y:10.9) and each city's Residential District.
- Lockboxes awarded upon completing all objectives are obtained from treasure coffers carrying personal rewards.
Missions are comprised of three phases, each with a primary objective and secondary objective.
Primary Objectives - Proceed to the location displayed on the map and complete the indicated mission.
Secondary Objectives - Complete FATEs that spawn randomly throughout the map to fill the mission evaluation gauge.
By completing FATEs, players will also be able to obtain Damaged Lockboxes. Players must first collect forty damaged lockboxes and deliver them to the picker of locks NPC in order retrieve their contents.
Upon completing a mission, an aetherial gap will appear and allow you passage into previously inaccessible areas. These areas will contain stronger enemies, new fishing locations, and unspoiled gathering locations.
Rewards for Trials of the Matron
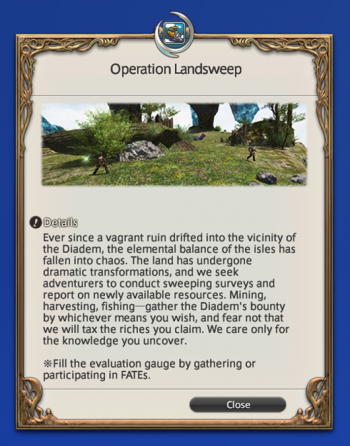
After entering the Diadem, players must explore the area and fulfill any assigned mission objectives. By doing so, they will be able to obtain Steel Sky Pirate Spoils, which can be redeemed for a variety of goods by speaking with the Spoils Collector at one of the settlements found in the Diadem.
- Spoils Collectors can also be found in the Pillars (X:14.6 Y:10.9), as well as in each city's Residential District.
- Steel sky pirate spoils awarded upon completing all objectives are obtained from treasure sacks carrying personal rewards.
Missions are comprised of three phases, which must be completed as players explore the area.
Exploring the Diadem - Players must fill the evaluation gauge by completing FATEs or gathering with Disciples of the Land as they explore the area.
By completing FATEs, players will also be able to obtain damaged lockboxes. Players must first collect forty damaged lockboxes and deliver them to the picker of locks NPC in order retrieve their contents.
Upon completing a mission, an aetherial gap will appear and allow you passage into previously inaccessible areas. These areas will contain stronger enemies, new fishing locations, and unspoiled gathering locations.
Treasure Coffers
Treasure coffers obtained by defeating monsters will occasionally contain damaged lockboxes.
- If there are sixteen unopened treasure coffers on the field and a seventeenth treasure coffer is discovered, the oldest coffer of the lowest available tier will be replaced.
- Please note that if the coffer that is replaced has already been opened, regardless of the loot rules that have been selected, the items it contained will automatically be distributed among party members when it vanishes.
Emergency Missions
Occasionally, emergency missions will occur during exploratory missions.
These missions will unlock special areas wherein players will be thrown into large-scale battles. Exclusive rewards await those who successfully clear these missions, so be sure to help each other out and win the day!
- Players who fail to contribute to battle will not receive a reward.
- Emergency missions will end after 15 minutes.
- In the event an emergency mission occurs, the time limit for exploratory missions will be extended by 15 minutes.
Players will randomly acquire Coven Weapons (Item Level 280 Weapons), Sunburst Armor and Sunburst Accessories (Item Level 265 Armor and Accessories) as rewards for completing Emergency Missions.
Enemies
Level 60 enemies, as well as enemies that have an icon and number indicating their relative strength, will appear within the Diadem. The higher the number the more powerful the enemy. Among them are also exceptionally powerful enemies known as notorious monsters, which are denoted by a unique icon.
Field Objects
As you explore the Diadem, you may encounter constructs with various effects. Proper use of these constructs is essential to a successful mission.
Shops and NPCs
Within the Diadem are small settlements with merchants who offer the following services:
- Opening lockboxes
- Gear repair
- Exchange of unwanted aetherial gear for brass sky pirate spoils
- Sale of goods for brass and steel sky pirate spoils
- Weather forecasts for islands in the Diadem
Spiritbonding
Gear will gain spiritbonding at an increased rate in the Diadem in comparison to other duties.
- The increased spiritbond gain does not apply to crafting or gathering.
Finishing Exploratory Missions
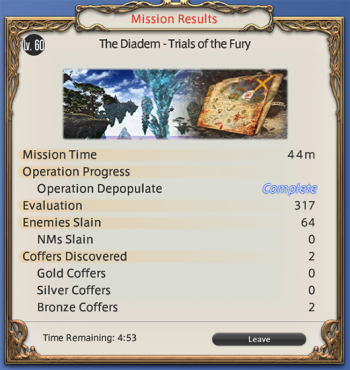
When time has expired, or you choose to end the exploratory mission early, you can view a list of completed objectives.
Loot
Minion Drops
*Only available in Diadem.
Other Drops
Tips and Tricks
- Special FATEs are always indicated with a boss symbol with exception of the Pegasus fate and drop Minions as well as lockboxes.
- After killing monsters sometimes a Corrupted Sprite will spawn, kill these for a bonus chest.
- Hidden all around the map are Buried Coffers, the spawn points change each time a new diadem is generated but usually one can be found in each of the two caves as well as most all of the islands. These can be bronze-gold tier chests. All parties can see these chests so make sure to nab them before someone else finds them.
- High rank mobs found in the lower islands have a high chance of dropping chests.
- When farming Fates for evaluation try to complete ones with rank IV monsters first as these will yield the most evaluation and lockers.
- If your gear breaks at any point while in the diadem a mender can be found on the western island where you can exchange spoils at.
- The Emergency Mission does not have a spawn trigger, but instead will randomly appear regardless of activity or fates completed.
- The first boss (the giant stone tablet) of the EM does not need a tank, its only attacks are the AoEs it casts, so turn off Grit and go ham :D
- The giant Pegasus that you occasionally run into does not serve any purpose, it simply runs in a preset loop while stopping occasionally, then despawns and appears somewhere else.
- When a diadem instance is created it initially has 9 parties, mixed of combat and gathering groups. Once a party leaves a new one can be queued in to replace them so diadem instances can have a lifespan for a few hours. A good way to find out how old your instance is would be by checking some of the reliable chest spawn areas to see if has been looted, if it hasn't then it is very likely you're in a new instance.
- If you queue into Diadem through Trials of the Matron for gathering, you are able to participate in Emergency Missions just like everyone else.
- FATE farming is generally pointless once you meet evaluation requirements for your mission, the only potential benefit is increasing the chance of a boss FATE to spawn.
- Gathering in Diadem is definitely worth your time, especially for Unspoiled Nodes as you can easily gain close to
 1,000 Blue Gatherers' Scrips within a single instance.
 - If things go wrong in your EM there can still be hope, if the final boss is freed before the legatus have died, if you are able to destroy the crystals you can stop the boss from 1-shotting everyone in his path, however it is not a good idea to destroy all of the crystals before you have dealt with the legatus as you could free him early causing unnecessary stress on tanks and healers having to deal with the remaining legatus as well as the boss.
- Even if a FATE expires or is failed you still receive some evaluation points.
- Be very careful when fighting the Westwhirled FATE to not pull more than 1 or 2 at a time, they spam a very long range aoe with a stacking resistance down debuff which can quickly overwhelm healers and cause a wipe.
- You can switch jobs whenever you want out of combat, taking advantage of this in Emergency Missions could very well save you from failure.
Achievements
This duty was associated with several achievements that are no longer obtainable:
| Name | Points | Task | Reward | Patch |
|---|---|---|---|---|
| Foot in the Clouds I | 5 | Receive an evaluation of 200 or better on an exploratory mission to the Diadem. | - | 3.1 |
| Foot in the Clouds II | 10 | Receive an evaluation of 200 or better on a total of 10 exploratory missions to the Diadem. | - | 3.1 |
| Foot in the Clouds III | 20 | Receive an evaluation of 200 or better on a total of 100 exploratory missions to the Diadem. | - | 3.1 |
| Hand in the Clouds I | 5 | Receive an evaluation of 400 or better on an exploratory mission to the Diadem. | - | 3.1 |
| Hand in the Clouds II | 10 | Receive an evaluation of 400 or better on a total of 10 exploratory missions to the Diadem. | - | 3.1 |
| Hand in the Clouds III | 20 | Receive an evaluation of 400 or better on a total of 100 exploratory missions to the Diadem. | - | 3.1 |
| Head in the Clouds I | 5 | Receive an evaluation of 600 or better on an exploratory mission to the Diadem. | - | 3.1 |
| Head in the Clouds II | 10 | Receive an evaluation of 600 or better on a total of 10 exploratory missions to the Diadem. | - | 3.1 |
| Head in the Clouds III | 20 | Receive an evaluation of 600 or better on a total of 100 exploratory missions to the Diadem. | - | 3.1 |
| Crown of Thorns I | 5 | Slay a notorious monster on an exploratory mission to the Diadem of any difficulty. | - | 3.1 |
| Crown of Thorns II | 5 | Slay a total of 5 notorious monsters on exploratory missions to the Diadem of any difficulty. | - | 3.1 |
| Crown of Thorns III | 5 | Slay a total of 10 notorious monsters on exploratory missions to the Diadem of any difficulty. | - | 3.1 |
| Crown of Thorns IV | 10 | Slay a total of 50 notorious monsters on exploratory missions to the Diadem of any difficulty. | - | 3.1 |
| Crown of Thorns V | 20 | Slay a total of 100 notorious monsters on exploratory missions to the Diadem of any difficulty. | 3.1 | |
| Have a Haillenarte I | 5 | Complete a Haillenarte exploratory operation in the Diadem. | - | 3.55b |
| Have a Haillenarte II | 5 | Complete 10 Haillenarte exploratory operations in the Diadem. | - | 3.55b |
| Have a Haillenarte III | 10 | Complete 30 Haillenarte exploratory operations in the Diadem. | - | 3.55b |
| Have a Haillenarte IV | 20 | Complete 100 Haillenarte exploratory operations in the Diadem. | - | 3.55b |
| Crowning Achievement I | 5 | Successfully complete 30 FATEs in the Diadem. | - | 3.55b |
| Crowning Achievement II | 5 | Successfully complete 100 FATEs in the Diadem. | - | 3.55b |
| Crowning Achievement III | 10 | Successfully complete 300 FATEs in the Diadem. | - | 3.55b |
| Gem and the Hallowed Lands | 10 | Successfully complete a Haillenarte exploratory operation on the Missing Gem. | - | 3.55b |
